My #BeautyStory and Beauty Inspiration

This is a sponsored conversation on behalf of Dove and The Motherhood.

Family

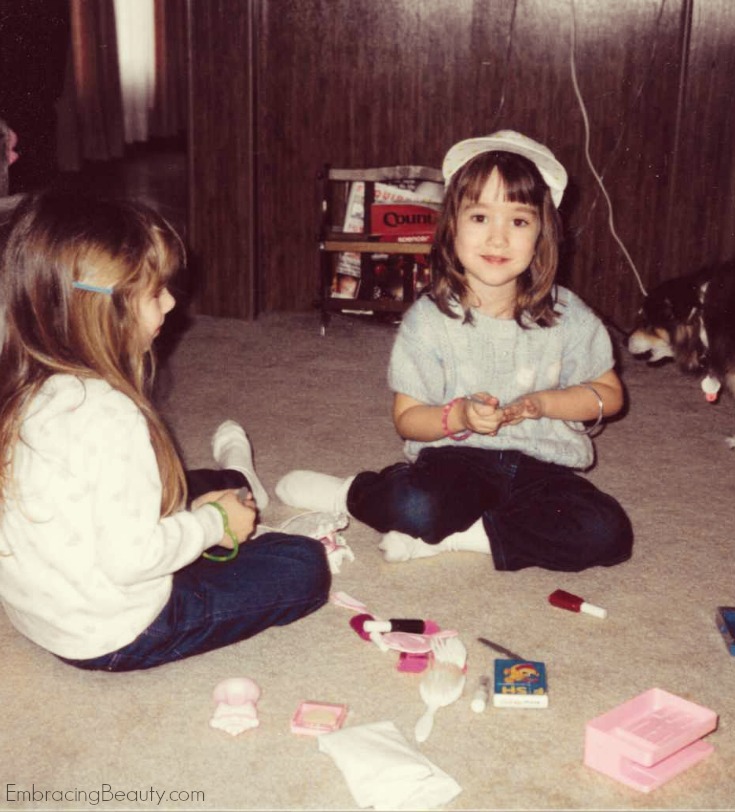
Mom knows best, right?  I think that’s true most of the time and when it comes to beauty I definitely think that’s true – in my case it is!  My mother was, and still is, a beauty.  Here are a few of the beauty tips that I learned from her, that she probably learned from her mom.

Beauty Advice

  • – Moisturize, moisturize, moisturize.  A good moisturizer is a woman’s best friend.
  • – My mom taught me that my neck and clavicle have the same skin as my face so I should moisturize it just as often and with the same product.
  • – My mom taught me to wash my face with Dove every night before bed.  I was eager to try fancy scrubs and masks but she said a simple gentle cleanser is all I needed.
  • – Use baby oil as an eye-makeup remover.  It’s cheap, gentle, and works great.
  • – “Never leave the house without lipstick” is something my grandmother ingrained in me from a young age.  At times I might opt for lipgloss instead but there’s always something colorful on my lips.  Like mother, like daughter.  From a young age, I remember admiring my mother’s skill for applying lipstick without a mirror.
  • – Drink water all day long.  It’s good for your body and your complexion.
  • – “Don’t touch your face.” My mom used to give me a hard time about how much I touched my face and how it would give me breakouts.  I’m still working on this one!
  • – Use conditioner on the ends of your hair every time you wash it.
  • – “If you’ve got a good complexion make up will just be icing on the cake.” My mom had me using good skin care products since before I was 18.
  • – Age gracefully. My mom still doesn’t have grey hair but when she does I know she’ll embrace it with gusto.
  • – She always encouraged me to learn what colors and styles looked good on me and ignore the fads.
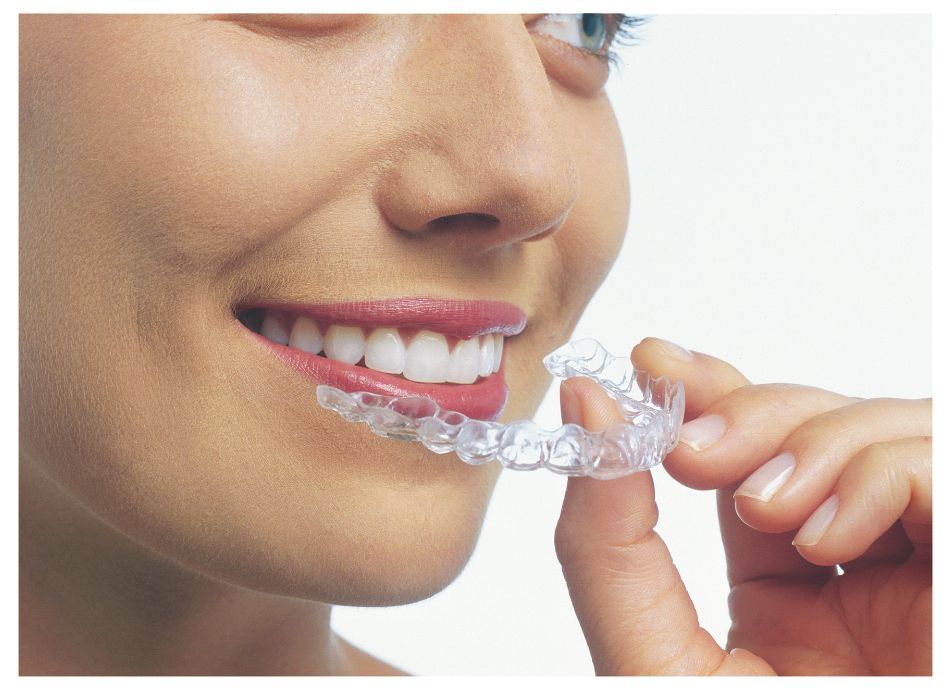
  • – Last but not least, my mom taught me to smile.  She told me that a smile always makes you appear prettier.  I try to remember this every day but especially on days when I’m not as put together as I’d like to be you can bet that I’ll be smiling.

A Dove survey finds that most women (84% in fact) trust the women in their lives more than celebrities for beauty tips and advice.  From all the advice I learned and still incorporate from my mom and grandmother, I’d believe that to be true!

What tried-and-true beauty advice was passed onto you from the women in your life? Share your own #BeautyStory to celebrate the real women who have shaped it and take a look at this video from Dove for even more inspiration.

Cost-Cutting Tips for Customizing T Shirts

T shirts a common item wore by people around the globe. It is one of the most popular garments because it can be worn with almost anything such as jeans, lowers, skirts, shorts, etc. T shirts are also readily available in the market whether it is a market in the US or in central Asia. There are many different kinds of t shirts available too. Branded t shirts are one of the most expensive kind of t shirts whereas; ordinary t shirts available in the market can be highly affordable.  I saw a sale yesterday where plain t shirts were only $2.50.

Customized t shirts replicate a person’s personality which is why cheap customized t shirts may not be easily available. A person will have to purchase a solid color t shirt and customized it himself in order to save money. If you’re looking for an inexpensive method t shirt customizing, follow these steps:

t-shirt

  1. Buy affordable t shirt material

T shirts of every material are available in the open market. A very fine material would burden the wallet whereas a cheaper one will keep the budget within range. If a person searches properly, he or she will be able to find ample kinds of t shirt materials they would like. The first step towards customized t shirts for a cheaper value is to find the most suitable material for a t shirt. The most favorable type of material is 100% cotton which is also very affordable as compared to silk shirts or nylon shirts. 100% cotton shirts are also very easy to customize and comfortable to wear. Majority of the customized t shirts available in the market at branded stores are cotton since the consumer demand is high for this material.  You’ll also want to take note if the material is preshrunk or not.

  1. Self customization as compared to buying customized t shirts

A person can walk into a store and purchase his favorite customized t shirt. However, this t shirt will cost him double the amount of customizing a t shirt personally. Self customization means that a person engages himself into putting together a theme for the t shirt. This method is affordable and leaves a person with the t shirt just the way they want it as compared to buying a branded ready made t shirt. The first step would be for the person can choose the basic color of the t shirt. The second step would be to select the design of the t shirt and what image or text you wants displayed on it. Self customization can save you a lot of money!

  1. Approaching an independent t shirt printer

Once an individual has the shirt theme finalized, he or she can approach an independent t shirt printing person or company which can produce the final product. Having a t shirt printed by an independent printer allows a person to obtain a cheaper costing t shirt. T shirt printers are readily available in the market and cost a small amount to print a design or an image on the t shirt. They operate a cloth printer which transmits the image or design onto the t shirt with non-erasable ink. These independent printers can be found in shopping malls or t shirt markets where they also help a person customized t shirts for a low price. Cheap customized t shirts help people with low budgets to enjoy a little personalized clothing.

This post was written by Jordon, who loves to assist people in making their life trendy through his informative articles, which he regularly submits in directories and other sites such as Thetshirtman.

My Traditional Braces vs Invisalign

Disclaimer: This is a sponsored post. However, all thoughts and opinions are my own.

My teeth aren’t as straight as I would like for them to be.  I’m sure I’m not the only one who feels that way but I HAD BRACES.  Every time I think of my braces I get frustrated.  I had THE worst orthodontist.  I mean, I’m sure he was a great guy and all but he was not in the right profession.

I had the old fashioned metal braces with bonded brackets that were connected by a metal wire that went across my entire mouth to the edges where it connected with metal pieces that were fit snugly over my teeth.  It wasn’t pretty.  I always tried get the white rubber bands on my braces {when my orthodontist had them} because I didn’t want to draw any unneeded attention to them.

Not only were my braces unattractive but they hurt!  I’m not talking about the teeth-moving-pain that is expected but the wires on the end would come loose and poke my gums.  Ouch!  Sometimes the brackets themselves would be sharp and cut my gums.  I was given wax to put over top of them so they didn’t rub my gums.  They were sharp when my finger rubbed over them so of course it tore up my gums.  I’m confident this wasn’t a normal experience for most braces wearers. All of my friends that had braces ate whatever they wanted and the brackets never came off.  Me, I was a rule follower.  I avoided the foods I was told to and my brackets still came off!  It was frustrating.  When I would go in for an appointment he would re-adhere the brackets that came off and reuse the wires.  I didn’t know until later that this wasn’t common practice.

Again, I’m sure my orthodontist was a nice guy and maybe he had state of the art equipment 20 years before I was his patient but it was long outdated by the time I was there.  I can remember vividly that he was grinding down two of my teeth {at least he saved me from vampire teeth!} with a drill that he had to pump with his foot.  I’m not kidding!  There’s no way I could make this stuff up.

When it was time to get my braces off I was given a mouth piece to wear on my top teeth for three months.  After that I was told that I didn’t have to wear it any longer.  You can bet that I was counting down those months!  Unfortunately, I later found out that he gave me horrible advice and to keep the progress I had made I needed to continue to wear my mouth piece at night.  My husband had braces and he still has a built in little brace on the back of his teeth to keep them straight.

 invisalign

I could go on with my orthodontist horror stories but I’ll stop.  I’m sad that my parents paid so much money for my teeth to still be crooked just a short while after I had them removed.  I’m sad that my teeth are still crooked.  I’m sad that they didn’t have the sophisticated braces like Invisalign when I was younger.

Just as the orthodontist my husband had was using took advantage of newer technology, many orthodontists today are using the latest technology they have available by using Invisalign.  If you’re not familiar, these aligners are made of lightweight plastic that sits smoothly on the teeth {which is bound to be much more comfortable than metal shoved between your teeth!}.  The cost is similar to traditional braces but usually requires fewer office appointments, shorter visits, and no shameful “emergency” visits for a broken bracket.  To find out more information on Invisalign you can check out the Invisalign Website.

Invisalign vs Braces

If you or your child is considering Invisalign try out their Invisalign Smile Assessment to see if you or your child is a good candidate for Invisalign.  If it looks like these would be a good match for you, you can use the Invisalign Doctor Locator to find a doctor nearest you.

To stay up to date on the latest Invisalign news you can follow Invisalign on Twitter or “like” Invisalign on Facebook.

Disclaimer: This is a sponsored post. However, all thoughts and opinions are my own.

Tree Hut Foot Scrub – One Step Towards Natural Beauty

This post brought to you by Tree Hut. All opinions are 100% mine.
 photo treehutfoot-GoogleSearch_zpsdd84afd4.jpg

Flip-flop season is officially upon us and I for one couldn’t be happier!  Well, except for my calloused feet.  Winter sure put a hurting on them and they could use a little, umm, extra care.  I put lotion on my feet every single day when I get out the the shower but the dry winter months are rough (ha! rough, get it?).

Recently, I heard of Tree Hut products.  They have hand cream, foot cream, AND a foot scrub!  If you’re like me you get excited whenever you hear of a new product that could make your feet softer without the back pain that comes from spending 30 minutes scrubbing away at your feet.  Yes, yes, I know that’s what pedicures are for.  Maybe I’m too prideful but I want to get my feet looking decent before I go there.  They can smooth up the rough edges but I want to be able to take care of the majority of damage at home.  So, that brings me back to Tree Hut.  Did you know that this nationwide brand is sold at Walmart?  That’s nice for me so I can just pick some up when I’m getting groceries and not have to make a special trip.

While I haven’t tried these products yet I’m anxious to and I just so happen to be going to Walmart tonight.

Here’s a little more about the their products:

Tree Hut foot cream

  • -Certified Organic Shea Butter: skin repairing & moisturizing, anti-aging, promotes elasticity
  • -Argan Oil: natural anti-aging properties
  • -Rose Hip Oil: natural anti-aging properties
  •  -Non-greasy formula
  • -Paraben Free and No DMDM
  • -Made in the USA
  • -Not tested on animals


Tree Hut hand cream

  • -Certified Organic Shea Butter: skin repairing & moisturizing, anti-aging, promotes elasticity
  • -Aloe Vera: Nature’s soothing moisturizer
  • -Peppermint Oil: Moisturizes skin
  • -Paraben Free and No DMDM
  • -Made in the USA
  • -Do not test on animals


Tree Hut foot scrub

  • -Certified Organic Shea Butter: skin repairing & moisturizing, anti-aging, promotes elasticity
  • -Real Sugar: Natural sugar exfoliates skin smooth
  • -Peppermint Oil: Moisturizes skin
  • -Paraben Free and No DMDM
  • -Made in the USA
  • -Do not test on animals


summer style


I can’t wait for my feet to be summer ready!  Check out this fun summer style board I put together on Polyvore.

Doesn’t it just scream “Summer”?

Are your {feet and hands} ready to be seen this summer?  If not, be sure to head to Walmart and check out Tree Hut foot cream and Tree Hut hand cream!  Let your #NaturalBeauty shine this summer!  Then come back here and let me know what you think of it.

To stay up to date on the latest Tree Hut news you can follow Tree Hut on Twitter and like Tree Hut on Facebook.

Visit Sponsor's Site

Party Bag Dilemmas

In years gone by kids attending parties received a small treat like a bar of chocolate as a thank you for coming but these days it is standard practice to hand out party bags containing several items to all of the children. This does often mean that the kids have something to keep them occupied which is always a blessing but it is yet another thing for the parents to sort out when they are organizing the party and can add a considerable cost to the event. There can be a little one-upmanship with these gifts as well as parents vie to present the best party bags at their events. So if you are organizing a kids party what should you put in your bags to keep the kids happy and your bank account under control?

Extravagance

There has long been a tradition of handling out gestures of appreciation to guests at parties. Take weddings for instance. You rarely attend a wedding which does not have some form of favor on the table even if it just a small bag or box containing sweets. The practice has also been extended to include major celebrity events like awards ceremonies where the gifts have simply become promotional vehicles for large companies. The star guests receive goody bags of treats of really quite ridiculous value in order to raise big headlines for the providers. Take the Oscars as an example. The 2012 ceremony saw all Oscar nominees gifted $60,000 worth of goods including an elephant safari in Botswana and a cocktail party by Disaronno!

This year’s Brit Awards saw celebrity guests walking off with perfume, sunglasses, jeweler  luxury handbags and a hotel stay worth £1800. All this and these guests are the very people who don’t need the gifts and may not even want them. One of the Brit Award giveaways was a Karaoke Kit!

Real World

Back in the real world us ordinary folk inhabit, party bags are a nice touch and a great way of showing your appreciation to those who have taken the time to attend your event but are never going to contain incredibly expensive luxury goods. With kids parties potentially having dozens of young guests it can be difficult to make up party bags which the kids will really like but which do not cost the earth.  Most parents want to show a little individuality and do not want to simply resort to sweets for their bags but there is no need to fret too much about making a big impact. In order to save time and a lot of thought it is a good idea to seek out ready-made solutions. It is now possible to buy party bags complete with a range of appealing goodies without breaking the bank. Sites such as Gifts for Tweens offer an excellent range of really original bags and goodies which look great but are reasonably priced.  There are bags for junior explorers and little fashion freaks and some great fillers like lovely Santoro journals and cards for magic tricks. Much better than a few sweets and no effort required!

Meaning

Ultimately it is the thought that counts and there is no need to fret over your party or party bags. Kids will appreciate any gift and no one is going to expect an elephant safari or a karaoke kit for that matter! Choose an attractive ready-made option or take a look at the sites who sell these bags to see what other interesting elements you could include in yours and job done! You can now spend your valuable time (and money) on other aspects of the party.

Sally Stacey, the author of this post, is a blogger and party enthusiast who currently writes on behalf of Gifts For Tweens.

Rod Stewart’s Time Album

When I was growing up my mom had a few favorite tapes {I’m showing my age} that she would listen to over and over again.  One of those was a Rod Stewart tape.  I grew up loving and singing those songs…long before I knew the meaning.  As I got older and I realized what the song “Hot Legs” was really saying I quit singing them…out loud anyway.  Rod Stewart’s songs will always have a place in my heart.

I received Rod’s latest CD to review for this campaign from One2One Network.  As always, all opinions are my own.

Rod Stewart

Recently, I found out that Rod {I can call him by his first name, right?  We practically grew up together!} had created a new album.  He wrote and produced 11 out of the 12 songs on this album himself.  He said that he rediscovered the spark for songwriting while reviewing his life for his recent memoir.

“Suddenly ideas for lyrics were piling up in my head,” he says. “Next thing I knew, I had a song called ‘It’s Over’ about divorce and separation. And now I was getting up in the middle of the night and scrambling for a pen to write things down, which has never happened to me. I finished seven or eight songs very quickly and I still wasn’t done, and it became apparent that I would eventually have a whole album of material to record.”

Here is a list of the tracks on the new CD:

Time Track Listing:
1. She Makes Me Happy
2. Can’t Stop Me Now
3. It’s Over
4. Brighton Beach
5. Beautiful Morning
6. Live The Life
7. Finest Woman
8. Time
9. Picture In A Frame
10. Sexual Religion
11. Make Love To Me Tonight
12. Pure Love

The Huffington Post says, “Rod Stewart said he was “over the moon” as he celebrated his 15th number one record with a champagne toast.  The 68-year-old star admitted he was “very proud” to be back at the top of the charts for the first time in 34 years with new album ‘Time’.”

I listened to the CD and enjoyed it but I knew someone who would like it even more, my mom.  I gave it to her for Mother’s Day and a few days later I asked her what she thought of it.  She said that she really loved it!  She wasn’t such a fan of the songs he remade a few years back {although I enjoyed those a lot!} but she loved these and said that they reminded her of his older albums.

Along with the release of Time, Rod is about to embark on the European leg of his Live the Life tour on June 1st, while the American dates {with Steve Winwood} will kick off October 17th.

Puzzle Nail Art Tutorial

DIY Puzzle Nail Art

Last month, I told you about my puzzle nail art and how I created it.  I was excited about my puzzle nails and I’m glad to know that you liked them too!  I’ve received numerous comments and emails requesting pictures to show the tutorial step by step so I’m here to hopefully visually explain with pictures what I tried to explain with words before.  I hope this helps clear any confusion but as always, if you have any questions please feel free to contact me!

Here are a few simple steps that I think make for a great at home manicure:

  1. Trim, file, buff, & push back cuticles.  Buffing might seem like a waste of time but it will help your nail polish last longer!
  2. Apply a base coat.  Let dry.
  3. Apply your base color of choice.  I recommend starting with your lightest shade (even though I forgot to do this myself!).
  4. Allow to fully dry.  This could take a while so I usually add a quick drying top coat here so I can get to designing my nails (the fun stuff) right away.
  5. Apply tape and paint the remaining areas.
  6. If you’re doing the puzzle design that I did, take a dotting tool (or a toothpick) and dip it into the polish and then onto your nail on the  opposite color.  Repeat with each square.
  7. Apply a top coat.
  8. Take a picture and post it on Instagram with the tag #EmbracingBeauty so I can see it.  (Really, I want to see!)

Scissors and tape

One you’ve got your lightest color applied and fully dry cut two pieces of tape to use.

Color Blocking 101

Apply the two pieces of tape to your nail.  You want the two corners to meet in the middle and barely touch.  Make sure you use the smooth sides of the tape and not the ridged edge where you tore it off…unless you’re not doing puzzles and you’re going for that look.  Smooth the tape down with another finger nail to make sure there are no air pockets underneath where polish might seep.  Then carefully apply your darker color over your light one.  While your nail polish is still tacky and not fully dry begin sloooowly peeling the tape off.  Wait until your polish is fully dry before moving on to the next step.

Nail Polish Dotting

Grab your favorite dotting tool and bottle of polish.  I use the cheapo dotting tools from Amazon {and love them!} but be warned they take a few weeks to ship.  Right now they are selling for $1.86 shipped but the price could always change.  You could also use a toothpick or a mechanical pencil.  For this dotting technique I chose a wider end than I usually use.

Taking your brush from your bottle of polish dab some out on your work surface.  I always use the back of a magazine I have laying around.  Screw the lid on quickly and dip your dotting tool in the polish and then on your nail.  Don’t wait too long because the polish gets tacky and hard to work with when it’s drying.  Apply one dot of your darker color onto the square of the lighter color polish.  Repeat with the other light colored square.

Nail Tool Dotting

Repeat with your lighter color on top of your darker color.  As you can tell by this picture the paint is thick and bubbled up – that’s okay!  Once it’s dry it will be flat and look perfectly like a puzzle piece.  Just be careful not to touch your nails for a while because it will take a little longer to dry this way.  You can also add a top coat to help seal your manicure after your polish dries.

I think that’s it!  If you got a little polish on your fingers you can remove that with nail polish remover.  I find that an old art paint brush dipped into acetone works great for scrubbing off those pesky stray smudges of polish.

If you try out these puzzle nails I would love to see the results!  Please email them to me or share them on Instagram with the tag #EmbracingBeauty so I can see it.

Happy Painting!

Under Eye Issues: How To Use Concealer and Color Corrector Correctly

How to Use Concealer & Color Corrector Correctly

Most of us have some type of under eye issues. The most common problems include bags or dark circles under the eyes. Contrary to popular belief, these ‘dark circles’ are not always black or brown in color, although this can certainly be the case. Some ‘dark circles’ can be blue, red, pinkish, or even purple in color. It usually depends on your skin tone, and just how long you have been without sleep or have been really stressed out. But what do you do about these problems? How can you fix them so you don’t look like a zombie? The answer is simple. You use concealer and color corrector. Today we are going to show you how you can use either of these nifty tools correctly.

Color Corrector

Before you begin, you need to know just a few things about the color basics. First, the color green will neutralize red, so people who have a lot of redness on their face should use a green corrector before adding their foundation or concealer. Lighter skin tones will be the ones who benefit the most with these types of correctors. Darker skin tones have hyper-pigmentation and discoloration. They need oranges and bisques. Sallow skin will need a lavender or lilac type of corrector to brighten the skin.

Remember that darker skin tones will need darker tones, and lighter skin tones need lighter tones. It’s very simple. A little bit of trial and error will show you what the exact perfect shade for you is.

Using a color corrector is actually very simple. Simply apply a dab of the corrector on your skin- in this case, beneath the eyes, and rub in. Make sure you rub it in completely so that you don’t come out with a fake, caked on look. That’s it! Done!

When looking for a concealer, you need to find one that matches your natural skin tone- just like if you were searching for foundation or powder. A concealer should work to ‘conceal’ your blemishes and dark circles so that your skin appears even, smooth, and youthful looking. It should not look caked on, overly tan, super pale, etc. Remember that natural is beautiful, so pick a color that works best with your skin tone- whether that be light or dark.

You use concealer just like color corrector. Apply a bit to the area where you need it, and rub it in. It’s actually very simple to use, it’s the part about finding the right shade that tends to be so difficult.

Proper Way To Apply

There is a set order when applying your face makeups, and if you do not adhere to this strict order, you will not be able to come up with the natural looking desired results. So, for your convenience, we have listed them out in the correct order so that you can be sure to achieve that perfect look you have been trying to hard to get.

1 Color Corrector
2 Concealer
3 Foundation
4 Powder
5 Bronzer (if using)
6 Blush (if using)

You do not have to feel as though you must use all six face makeups. Some people will only be using foundation and powder, while others may actually be using all six. It all depends on your personal preference, and the look you are trying to achieve.

I hope that you found this to be insightful, and that you now understand how to get rid of those dark circles under your eyes…the correct way. Have something to tell us? Do you have tips or tricks, or a favorite product you like using? Let us know all about it in the comments below! We can’t wait to hear what you have to say!

Author Bio: Amanda is a skincare fanatic and the author of SkincareHQ.org which recently featured an article on The Best Foundation For Oily Skin. Aside from skincare, Amanda loves to travel and dreams of one day going to Italy. If you have any questions or comments for Amanda, feel free to reach out to her @Skincare_HQ on Twitter!

Saving for a Better Future with #MassMutual

Ever since I was a little kid I knew how to work hard and save for what I wanted.  I can explicitly remember cleaning family members houses  to earn money for a new Barbie doll.  In elementary school they encouraged us to open a savings account and we could add our money to it each week by bringing it to our teacher.  It was fun to see that money add up over time and the more it grew the more I wanted to contribute to it.  It was a great feeling of accomplishment for a small child.

When I was in high school I got my first job and I made $6.50 an hour.  It was a great job just starting out and there was opportunity to earn more through incentives.  I worked hard and earned over $12 an hour.  I gave my tithes out of each paycheck and the rest of that money went into a savings account.  I didn’t spend even a penny on anything for myself.  After I graduated I bought a laptop with the money I had saved and the rest of that money went toward my tuition.

Fast forward a few years and now I’m married and a mom to a beautiful little girl.  My husband has a good job that has allowed me to stay at home.  We’re so grateful for his job!  For several years now I’ve been blogging and that has helped bring in an extra income while staying at home and caring for my family.  It’s a win-win!  It’s something I love doing and it feels great to be able to contribute to the family’s finances a bit.

A few years after we were married we went through Dave Ramsey’s Financial Peace University together and we absolutely loved it.  It has transformed the way we think about money and it has enabled us to make wise financial decisions together.  We not only want to have our needs provided for in the here and now but we also want to plan for our future.

A new research study, MassMutual’s State of the American Mom, found that many moms have strong hopes and convictions about providing financially for their families, but given the multiple demands of the life of a mom, many also find it hard to achieve.  I think we can all relate to that, right?  College savings, saving for retirement, managing day-to-day expenses and educating yourself and children all rank as top priorities, yet some moms shared that they may feel overwhelmed about ways to start thinking about all of them.

Mom Research Study Infographic

My husband and I are doing our best to plan for our future.  We’ve agreed to cut back on certain budget areas like clothing, vacations, and entertainment until we get to the financial state we want to be.  We have been putting money into retirement regularly now for a good number of years.  We have life insurance policies set up for each of us just in case.  We don’t have a college savings plan for our kid(s) yet but we’re waiting a while to start that until we get to where we want to be financially.

As busy parents it’s easy to focus on the immediate and put off thinking about the future until it’s too late.  It’s far better to be prepared than to be hurting later.  MassMutual has created a handy new quiz to help moms start thinking about their financial future and gives them tips on how they can take small steps to plan for their financial futures.

Take the Quiz


I took the quiz and it labeled me as a “successful planner,” and I think that’s a fair assessment.  I feel fairly optimistic about our financial situation but it’s always a good idea to revisit our plans every year.

Where are you at financially?  What steps are you taking to ensure a financially secure future?

If you are seeking guidance concerning your financial state, MassMutual has a family finances page with some helpful resources for financial planning, ideas for teaching your kids about money, and even how to find a financial professional in your area.  You can also like MassMutual on Facebook and follow MassMutual on Twitter.


I wrote this post as participation in in a blog tour for Mom Central on behalf of MassMutual and received compensation in the form of an Amazon gift code to thank me for taking the time to participate.

DOLE Fruit Parfaits #DoleParfaitEscape

Dole Parfait

My family is always looking for new quick and low-fat snacks so I was eager to try DOLE’s Fruit Parfaits.  They are yummy!  They contain all natural fruit, they’re naturally low in fat, cholesterol free and very low in sodium.  Plus, they are rich in Vitamin C!  I love snacks that feel like a splurge but really aren’t.

Dole Parfait Fruit Cup

DOLE Fruit Parfaits are available in three delicious flavors: Pineapple and Creme, Apples and Creme, & Peaches and Creme (it’s pictured above and it’s my favorite flavor!).  They have small pieces of fruit with a light refreshing creme on the bottom.  They are great and at only $2.79 for a 4 pack (and often on sale) they are very affordable too!  For more information, including full nutritional facts you can visit Dole.com.  You can also connect with DOLE on Facebook or Twitter too.

Which flavor do you want to try?

Disclaimer: I am part of the Mom It Forward blogger network. Mom It Forward and DOLE partnered in support of this campaign. DOLE compensated me for participation in this campaign. However, all thoughts and opinions are my own.