Sally Hansen 3.1 Phillip Lim Fall 2016 Nail Art

This post contains affiliate links.

Sally Hansen Fashion Week

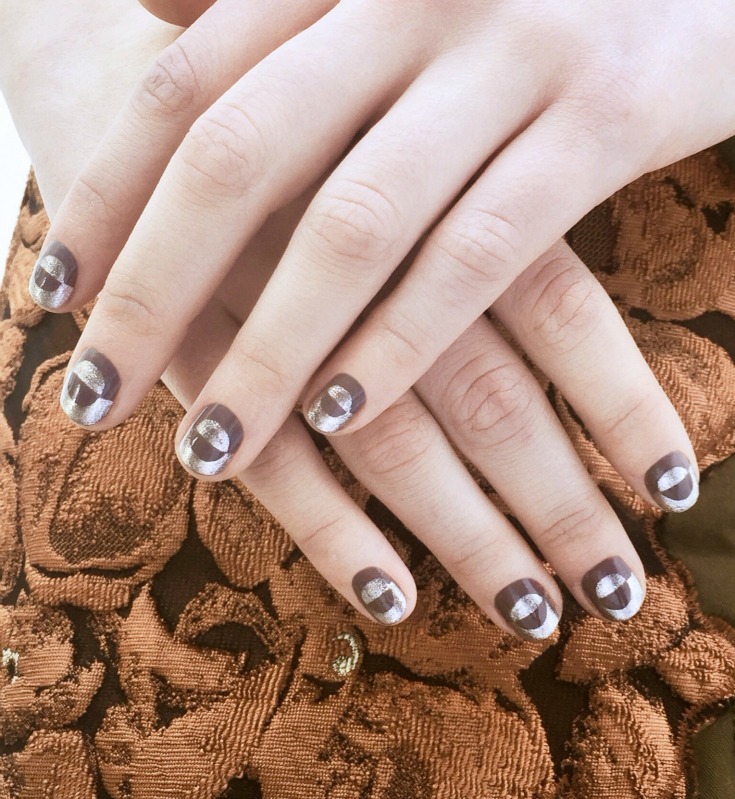
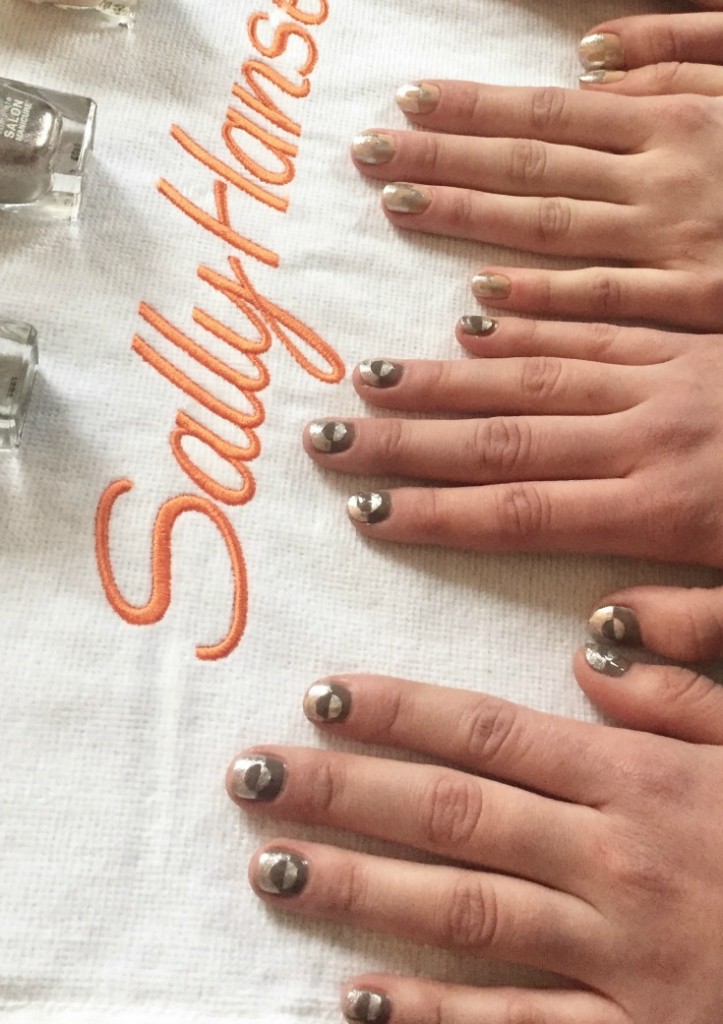
Sally Hansen is proud to be the exclusive nail partner for 3.1 Phillip Lim and to create nail looks for the Fall 2016 fashion show during New York Fashion Week. “For Fall 2016, I was looking at a lot of Japanese influences so it was important to me that the nails were precise and simple. We went with graphic combinations of neutral and metallic creating a beautiful optical illusion effect,” explained Phillip Lim.

Phillip Lim Nail Art

THE INSPIRATION

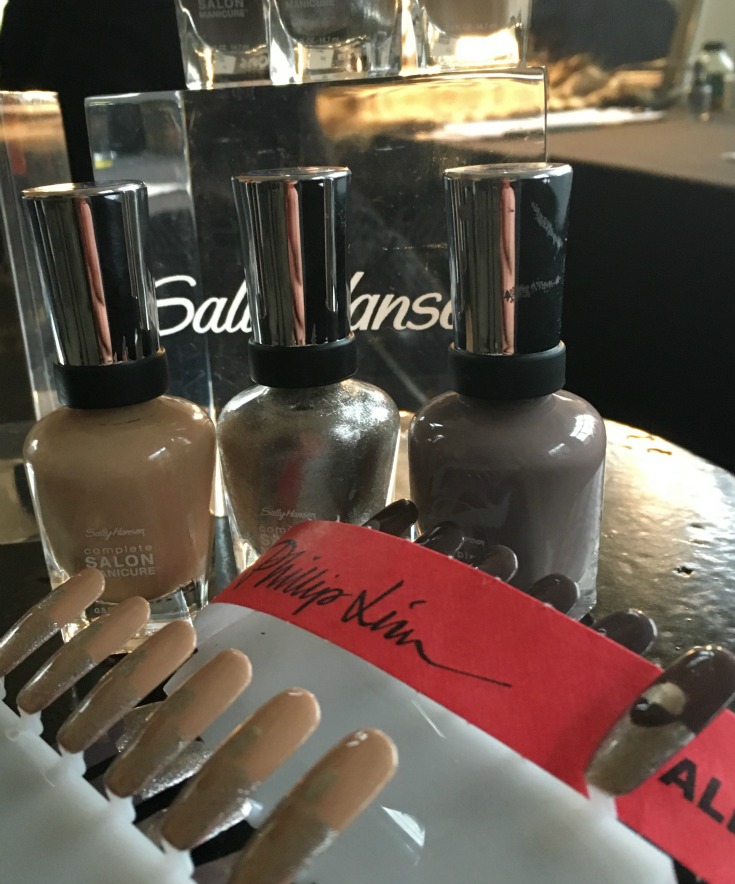
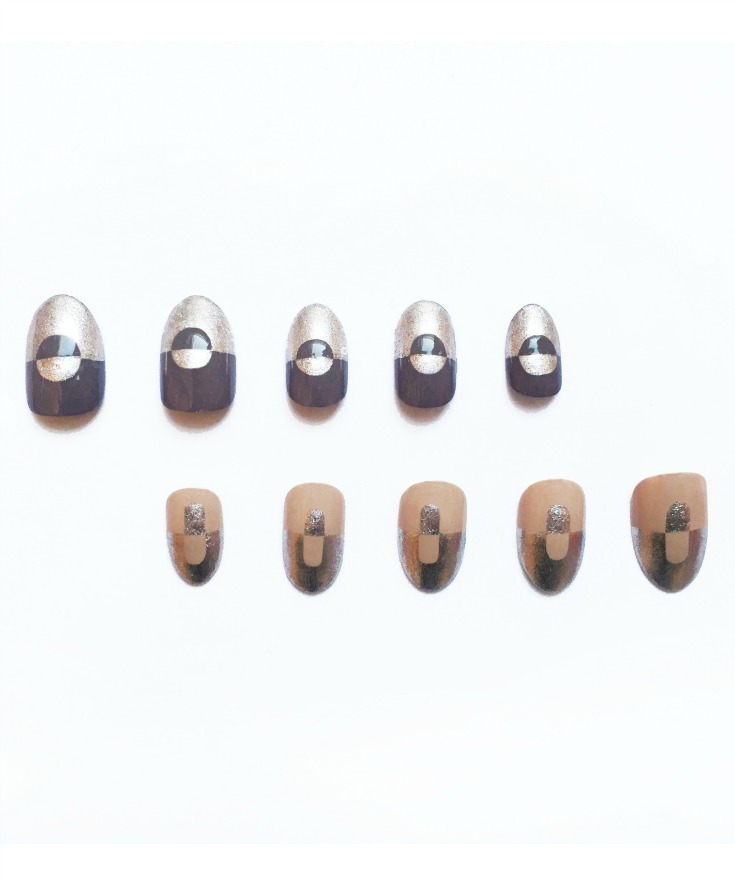
“3.1 Phillip Lim’s new collection was inspired by Japanese craftsmanship, elegant lacquered wood, samurai sword embellishment, and even lipstick packaging. The location is intimate, secretive and lit by red light, evoking an underground performance or fight club. I thought immediately about a tradition I had once heard from the Heian period in Japan when ninjas would paint the symbol of their clan on their thumb. I wanted the nail look to feel symbolic and to have a striking contrast, hence the use of metallic with the beige shade, but to also work with the palette of the collection – a traditional autumnal array of olive green, mustard and burgundy. We did a circular optical illusion in Sally Hansen Complete Salon Manicure in Commander in Chic and Sally Hansen Complete Salon Manicure in Gilty Party on half of the girls and an oval shape in Sally Hansen Complete Salon Manicure in Camelflage and Sally Hansen Complete Salon Manicure in Gilty Party on the other half. The oval shape was inspired by the hardware on the bags and belts.” – Madeline Poole, Sally Hansen Global Color Ambassador

Phillip Lim Sally Hansen Nails

Commander in Chic (which happens to be my favorite nail polish color ever!!), Gilty Party, & Camelflage are part of Sally Hansen’s award-winning Complete Salon Manicure collection that infuses trend-setting shades with an expert-quality formula to deliver salon-caliber results. Sally Hansen Complete Salon Manicure delivers seven salon manicure steps in one bottle. Chip-resistant strength joins gel-quality shine. Runway-ready color meets nourishing benefits. Plus, with a built-in base and top coat, it’s all you need to achieve a professional manicure at home.

Sally Hansen Nail Art

THE MANICURIST

Sally Hansen Global Color Ambassador Madeline Poole is a nail artist working in New York and LA. Trained as a painter, Madeline discovered the world of on-set manicuring, immediately recognizing that it was a culmination of all of her talent, interests and expertise. Her unique ability to craft innovative nail designs, impeccable execution, and emphasis on skin care has made her one of the most sought after names in the beauty industry. As part of her collaboration with Sally Hansen, Madeline helps set the artistic direction for a new generation of modern nail looks and collections globally with her fashion-forward vision.

To recreate this nail art yourself you can pick up the colors Commander in Chic, Gilty Party, & Camelflage on Amazon.

Nail Art Supplies

If you need nail art tools you can get a handful of them here for $3 and under shipped!

Mad for Metallics Nail Art Tutorial – Julep

This post contains affiliate links.

Mad for Metallics Tutorial

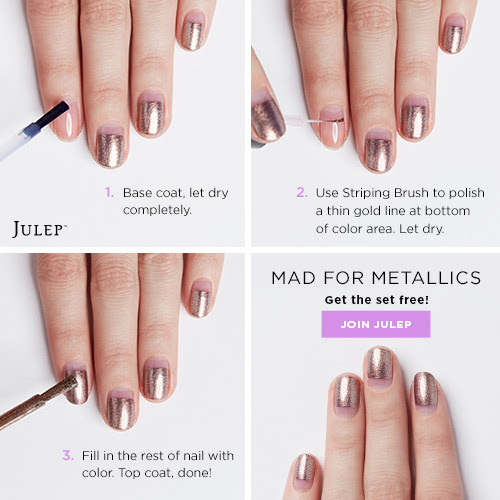
Are you looking for a new way to give your holiday manis a little more impact? Try this easy tutorial using polish from Julep’s new Mad For Metallics Welcome Box. All it takes is three quick steps:

1. Apply your base coat and let dry completely.

2. Use a striping brush to polish a thin line at the bottom of the color area and let dry.  (Amazon prices always change but right you you can get a striping brush set for $1.55 shipped here!)

3. Fill in the rest of nail with color. Apply your top coat and you are done!  Voila!

Did you know that when you join Julep’s beauty box, you’ll get a box of brand-new, full sized nail color and beauty products each month – and you deserve it!

  • – Julep is affordable. Every month you get more than $40 of full-size products for just $24.99 per month (Tip: Prepay for three months at a time and save $15. Sweet!)
  • – Julep is the only customizable box of full-size, limited-run nail colors and beauty innovations. That means no surprises, no dupes or colors you don’t like. You can see what is in your box each month and have the option of swapping out colors/products you already have or don’t want.  I rarely swap out colors myself but it’s nice to have the option.
  • – Julep subscribers get 20% off all single product purchases, free shipping, early access to secret sales. If you are passionate about your polish, that adds up to some amazing savings!  Plus, they make great stocking stuffers!!

Join Julep and get the 4-piece Metallics Welcome Box FREE ($50+ value) – just pay $2.99 shipping with code MADLOVE. Want an even better deal? Pre-pay for your first three months of Julep and get the Welcome Box and shipping FREE. Either way, you are going to LOVE Julep.

***

NOVEMBER BIRTHSTONE WELCOME BOX OFFER

Join Julep beauty box and get your first beauty box free!

OFFER: Join Julep beauty box and get the November Birthstone Welcome Box FREE ($58 value) – just pay $2.99 shipping

Ombre Nail Art Tutorial & Free Nail Polish Offer from Julep

This post contains my affiliate links in addition to the free fun ombre nail tutorial!
Ombre Nail Art

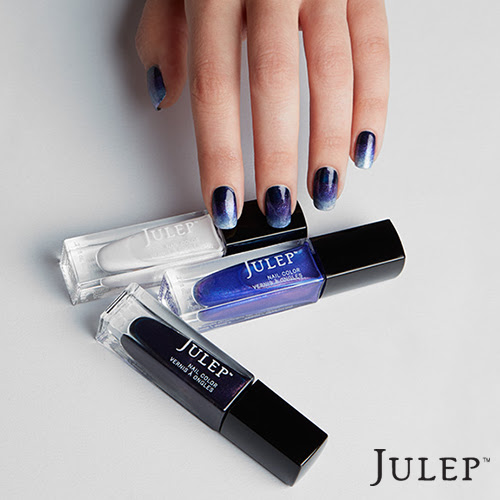
Ombre isn’t a new trend–it’s been around for a few years, on everything from clothing to nail art to hair. And yet, its popularity still isn’t fading! Why? Probably because ombre is so fun to create and so easy to DIY. Julep has shared a new ombre nail art tutorial that uses colors from their ‘Fall Into Ombre’ Welcome Box – FREE when you join Julep Maven.  I’ll have more info on that at the bottom of this post.

ombre nails for fall

Here we go!  Let’s get started.

1. Choose three polishes that blend well together, spanning from dark to light. Not sure what to pick? You can’t go wrong with a deep, opaque color, a lighter shade of the same color, and white. Polish your nails with your darkest color. Allow them to dry.

2. Pour two small dollops of your medium and light colors on a smooth surface (like a piece of wax paper). The two dollops together should be about two-thirds the length of your nails. Use a toothpick or orangewood stick to swirl them together slightly so they mix in the middle, forming a gradient.

3. Dip the edge of a cosmetic sponge directly into your dollops of nail polish then align the sponge so that the lightest color is at the tip of your nail. Press the polish onto your nails with the sponge, dabbing and repeating until you achieve the desired effect. This doesn’t have to be precise!

4. Clean up the edges with our polish corrector pen or a thin brush dipped in polish remover. Finish with a top coat. Voilà!

Get the colors used in this look for FREE when you join Julep Maven, the subscription beauty box program. As a Julep Maven you’ll receive a box of brand-new, full sized nail color and beauty products each month – and you deserve it!  

Info on Julep Maven:

  • – Julep Maven is affordable. Every month you get more than $40 of full-size products for just $24.99 per month (tip – prepay for three months at a time and save $15).
  • – Julep Maven is the only customizable box of full-size, limited-run nail colors and beauty innovations. That means no surprises, no dupes or colors you don’t like. You can see what is in your box each month and have the option of swapping out colors/products you already have or don’t want.
  • – Julep Mavens get 20% off all single product purchases, free shipping, early access to secret sales. If you are passionate about your polish, that adds up to some amazing savings!  This is a great way to save on Christmas gifts!!

LIMITED TIME OFFER! Join Maven and get the 4-piece Ombre Welcome Box FREE ($50+ value) – just pay $2.99 shipping with code FALLGIRL. Want an even better deal? Pre-pay for your first three months of Maven and get the Welcome Box and shipping FREE. Either way, you are going to LOVE being a Maven.

Nail Art Supplies Cheap

Nail Art Supplies

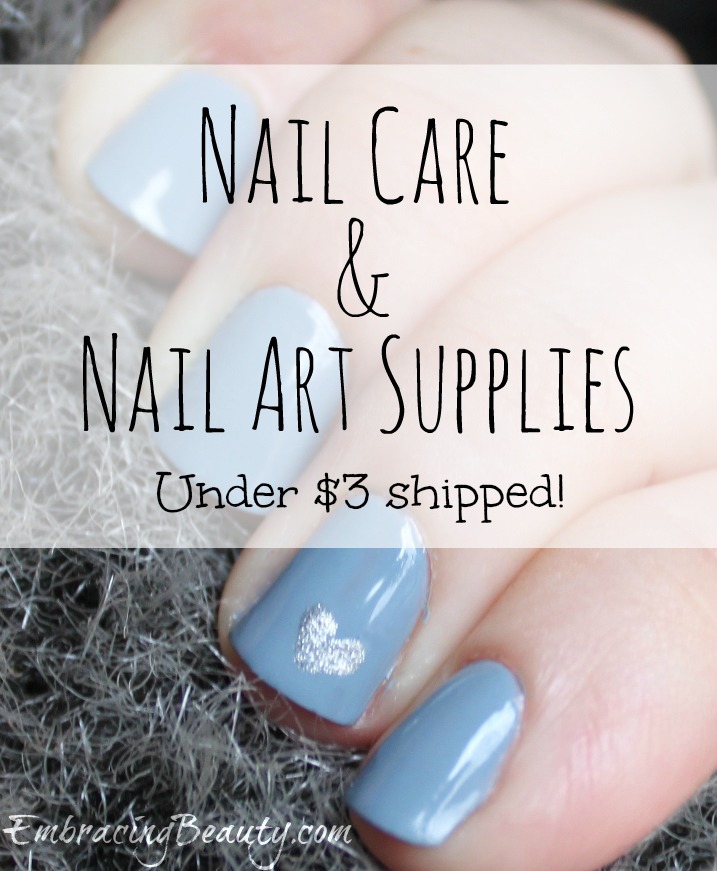
If you’re looking for affordable nail or nail care products look no farther than Amazon.  I’ve rounded up a list of nail tools, polishes, and nail art accessories all for under $3 each, including shipping!  As always with Amazon, prices fluctuate regularly so double check the prices before checking out.

These are a few that are juuuuust over $3.

If you want to learn more about the manicure in the picture above you can check that out here.  It’s an adorable Valentine nail art!

Nail Wraps Compared – Sally Hansen, Jamberry + More

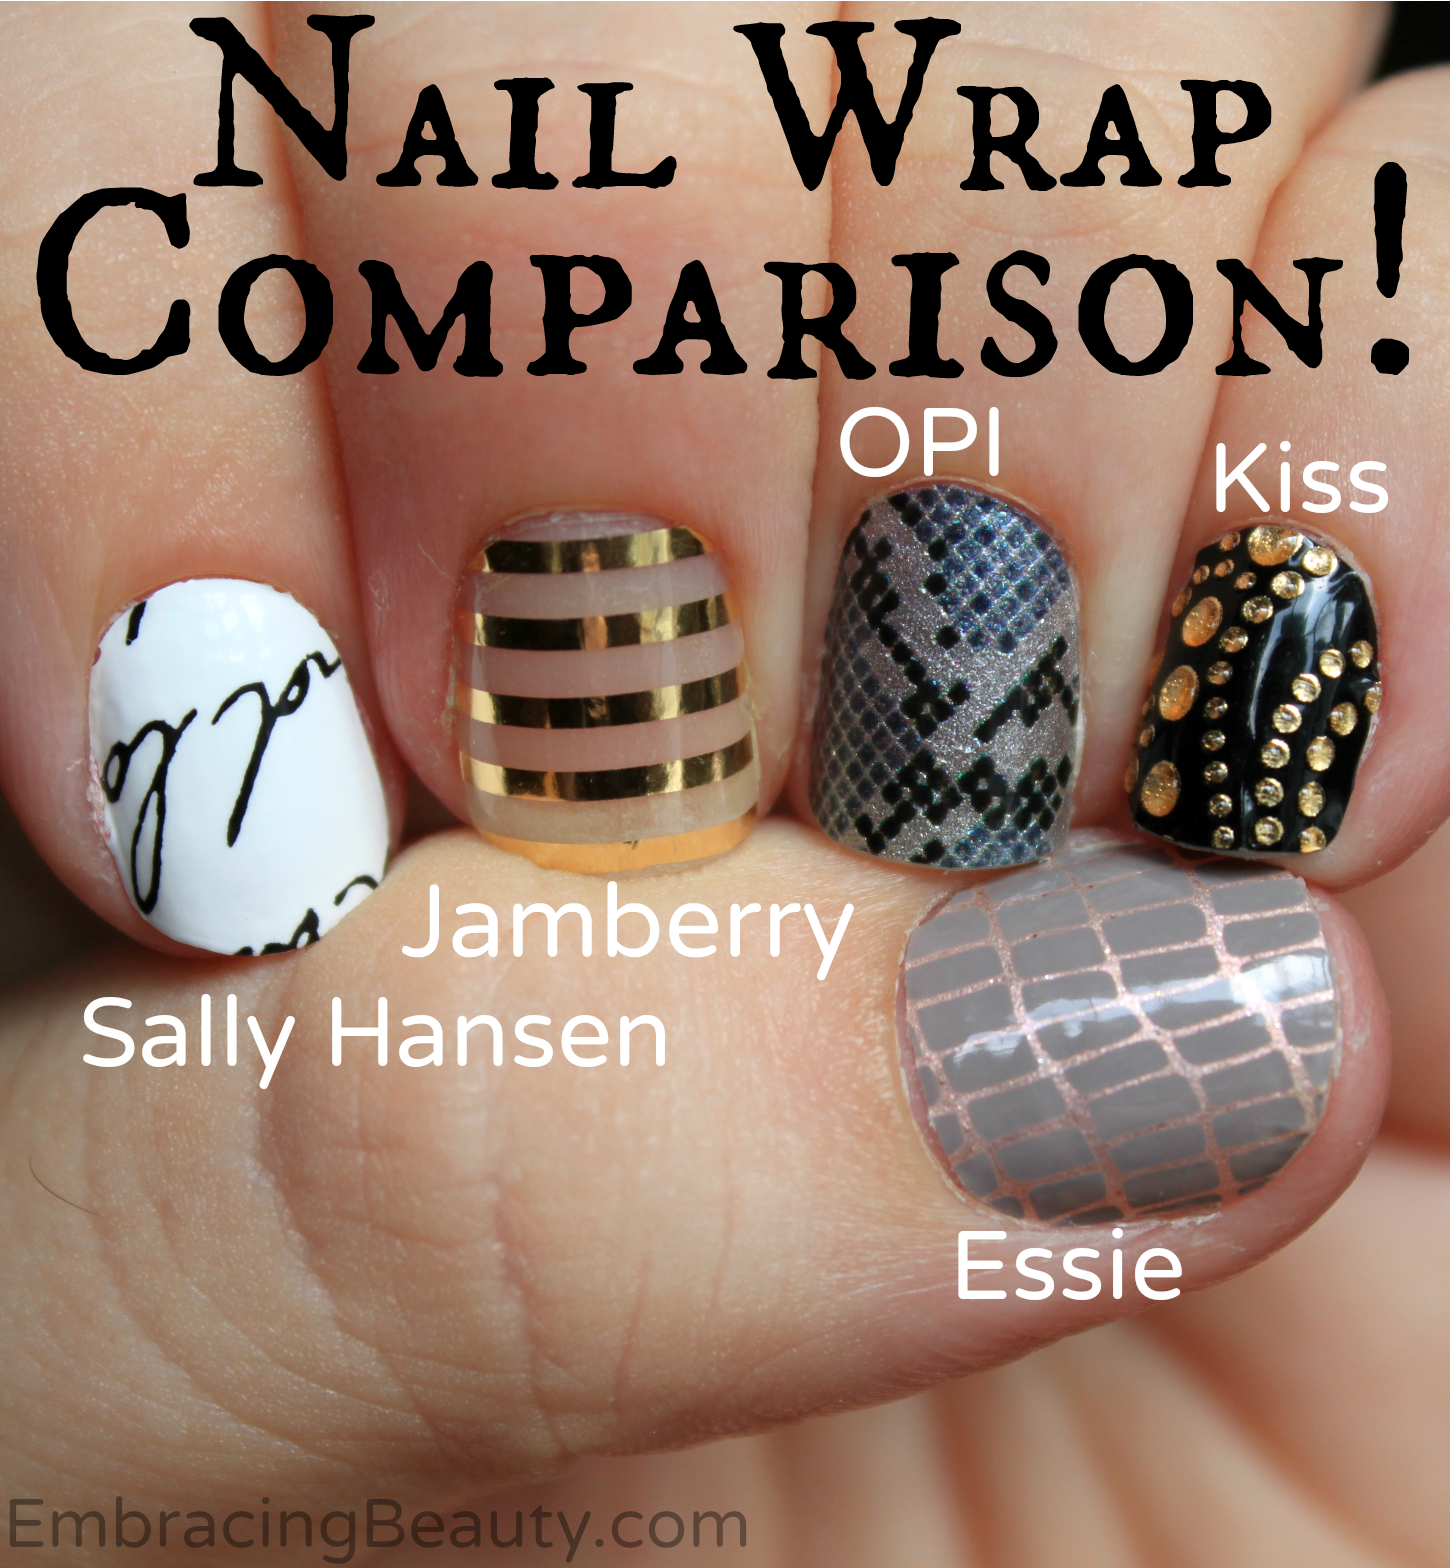
Nail Wrap Comparison
I’ve been thinking about doing this post for a while and I’m excited to finally be doing it!!  I’m currently reviewing five different nail wrap (stickers, decals, shields, or whatever name you call them).

I’m only on day two and they look the same as they did on day one, pictured above.  I’m going to be wearing these for a full week and I’ll report back to you with the results.  I’ll be judging them based on the following aspects:

  • – Style/design
  • – Ease of application
  • – Durability
  • – Ease of removal
  • – Chemical components
  • – Shape of wraps
  • – Cost

Do I have a dog in the fight or am I pulling for a specific brand?  No, not really.  When I post my full review I’ll have affiliate links to all of the wraps so you can buy them if you’d like {except for Jamberry and that will link to my friend’s site where I make no profit at all}.  You’ll be getting my full, honest, 100% authentic opinion, just like always but sometimes I feel that it’s important to point that out.

I’m anxious to see how they’ll hold up!  Are you?  Which design is your favorite?


UPDATE: You can now go and see our Nail Wrap Review!

Disney Mickey and Minnie Nail Art

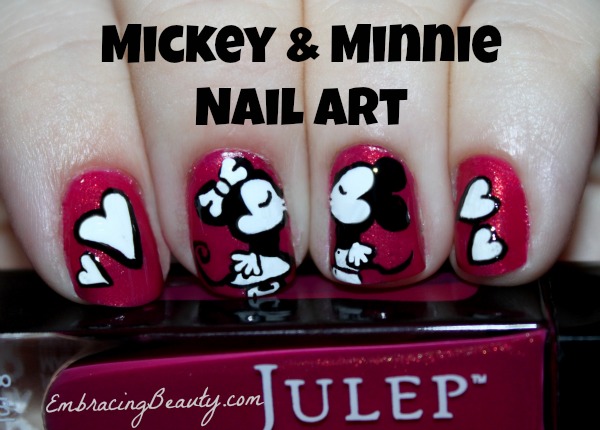
Mickey and Minnie Nail Art

Minnie Mouse is one of my favorite Disney characters!  She’s adorable for little girls and grown up girls too!  I love her sweet face, her relationship with the mouse who started it all, Mickey, and her love of polka dots.  What’s not to like?

If you follow me on Pinterest {and I hope you all do!} you’ve been bombarded with my Minnie Mouse pins lately.  I’m sorry about that!  You see, my little girl is about to turn two and I’m searching for every idea possible to make her Minnie Mouse party a success.  {Check out my DIY Minnie Mouse Halloween costume I made her.}  While browsing and browsing I found quite a few cute Minnie Mouse nail designs {which I pinned on my Pretty Nails board}.  Some were simple and some were far above my skill level.  I chose to do a design that was right in the middle.  It stretched me out of my comfort zone and I’m very pleased with the results.  If you think these are awful, please keep your comments to yourself.  Don’t bust my bubble!

My favorite Mickey and Minnie images are from the 70’s and 80’s.  Do you remember the ones?  Minnie wore a blue dress, yellow shoes, and a hat with a flower in it?  I tried to make my characters look like the ones from back then except that Minnie has a bow instead of a hat.

Have you ever done your own Mickey and Minnie Mouse Nail Art?  If so, I would love to see it!

Products Used:

Here is a list of the products that I used for my Mickey and Minnie Mouse Design:

  • – Julep Polish in a beautiful shade that isn’t available yet….that I got to name!!!  I can finally cross that item off of my bucket list.  This color will be making it’s debut soon.  Don’t you want to buy it?  I think it’s absolutely beautiful!  My poor photography skills make it look a little darker in the picture than it actually is but don’t you love the rose gold flecks in it?  Even if I didn’t have the privilege of picking the color and naming it myself it would still be my favorite polish.
  • White Nail Art Paint (Milani)
  • Dotting Tool
  • Black Polish (Sally Hansen)
  • Base and Top Coat (Julep Base Coat, Julep Polymer Top Coat)

I’m sorry that this isn’t a tutorial post but I don’t think I could do it again if I tried!  I set aside a block of time, figured out what I wanted my design to be, and carefully applied each stroke.  Sometimes I used my dotting tool or my fingernail to remove a little paint if I went a little too far.  After I was happy with my design I sealed it off with a top coat.
Even though this isn’t a tutorial, I would be happy to do my best to try and answer any questions you might have so please feel free to leave them in the comments below.  Plus, feel free to leave a comment here telling Julep what you think of their new polish color!

Puzzle Nail Art Tutorial

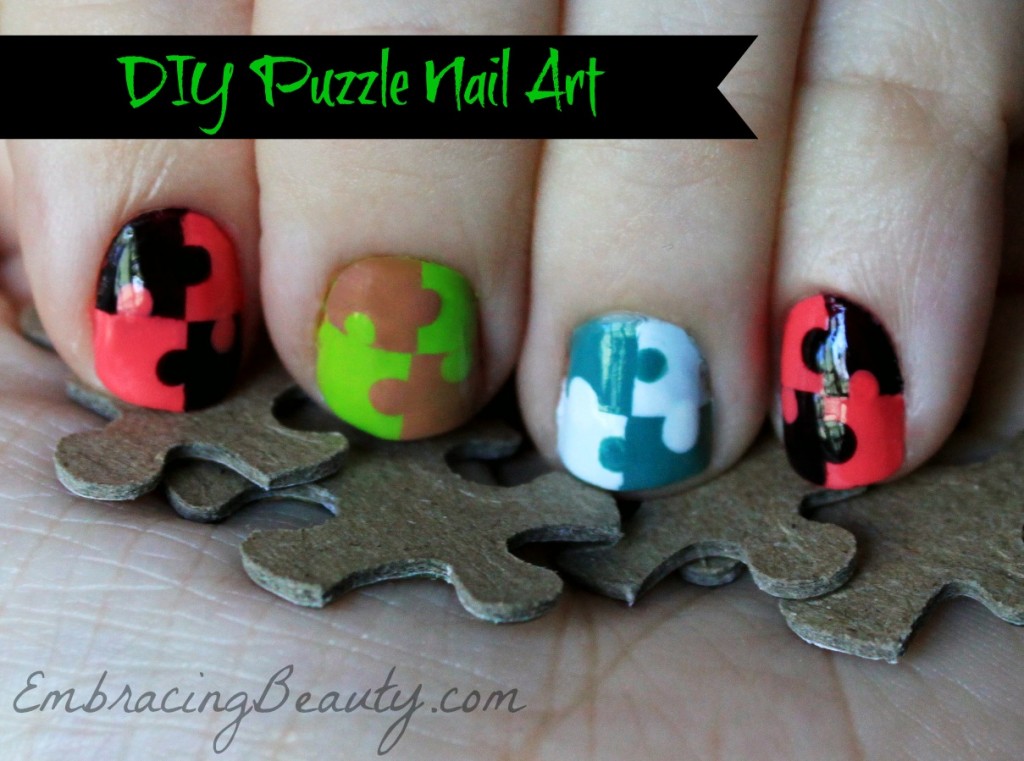
DIY Puzzle Nail Art

Last month, I told you about my puzzle nail art and how I created it.  I was excited about my puzzle nails and I’m glad to know that you liked them too!  I’ve received numerous comments and emails requesting pictures to show the tutorial step by step so I’m here to hopefully visually explain with pictures what I tried to explain with words before.  I hope this helps clear any confusion but as always, if you have any questions please feel free to contact me!

Here are a few simple steps that I think make for a great at home manicure:

  1. Trim, file, buff, & push back cuticles.  Buffing might seem like a waste of time but it will help your nail polish last longer!
  2. Apply a base coat.  Let dry.
  3. Apply your base color of choice.  I recommend starting with your lightest shade (even though I forgot to do this myself!).
  4. Allow to fully dry.  This could take a while so I usually add a quick drying top coat here so I can get to designing my nails (the fun stuff) right away.
  5. Apply tape and paint the remaining areas.
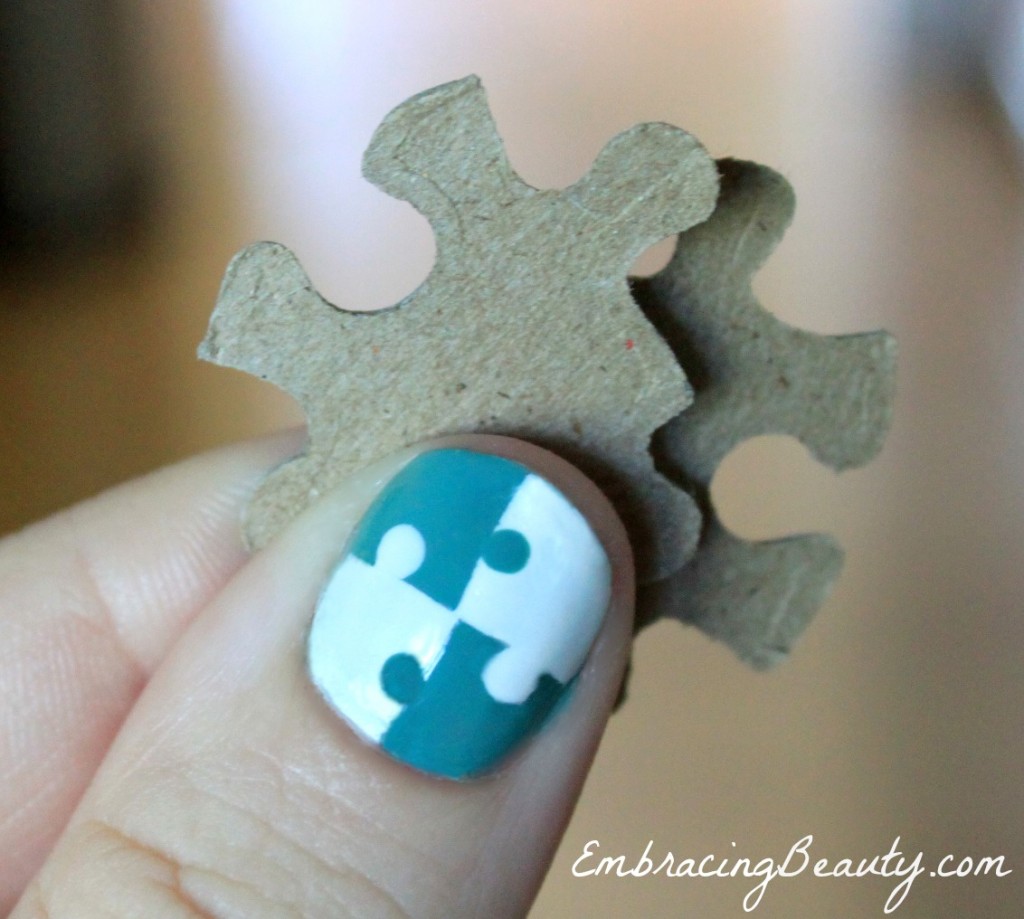
  6. If you’re doing the puzzle design that I did, take a dotting tool (or a toothpick) and dip it into the polish and then onto your nail on the  opposite color.  Repeat with each square.
  7. Apply a top coat.
  8. Take a picture and post it on Instagram with the tag #EmbracingBeauty so I can see it.  (Really, I want to see!)

Scissors and tape

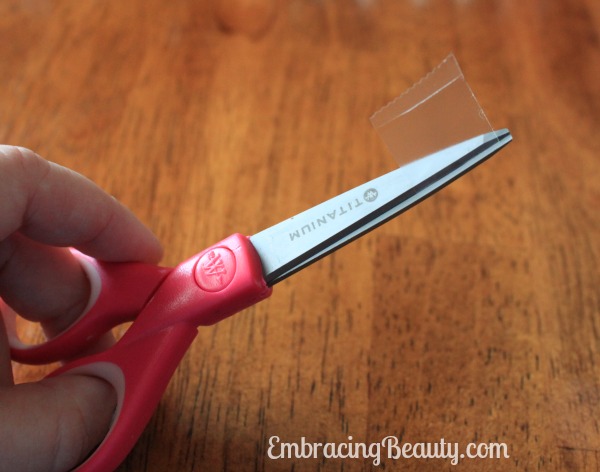
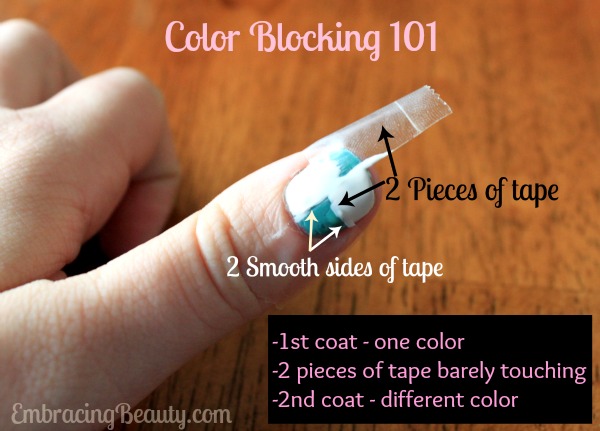
One you’ve got your lightest color applied and fully dry cut two pieces of tape to use.

Color Blocking 101

Apply the two pieces of tape to your nail.  You want the two corners to meet in the middle and barely touch.  Make sure you use the smooth sides of the tape and not the ridged edge where you tore it off…unless you’re not doing puzzles and you’re going for that look.  Smooth the tape down with another finger nail to make sure there are no air pockets underneath where polish might seep.  Then carefully apply your darker color over your light one.  While your nail polish is still tacky and not fully dry begin sloooowly peeling the tape off.  Wait until your polish is fully dry before moving on to the next step.

Nail Polish Dotting

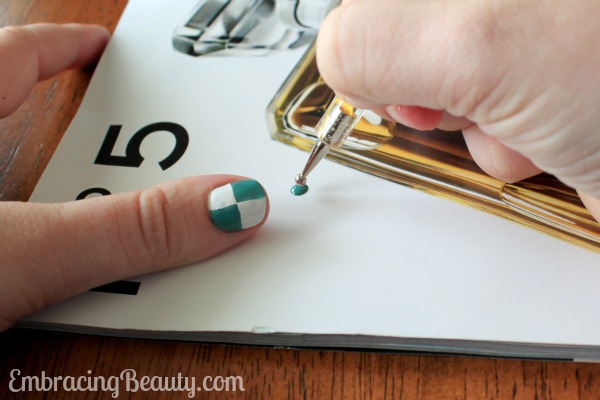
Grab your favorite dotting tool and bottle of polish.  I use the cheapo dotting tools from Amazon {and love them!} but be warned they take a few weeks to ship.  Right now they are selling for $1.86 shipped but the price could always change.  You could also use a toothpick or a mechanical pencil.  For this dotting technique I chose a wider end than I usually use.

Taking your brush from your bottle of polish dab some out on your work surface.  I always use the back of a magazine I have laying around.  Screw the lid on quickly and dip your dotting tool in the polish and then on your nail.  Don’t wait too long because the polish gets tacky and hard to work with when it’s drying.  Apply one dot of your darker color onto the square of the lighter color polish.  Repeat with the other light colored square.

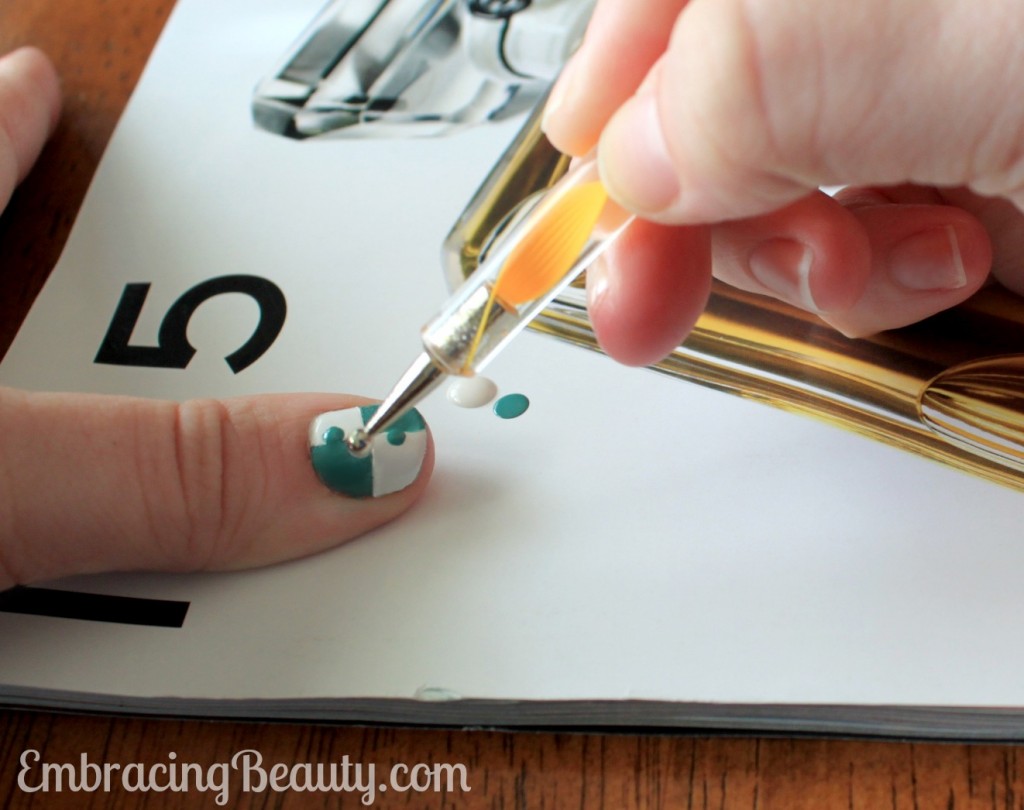
Nail Tool Dotting

Repeat with your lighter color on top of your darker color.  As you can tell by this picture the paint is thick and bubbled up – that’s okay!  Once it’s dry it will be flat and look perfectly like a puzzle piece.  Just be careful not to touch your nails for a while because it will take a little longer to dry this way.  You can also add a top coat to help seal your manicure after your polish dries.

I think that’s it!  If you got a little polish on your fingers you can remove that with nail polish remover.  I find that an old art paint brush dipped into acetone works great for scrubbing off those pesky stray smudges of polish.

If you try out these puzzle nails I would love to see the results!  Please email them to me or share them on Instagram with the tag #EmbracingBeauty so I can see it.

Happy Painting!

Color Block Puzzle Nail Art with Sally Hansen #IHeartMyNailArt #cbias

 *This post has been sponsored by Social Fabric and Sally Hansen but all opinions remain my own. Full disclosure is at the bottom of the post.

DIY Puzzle Piece Nail Art

I have what some would call an obsession.  I’m a nail polish fanatic.  Hoarder even.  I’m too embarrassed to show you just how many nail polish bottles I actually own.  I love experimenting with nail designs and adding a fun splash of color to my nails to accentuate my outfit.

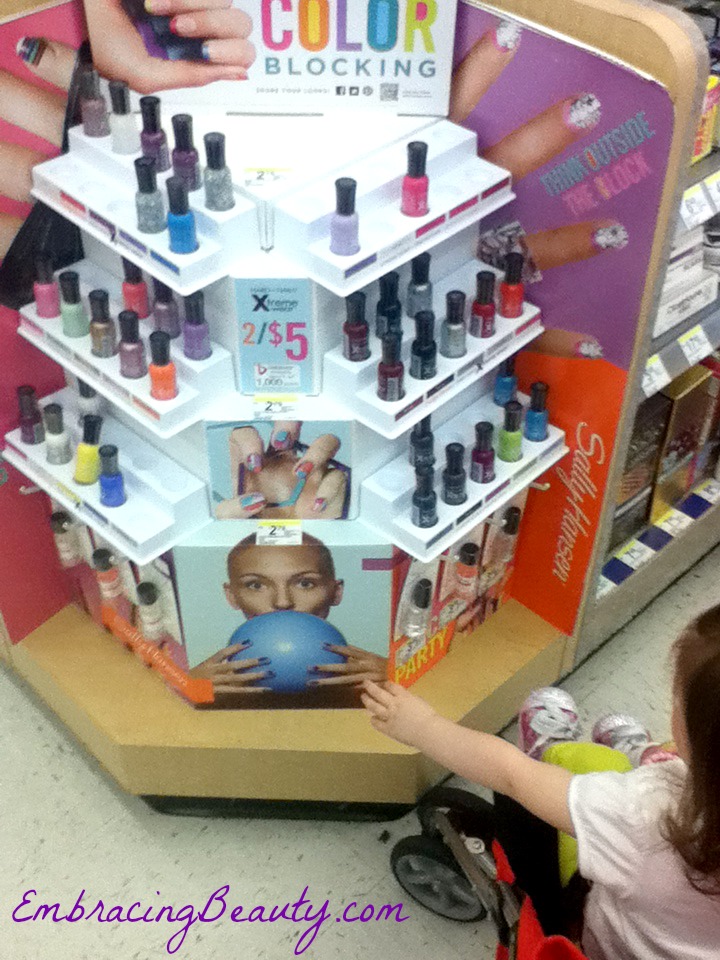
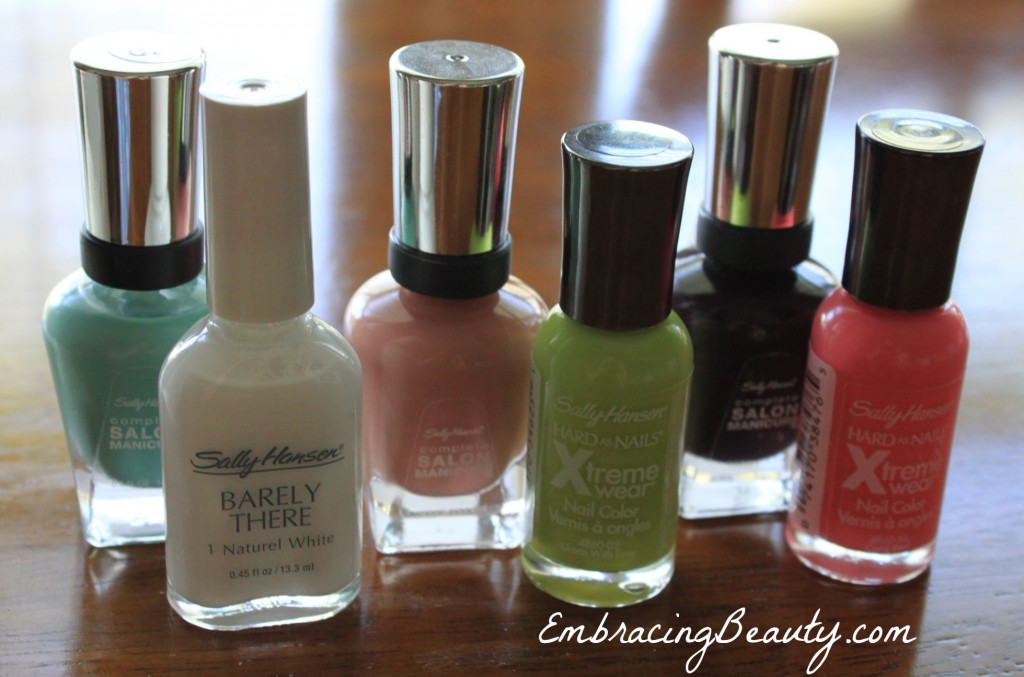
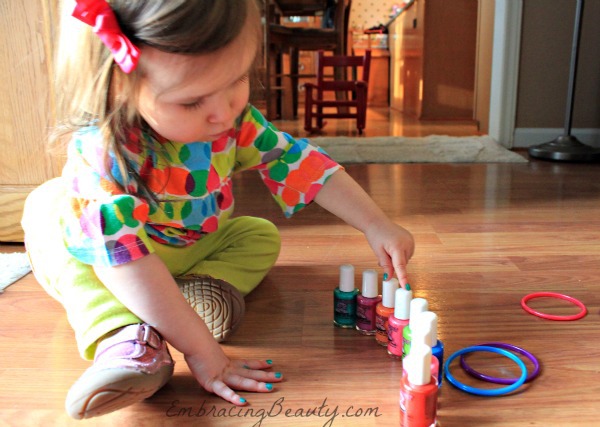
I’ve been eager to try a new design so I set a date, invited friends, and went shopping at Walgreens.  They have the biggest selection of Sally Hansen products that I’ve ever seen!  I was impressed.  I tried to think of what colors I had at home and which ones would be good to buy to match those.  I decided to let my daughter pick out which ones she wanted and I would make it work.  She loved picking them out and holding a few as we went through the store.  You can check out my entire Walgreens shopping trip to see all of the great varieties of Sally Hansen nail polish…and more pictures of my little girl!

Sally Hansen Nail Polish Stand

My little basket was full to the brim with everything I needed to host an excellent manicure party, that is, except for nail design tape.  I knew I could order some online but I wanted it quicker than that.  I searched up and down the isles but I couldn’t find what I was looking for.  I wanted to do color block nail art and to do it neatly I wanted tape.  Scotch tape works but I wanted the good stuff.  I asked a Walgreens associate if she knew if where I could find some.  She immediately stopped what she was doing and joined me in my search.  We could both picture it but we couldn’t find it.  She found some thin craft tape that we thought might fit the bill.  I’m happy to report that it worked wonderfully.  If you’re store is ever out of nail design tape (or you just can’t find it) check the craft isle!

When I got to the check out the cashier told me about two $5 coupons I could have used on my purchase if I had only gone to Coupons.com.  Being a teacher of couponing I felt like smacking myself on my head.  Even though I missed out on the coupons, I did get the 2/$5 deal w/ 1,000 points added to my Walgreens Balance Rewards Card (3/31-4/27).

If you have a smart phone, I recommend downloading their app to your phone.  They have several different handy services they offer including bar-code scanner, coupons, and you can keep track of your Balance Rewards right on your phone.  I really racked up on the reward points during this trip!

Sally Hansen Nail Polish

I had simple snacks for our “block party” so that we could eat while painting our nails.  Yep, you can tell I’m experienced at this!!  We had gummy bears, popcorn, and a few other little goodies.

DIY Puzzle Nail Art

The nail designs were so much fun to experiment with.  I wanted to get brave enough to do a complicated design like a stained glass window or a bunch of bricks each with a different color.  I decided to mix it up a little and do puzzle piece nail art.  Not too complicated but still kind of classy.

DIY Striped Nail Art

This simple stripe design was made using our craft tape.  It held strong enough not to let the paint bleed through but not strong enough to pull off the original color.

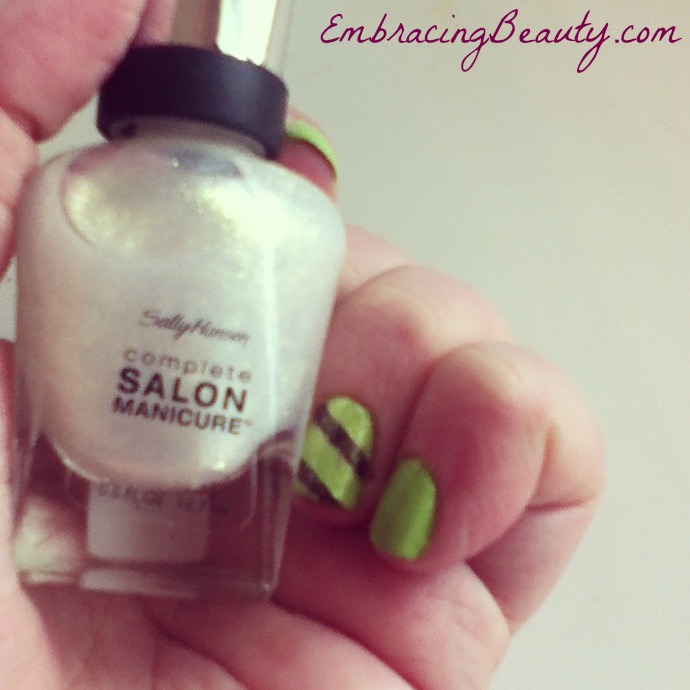
Sally Hansen Stripes

Here is a diagonal stripe with the most amazing sparkle polish over top!  Trust me, this photo doesn’t begin to show it’s beauty.

Here are a few simple steps that I think make for a great at home manicure:

  1. Trim, file, buff, & push back cuticles.  Buffing might seem like a waste of time but it will help your nail polish last longer!
  2. Apply a base coat.
  3. Apply your base color of choice.  I recommend starting with your lightest shade.
  4. Allow to fully dry.  This could take a while so I usually add a quick drying top coat here so I can get to designing my nails (the fun stuff) right away.
  5. Apply tape and paint the remaining areas.
  6. If you’re doing the puzzle design that I did, take a dotting tool (or a toothpick) and dip it into the polish and then onto your nail on the  opposite color.  Repeat with each square.
  7. Apply a top coat.
  8. Take a picture and post it on Instagram with the tag #EmbracingBeauty so I can see it.  (Really, I want to see!)

I had a great time and I hope you enjoyed reading about my latest nail art adventure.

If you end up catching the “color block bug” feel free to share your art with Sally Hansen on Facebook for a chance to win some great prizes.  Check out the Pinterest Party Walgreens and Sally Hansen are hosting where you could win a year’s supply of Sally Hansen!  You can always purchase Sally Hansen in Walgreens stores but did you know that you can also get it online?  It’s true, you can!  You can also connect with Sally Hansen on Twitter and Walgreens on Twitter.

*UPDATE! I have posted a step by step Puzzle Nail Art Tutorial here for those interested!*

What’s a nail design you would like to try?

*Disclaimer – I am a member of the Collective Bias®  Social Fabric® Community.  This shop has been compensated as part of a social shopper insights study for Collective Bias®  and COTY #cbias #SocialFabric.

Piggy Paint – Non-Toxic Nail Polish & Giveaway Ends 4/9/13

I’m so very excited that I don’t really know where to begin.  I guess I’ll start at the beginning!  Mom Central asked me if I wanted to participate in a campaign they were hosting for Piggy Paint.  I jumped at the chance because 1) I love nail polish, 2) I love Piggy Paint nail polish!

Piggy Paint Colors

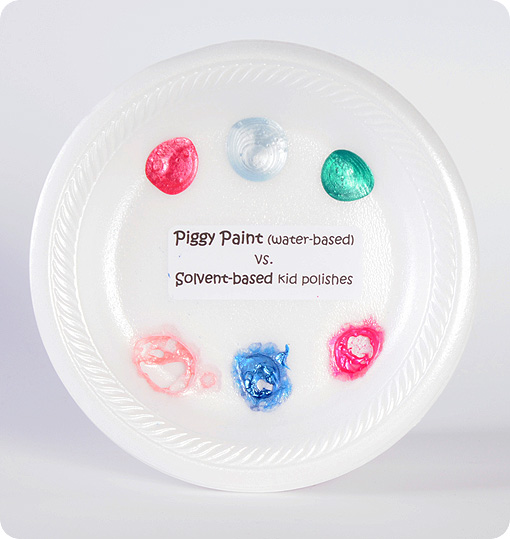
If you haven’t heard of Piggy Paint nail polish let me tell you all about it.  It’s incredible!  It was made by moms for moms.  Once upon a time, a mom was painting her daughters nails on a styrofoam plate and she noticed that the nail polish that spilled on the plate actually ate through the plate.  It was at that time that she decided to research nail polish and make her own nail polish for her kids.  That lady was Melanie Hurley and her nail polish is Piggy Paint.

Piggy Paint vs Solvent Nail Polish

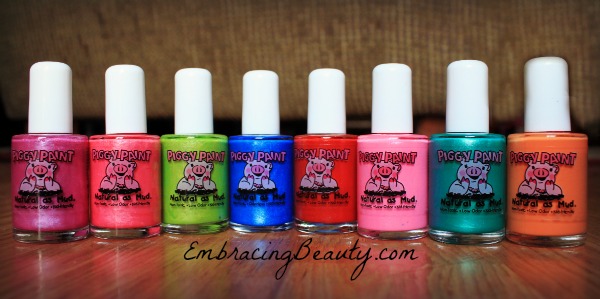
Piggy Paint is a water-based polish that is specially formulated of natural ingredients. Finally, a kid-friendly, pregnant-mama polish!  They say it’s as natural as mud!  It is free of formaldehyde, toluene, phthalates, biphenyl A, ethyl acetate and acetone…and it’s made in the USA!  Check out their cute new spring colors:

Piggy Paint

(From left to right)  Girls Rule, Forever Fancy, Dragon Tears, Tea Party for Two, Sometimes Sweet, Jazz it Up, Ice Cream Dream, & Mac-n-Cheese Please.  Aren’t those cute names?  Speaking of cute…check out my little girl!

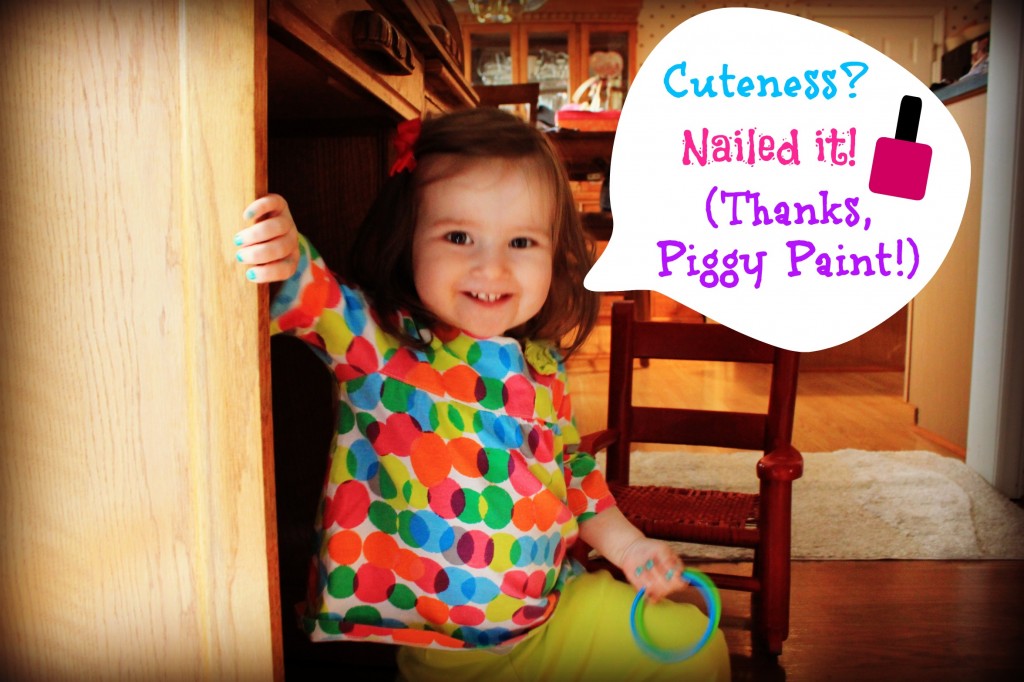
Cuteness Nailed!

I think she’s cute but I might be more than a bit biased.  She loved having her nails painted!  I was worried because I’ve never painted them before.  We played with the bottles all week and worked on her colors with them.  (So far she can say them all except orange!)  Then on Saturday I got my hair dryer out and sat in the floor.  She sat in her little red rocking chair and held perfectly still while I painted each nail.  Then I held her hand and sang the ABC song twice while I blew her nails dry.  The song and hair dryer helped keep her distracted and she was happy the whole time.  I occasionally blew it in her face and she liked that.  Then we painted the other hand and repeated the drying process.  Perfect nails without a smudge!  The bottle recommends two coats but one coat covered well and I didn’t want to press my luck.

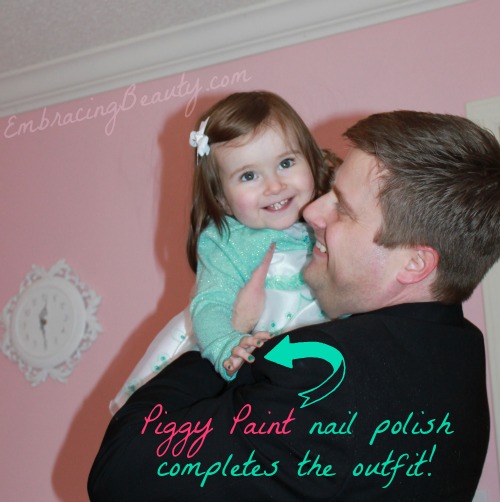
Piggy Paint Completes the Outfit

Here’s a picture of my little princess with her Daddy.  Her nail polish matched her Easter dress perfectly and everyone at church commented on her nails.  I was surprised how well the nail polish stayed on considering it’s a water-based polish.  It stayed on for two good days before it began chipping at all which is all I would expect anyway.  I think there’s going to be a lot of fingernail painting in our future…and I’m excited about it!

Want to buy?

You can buy Piggy Paint at Walmart and at PiggyPaint.com. To save 15% off your order enter “PiggyFun” at checkout.  This code expires April 30, 2013.

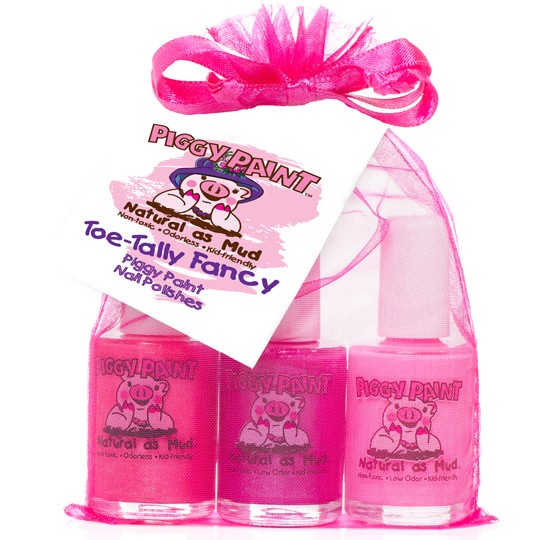
Toe-Tally Nail Polish Set

Want to win?

I have one “Toe-Tally Fancy” 3 polish set to giveaway to one lucky reader.  This is a $24.99 value!  Enter via the Rafflecopter code below.  Winners must be 18 years or older and from the continental United States.  Good luck!
a Rafflecopter giveaway

I participated in a campaign on behalf of Mom Central Consulting for Piggy Paint. I received a product sample to facilitate my review and a promotional item to thank me for participating.

Dazzle Dry Nail Polish & Easter Egg Nails

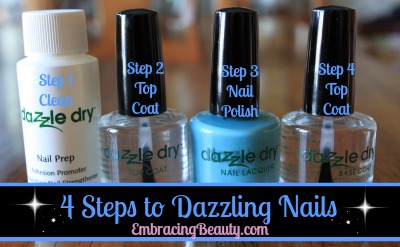
4 Steps to Dazzling Nails

If you’ve never tried Dazzle Dry’s 4 steps to dazzling nails then you are missing out!  It delivers a glorious shine that lasts and lasts as long as  your nail polish does.

Step 1 – Nail Prep gently cleans and conditions your nails.

Step 2 – Top Coat dries in 2 minutes flat and helps your nail color stay put for the long haul.

Step 3 – Nail Polish goes on smoothly in just one coat but the bottle recommends two.

Step 4 – Top Coat goes on and dries in a breeze leaving you with shiny, gorgeous, dazzling nails!


Dazzle Dry Nail Polish

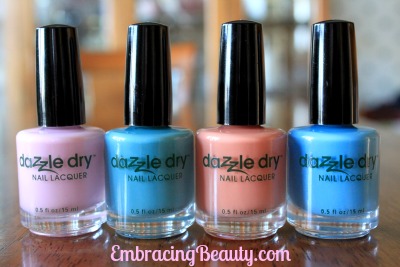
Check out these four new beautiful spring colors Dazzle Dry just came out with.  Aren’t they lovely?


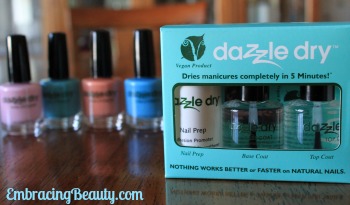
Dazzle Dry

Dazzle Dry says that they’ll dry manicures completely in 5 minutes and it’s true!  It takes longer than 5 minutes for all the steps and for the painting itself but once painted they dry very fast.


Base Coat Tip

I’ve used Dazzle Dry for years ever since my mom bought be my first set.  When I received this set in the mail, compliments of Dazzle Dry, I noticed that the base coat looked different than it usually did.  I thought it was just a new formula but as I was reading the small instruction booklet that came with it I found out that my base coat had actually turned to gel in the cold weather.  I’m glad I had read about it before trying to apply it like that!  The weather should be turning warm soon but I just wanted to post this and warn anyone who may be purchasing these in the future and who may receive a gelled base coat in the mail.  It’s a simple fix, all I had to do was soak it in warm water for just a few minutes and it turned back to liquid again.


Easter Egg Nails

Check out these Easter egg nails I painted in celebration of spring!  For the full step by step tutorial you can visit Shore Savings with Patti.

All in all, I highly recommend this set to anyone who is serious about beautiful nails.  It holds the color for a long time and the shine is unsurpassed!