Sally Hansen 3.1 Phillip Lim Fall 2016 Nail Art

This post contains affiliate links.

Sally Hansen Fashion Week

Sally Hansen is proud to be the exclusive nail partner for 3.1 Phillip Lim and to create nail looks for the Fall 2016 fashion show during New York Fashion Week. “For Fall 2016, I was looking at a lot of Japanese influences so it was important to me that the nails were precise and simple. We went with graphic combinations of neutral and metallic creating a beautiful optical illusion effect,” explained Phillip Lim.

Phillip Lim Nail Art

THE INSPIRATION

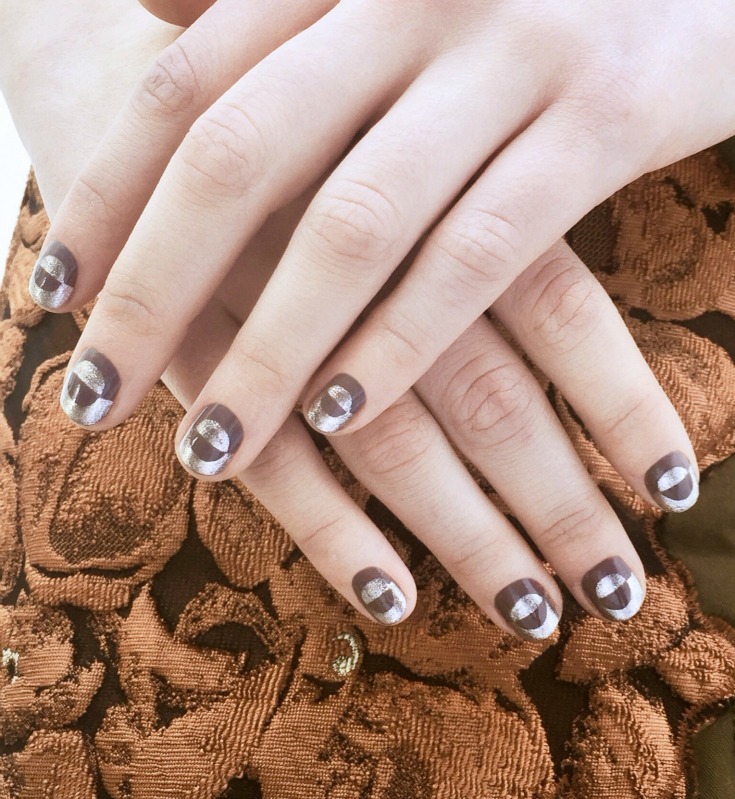
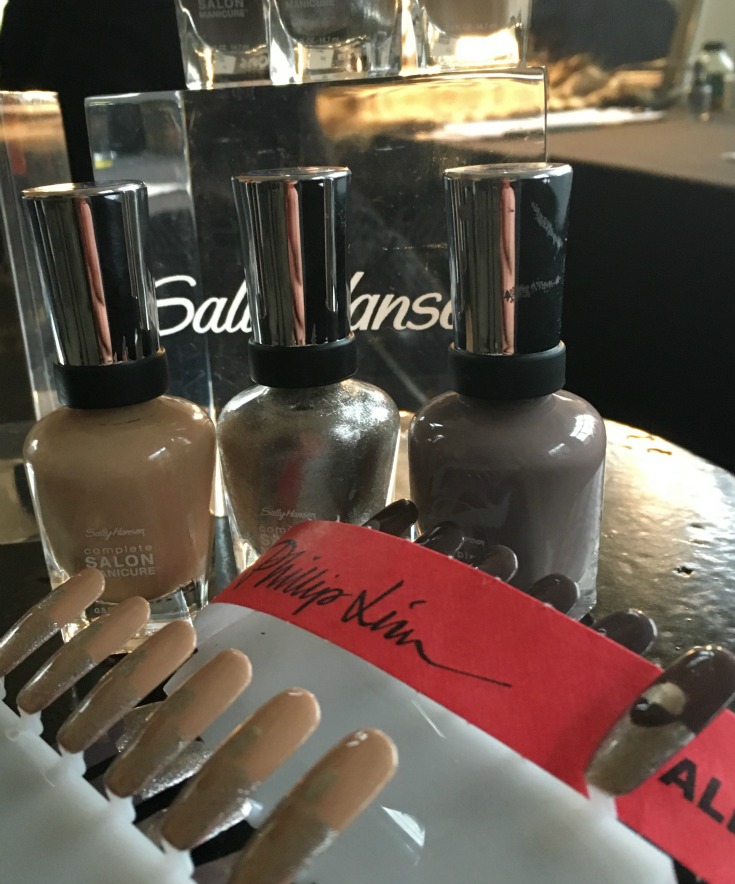
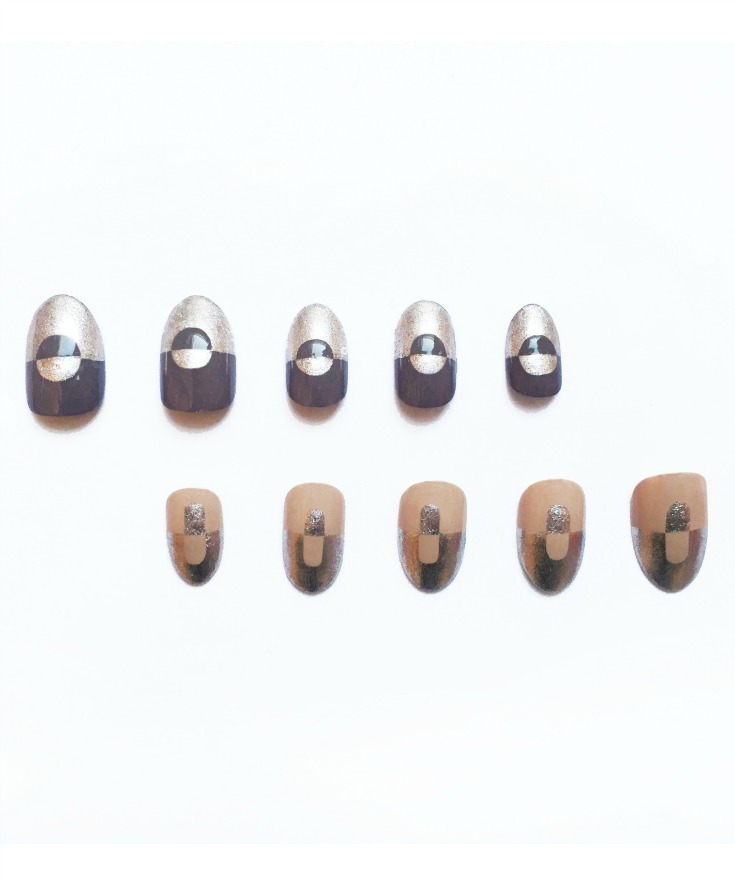
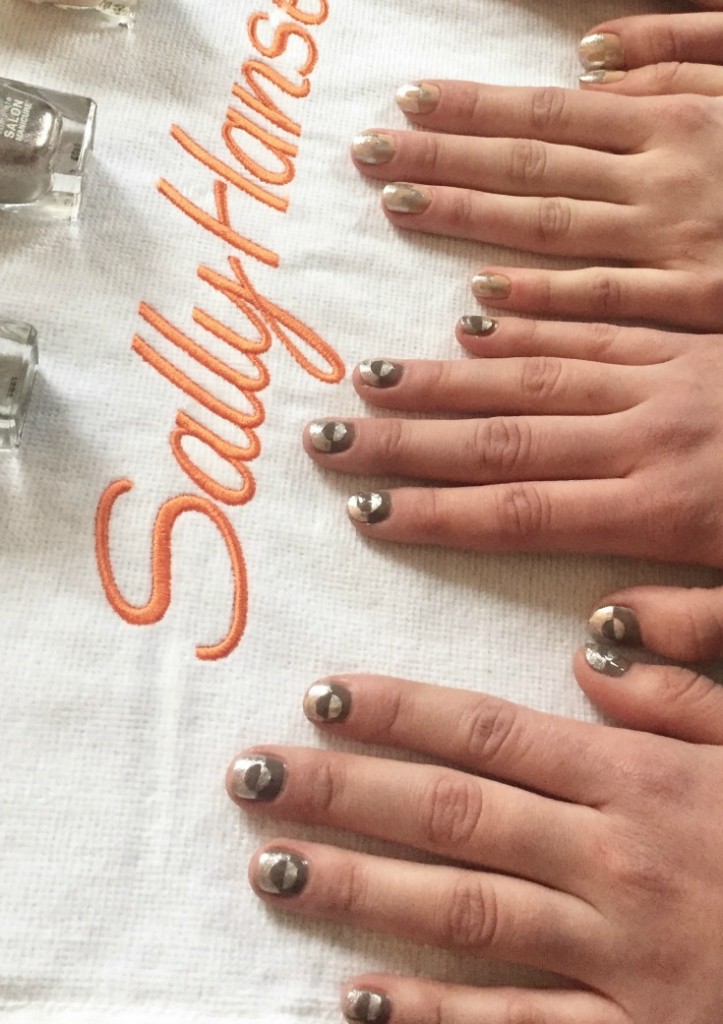
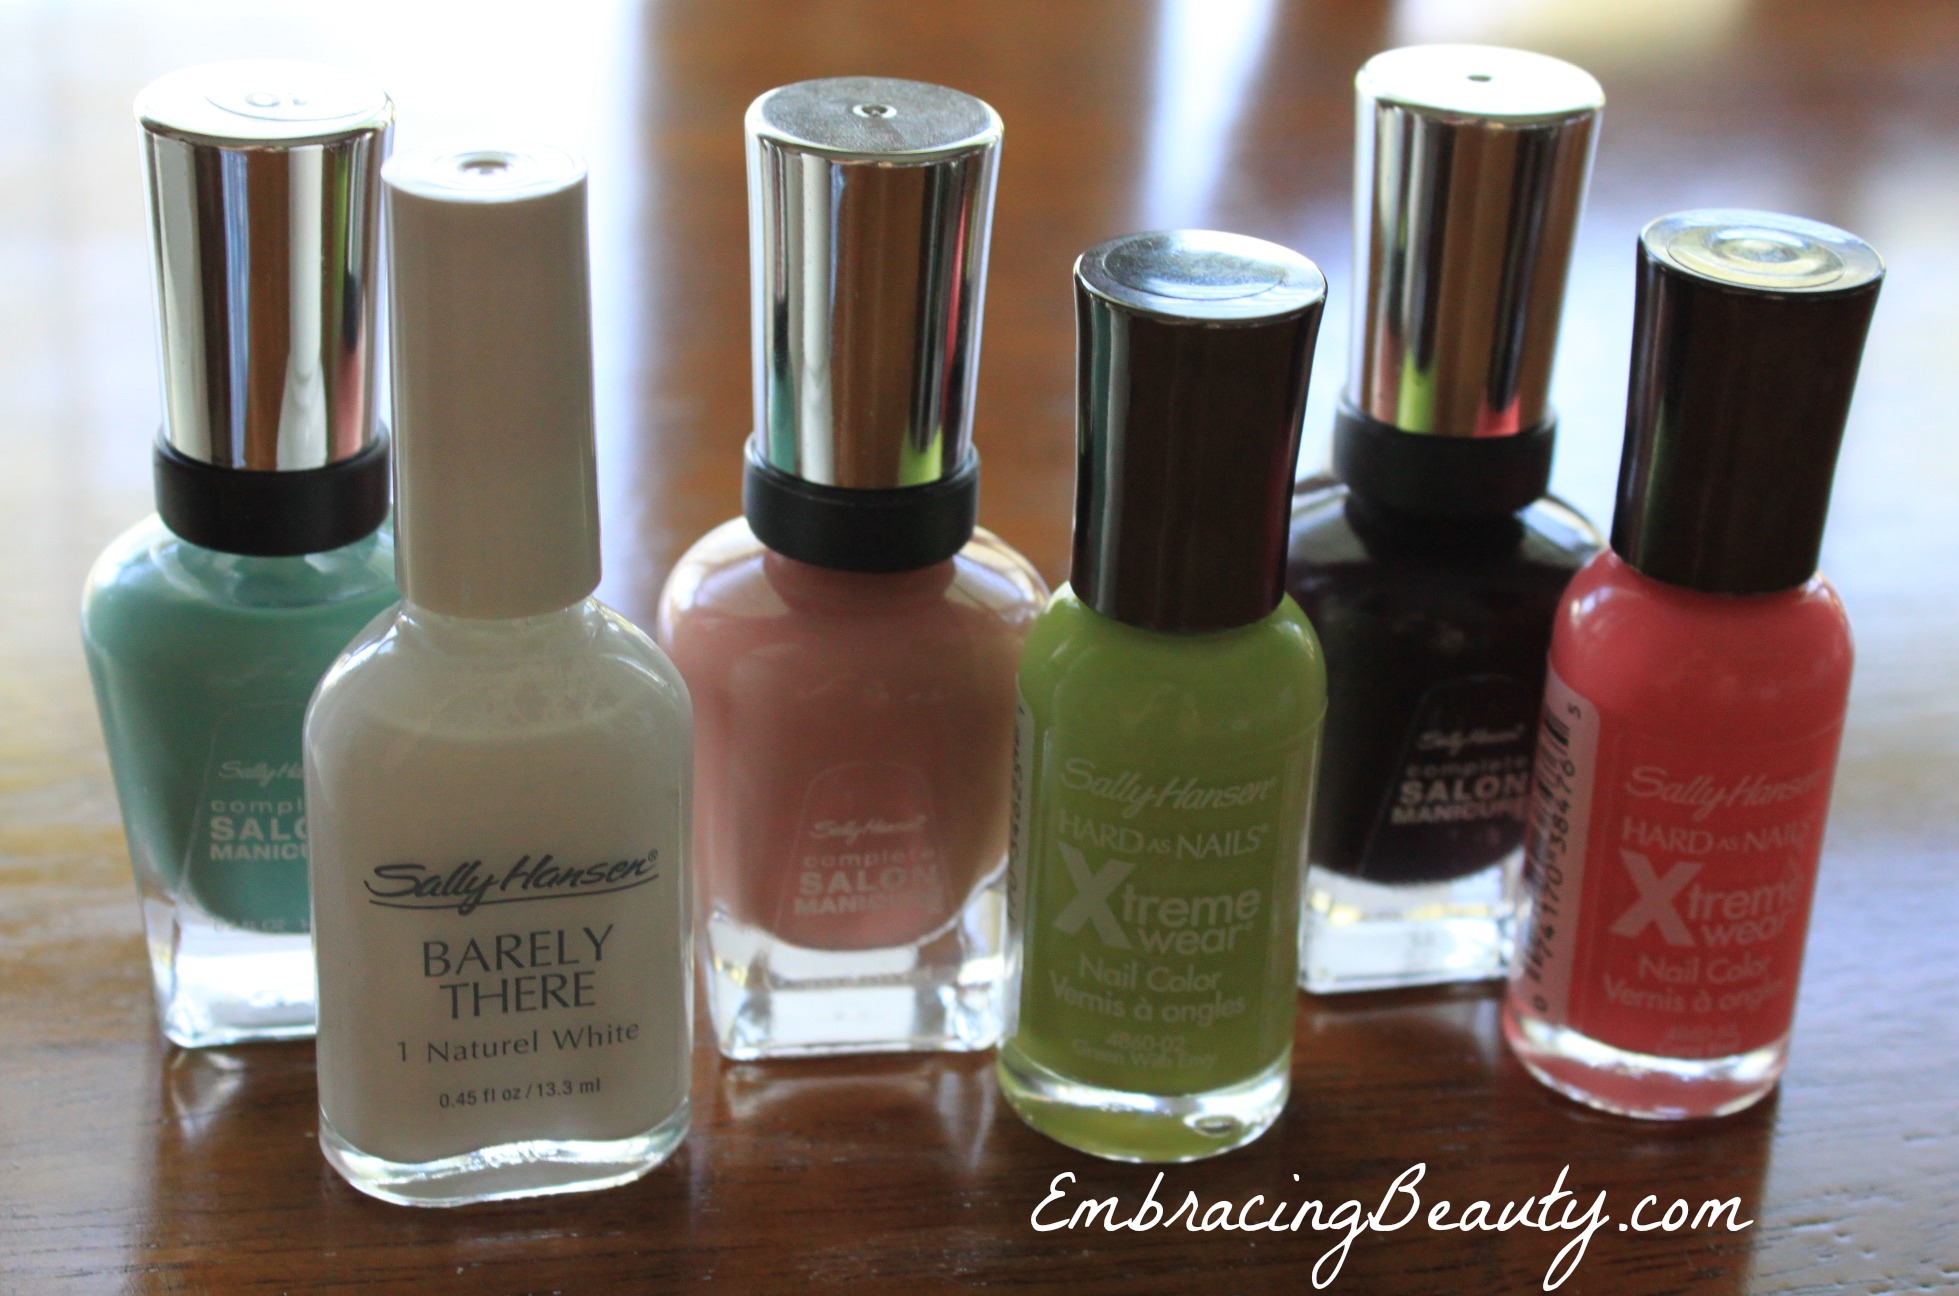
“3.1 Phillip Lim’s new collection was inspired by Japanese craftsmanship, elegant lacquered wood, samurai sword embellishment, and even lipstick packaging. The location is intimate, secretive and lit by red light, evoking an underground performance or fight club. I thought immediately about a tradition I had once heard from the Heian period in Japan when ninjas would paint the symbol of their clan on their thumb. I wanted the nail look to feel symbolic and to have a striking contrast, hence the use of metallic with the beige shade, but to also work with the palette of the collection – a traditional autumnal array of olive green, mustard and burgundy. We did a circular optical illusion in Sally Hansen Complete Salon Manicure in Commander in Chic and Sally Hansen Complete Salon Manicure in Gilty Party on half of the girls and an oval shape in Sally Hansen Complete Salon Manicure in Camelflage and Sally Hansen Complete Salon Manicure in Gilty Party on the other half. The oval shape was inspired by the hardware on the bags and belts.” – Madeline Poole, Sally Hansen Global Color Ambassador

Phillip Lim Sally Hansen Nails

Commander in Chic (which happens to be my favorite nail polish color ever!!), Gilty Party, & Camelflage are part of Sally Hansen’s award-winning Complete Salon Manicure collection that infuses trend-setting shades with an expert-quality formula to deliver salon-caliber results. Sally Hansen Complete Salon Manicure delivers seven salon manicure steps in one bottle. Chip-resistant strength joins gel-quality shine. Runway-ready color meets nourishing benefits. Plus, with a built-in base and top coat, it’s all you need to achieve a professional manicure at home.

Sally Hansen Nail Art

THE MANICURIST

Sally Hansen Global Color Ambassador Madeline Poole is a nail artist working in New York and LA. Trained as a painter, Madeline discovered the world of on-set manicuring, immediately recognizing that it was a culmination of all of her talent, interests and expertise. Her unique ability to craft innovative nail designs, impeccable execution, and emphasis on skin care has made her one of the most sought after names in the beauty industry. As part of her collaboration with Sally Hansen, Madeline helps set the artistic direction for a new generation of modern nail looks and collections globally with her fashion-forward vision.

To recreate this nail art yourself you can pick up the colors Commander in Chic, Gilty Party, & Camelflage on Amazon.

Nail Art Supplies

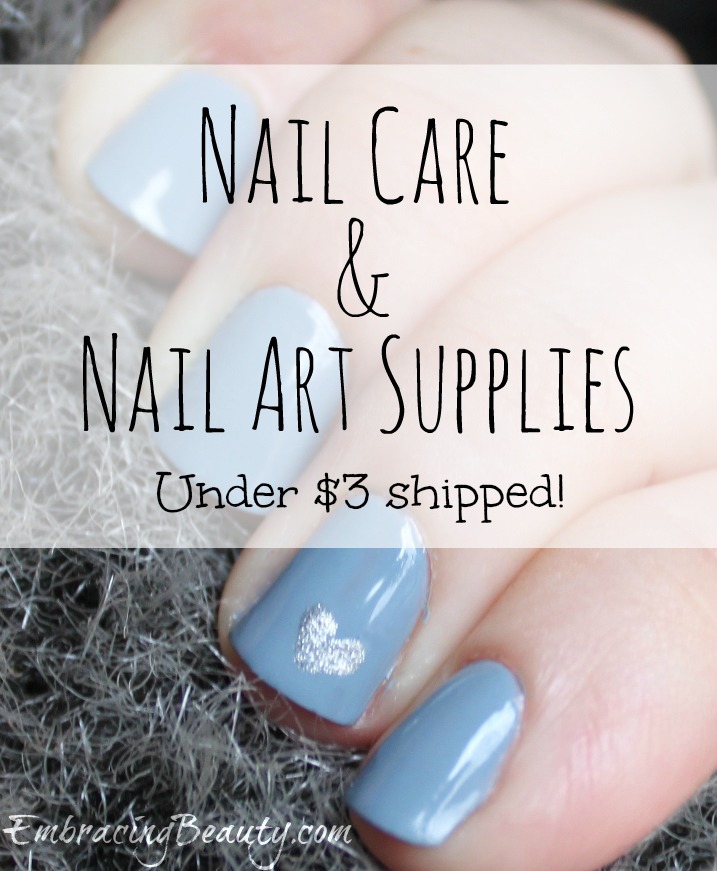
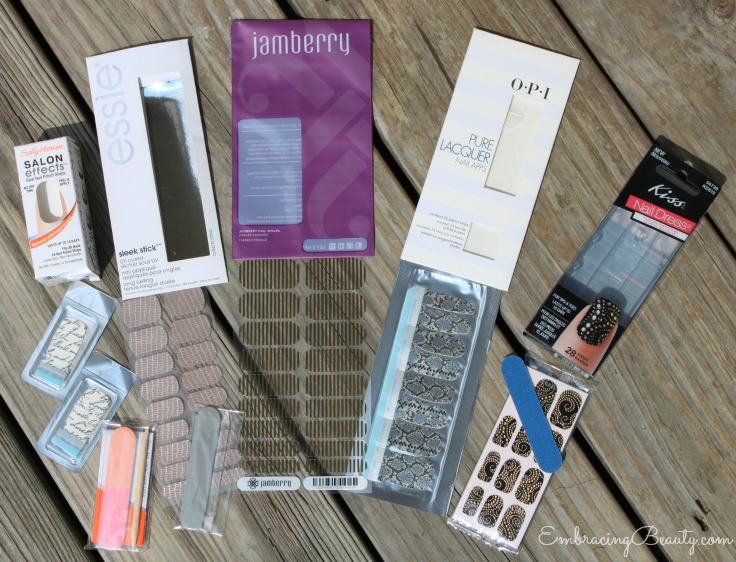
If you need nail art tools you can get a handful of them here for $3 and under shipped!

Nail Art Supplies Cheap

Nail Art Supplies

If you’re looking for affordable nail or nail care products look no farther than Amazon.  I’ve rounded up a list of nail tools, polishes, and nail art accessories all for under $3 each, including shipping!  As always with Amazon, prices fluctuate regularly so double check the prices before checking out.

These are a few that are juuuuust over $3.

If you want to learn more about the manicure in the picture above you can check that out here.  It’s an adorable Valentine nail art!

Nail Wraps Review – Sally Hansen, Jamberry + More

I’ve procrastinated writing this post for far too long because I spent weeks writing it in my head EVERY day.  I wanted this post to be perfectly detailed and totally unbiased.  I took detailed pictures every day.  Seriously.  I spent far too much time thinking, analyzing and worrying about this post….that I never wrote it.  As the old proverb goes, “Perfect is the enemy of good.”  Without further ado, here is my not perfect but hopefully helpful post.

Nail Wrap Comparison

As I said in my first post here, I’ll be judging them based on the following aspects:

  • – Style/design
  • – Ease of application
  • – Shape of wraps
  • – Cost
  • – East of removal
  • – Chemical components
  • – Durability

– Style/Design

I chose the designs that I personally liked so yes, I liked them all but allow me to go into a little more detail.

  • – Sally Hansen (white) – I love the script but due to the shaping of the wrap, which we’ll get to in a minute, I had to turn the wrap (and script) upside down.  I still like it though!
  • – Jamberry (gold) – I like this wrap because I can wear it on my bare nails or over top of another wrap or polish.  While I like the diversity of it, the stripes made it easy to tell if it wasn’t EXACTLY straight (and unfortunately it wasn’t).
  • – OPI (rattlesnake) – I adored this one!  The complexity of the colors and shimmer make it look much fancier in person than the picture captures.  When running your finger over the wrap you could even feel the snakeskin texture.
  • – Kiss (black) – I wasn’t a huge fan of this one to begin with, it’s a touch gaudy for my style but I did like it.  The 3D gemstones have a metallic look to them.
  • – Essie (grey) – This is another one that looks better in person.  The grey is a flat color while the pink behind it is fabulously shimmery.  This wrap is also textured.

Based on style/design my favorites are OPI & Essie.

Nail Wrap Brands

– Ease of Application

  • – Sally Hansen (white) – Came with orange stick and nail file.  Just peeled off and pressed on.  Easy peasy!!  After applying the nail wrap I used the enclosed nail file to remove the excess and it came off right away.  Very simple.  These wraps were very thin and were easy to stretch to get a good fit.
  • – Jamberry (gold) –  This package only came with the wraps themselves.  If you’ve ever tried Jamberry wraps before you know that it’s kind of a complicated system.  I’ll skip the details here and let you google those on your own but I’ll say that this wrap took the longest to apply.  I’ve used Jamberry wraps several times before this application so you’ll have to trust me, I did apply them correctly and took my time to make sure they were done right.  This was by far the hardest to apply but not so difficult that I wouldn’t do it again.  They were also the thickest wraps of the ones I reviewed.
  • – OPI (rattlesnake) –  Came with a small nail file.  This went on just like the Sally Hansen ones and were super thin and stretchy too.  Easy as could be.
  • – Kiss (black) –  Came with a nail file.  These wraps were slightly thicker than the Sally Hansen and OPI ones but not as thick as the Jamberry wraps.  The gemstones made it difficult to press the nail wrap down so it took more time than a few others but not as long as Jamberry.
  • – Essie (grey) – Came with a plastic orange stick and nail file.  These went on the same as the Sally Hansen and OPI wraps.  Very thin, stretchy, and quick and to apply.

Shape of Wraps

My nails naturally have a square-ish shape so my reviews are based on my personal experience.  If you have different shaped nails, I’m sure you’ll like different wraps.

  • – Sally Hansen (white) –  As I mentioned previously, I had to turn this wrap upside down to get a good fit and while I didn’t like that for this particular design I do love the fact that one side of the wrap was rounder and the other was more square.
  • – Jamberry (gold) –  Jamberry is the wrap that I had to cut the most.  They’re wraps are very round on all edges and that’s something I wish they would change.  However, they also had more wraps so I had more size options to search through to find ones that really fit from side to side.
  • – OPI (rattlesnake) –  This fit my nail the best!  It was like it was custom made for my nails.
  • – Kiss (black) – These also had one side that was square and one that was round.
  • – Essie (grey) –  These only had square sides but that worked in my favor.

Cost

I bought all of these from Amazon.com so I’ll add my Amazon affiliate links here and a link to my friend’s Jamberry site.

  • – Sally Hansen (white) – $7.13 w/ free shipping on Amazon.  Contains 16 strips.
  • – Jamberry (gold) – $15.00 on Jamberry.  Contains 18 strips.
  • – OPI (rattlesnake) – $12.99 on sale for $5.99 w/free shipping on Amazon.  Contains 16 strips.
  • – Kiss (black) – TWO pack for $15.00 + $2.95 shipping on Amazon.  Contains 28 strips per pack.
  • – Essie (grey) – $3.80 w/ free shipping on Amazon.  Contains 18 strips.

Ease of Removal

All of the nail wraps were easy to remove.

Chemical Component

I’ll be honest, I haven’t had time to go through and find out what all the chemicals mean in understandable terms.

For instance this is what is in the Sally Hansen wraps:Nail-Wraps-Compared

Nitrocellulose, Polyethylene Terephthalate, Adipic Acid/Neopentyl Glycol/Trimellitic Anhydride Copolymer, Acetyl Tributyl Citrate, Triphenyl Phosphate, Isopropyl Alcohol, Butyl Acetate, Calcium Aluminum Borosilicate, Stearalkonium Bentonite, Calcium Sodium Borosilicate, Silica, Synthetic Fluorphlogopite, Polyvinyl Butyral, Acrylates Copolymer, Benzoaphenone-3, Phosphoric Acid, Tin Oxide, [may contain +/-: Mica, Titanium Dioxide (CI 77163), Bismuth Oxychloride (CI 77163), Aluminum Powder (CI 77000), Iron Oxides (CI 77491, CI 77492, CI 77499), D&C Red No 6 Barium Lake (CI 15850), D&C Red No. 7 Calcium Lake (CI 15850), D&C Black No. 2 (CI 77266), FD&C Yellow No. 5 Aluminum Lake (CI 19140), FD&C Blue No. 1 Aluminum Lake (CI 42090), D&C Red No. 34 Calcium Lake (CI 15880), D&C Orange No. 5 (CI 45370), D&C Yellow No. 11 (CI 47000), D&C Red No. 22 (CI 45380), D&C Red No. 28 (CI 45410), Ultramarines (CI 77007), Ferric Ammonium Ferrocyanide (CI 77510), Manganese Violet (CI 77742), Violet No. 2 (CI 60725)].

I do know however that Jamberry wraps are free of formaldehyde, toluene, formaldehyde resin, camphor, and DBP.

Durability

This is what everyone has been waiting for.  Drum roll please….

These pictures are taken 15 DAYS AFTER APPLICATION!  That’s pretty remarkable in my opinion.

– Essie – It lasted well.  Being my thumb nail it got a lot of use and endured well.  When it began to show wear it slowly wore away at the end of the nail a bit.  Around day 9 it started chipping at the end of the nail and the rest of the nail remained in tact.

– Sally Hansen – It held out for the long haul too.  It slowly wore away at the edges and around day 13 I noticed some cracking in the polish.  I guess my nail bent at some point and instead of giving the wrap just cracked.  It was hardly noticeable at all and that was almost two full weeks of wear.  Day 15 the top of the nail started showing chipping too.

– Jamberry – It lasted well but began “lifting” after three days.  Some have suggested that a base coat would have helped it initially adhere better or a gel top coat would help it last longer but I didn’t use either of these.  The slight lifting remained slight until day 9 when the left side started to lift as well.  Day 12 the right side was lifting but it held in place and still looked nice.  You couldn’t tell that the wrap wasn’t fully secure just by looking at it so I lifted the wrap with my other finger to show you that it wasn’t connected all around.  You may notice in the picture below that the nail wrap rotated on my nail a bit.

– OPI – This wrap did the best I would say!  It barely wore away at the edges even after 15 days.

– Kiss – The gemstones stayed on well until day 10 when two came off.  It started chipping ever so slightly on day 9.  It started lifting on day 12 and by day 15 it was barely hanging on and many of the gems had fallen off.  However, I have to point out that Kiss wraps only promised to stay 10 days and they did that!

I played, I painted, and I washed and washed my hands.  I wasn’t easy on these nail wraps by any means and I am impressed with them all.  Each of them hold up better than regular nail polish and I’ll likely use them all again.

*Extra Notes*

  • – All of the wraps besides the Jamberry ones say that they are only good for one application because the rest of the wraps will dry out (they’re polish strips) BUT I stored them in a baggie right away and I’ve been able to use them again without any problem.
  • – All of the nail wraps have a nail polish scent except for Jamberry.  If you hate the scent of nail polish you’ll want to go with Jamberry wraps.
  • – Can you believe how fast my nails grew?  With that much growth in 15 days I’ll never need a nail wrap to last longer than a week!

Nail Wraps Day 15

What do you think?  Did you predict right?  PLEASE tell me if I didn’t answer a question that you had!  I want to be as helpful as possible.


Nail Wraps Compared – Sally Hansen, Jamberry + More

Nail Wrap Comparison
I’ve been thinking about doing this post for a while and I’m excited to finally be doing it!!  I’m currently reviewing five different nail wrap (stickers, decals, shields, or whatever name you call them).

I’m only on day two and they look the same as they did on day one, pictured above.  I’m going to be wearing these for a full week and I’ll report back to you with the results.  I’ll be judging them based on the following aspects:

  • – Style/design
  • – Ease of application
  • – Durability
  • – Ease of removal
  • – Chemical components
  • – Shape of wraps
  • – Cost

Do I have a dog in the fight or am I pulling for a specific brand?  No, not really.  When I post my full review I’ll have affiliate links to all of the wraps so you can buy them if you’d like {except for Jamberry and that will link to my friend’s site where I make no profit at all}.  You’ll be getting my full, honest, 100% authentic opinion, just like always but sometimes I feel that it’s important to point that out.

I’m anxious to see how they’ll hold up!  Are you?  Which design is your favorite?


UPDATE: You can now go and see our Nail Wrap Review!

Color Block Puzzle Nail Art with Sally Hansen #IHeartMyNailArt #cbias

 *This post has been sponsored by Social Fabric and Sally Hansen but all opinions remain my own. Full disclosure is at the bottom of the post.

DIY Puzzle Piece Nail Art

I have what some would call an obsession.  I’m a nail polish fanatic.  Hoarder even.  I’m too embarrassed to show you just how many nail polish bottles I actually own.  I love experimenting with nail designs and adding a fun splash of color to my nails to accentuate my outfit.

I’ve been eager to try a new design so I set a date, invited friends, and went shopping at Walgreens.  They have the biggest selection of Sally Hansen products that I’ve ever seen!  I was impressed.  I tried to think of what colors I had at home and which ones would be good to buy to match those.  I decided to let my daughter pick out which ones she wanted and I would make it work.  She loved picking them out and holding a few as we went through the store.  You can check out my entire Walgreens shopping trip to see all of the great varieties of Sally Hansen nail polish…and more pictures of my little girl!

Sally Hansen Nail Polish Stand

My little basket was full to the brim with everything I needed to host an excellent manicure party, that is, except for nail design tape.  I knew I could order some online but I wanted it quicker than that.  I searched up and down the isles but I couldn’t find what I was looking for.  I wanted to do color block nail art and to do it neatly I wanted tape.  Scotch tape works but I wanted the good stuff.  I asked a Walgreens associate if she knew if where I could find some.  She immediately stopped what she was doing and joined me in my search.  We could both picture it but we couldn’t find it.  She found some thin craft tape that we thought might fit the bill.  I’m happy to report that it worked wonderfully.  If you’re store is ever out of nail design tape (or you just can’t find it) check the craft isle!

When I got to the check out the cashier told me about two $5 coupons I could have used on my purchase if I had only gone to Coupons.com.  Being a teacher of couponing I felt like smacking myself on my head.  Even though I missed out on the coupons, I did get the 2/$5 deal w/ 1,000 points added to my Walgreens Balance Rewards Card (3/31-4/27).

If you have a smart phone, I recommend downloading their app to your phone.  They have several different handy services they offer including bar-code scanner, coupons, and you can keep track of your Balance Rewards right on your phone.  I really racked up on the reward points during this trip!

Sally Hansen Nail Polish

I had simple snacks for our “block party” so that we could eat while painting our nails.  Yep, you can tell I’m experienced at this!!  We had gummy bears, popcorn, and a few other little goodies.

DIY Puzzle Nail Art

The nail designs were so much fun to experiment with.  I wanted to get brave enough to do a complicated design like a stained glass window or a bunch of bricks each with a different color.  I decided to mix it up a little and do puzzle piece nail art.  Not too complicated but still kind of classy.

DIY Striped Nail Art

This simple stripe design was made using our craft tape.  It held strong enough not to let the paint bleed through but not strong enough to pull off the original color.

Sally Hansen Stripes

Here is a diagonal stripe with the most amazing sparkle polish over top!  Trust me, this photo doesn’t begin to show it’s beauty.

Here are a few simple steps that I think make for a great at home manicure:

  1. Trim, file, buff, & push back cuticles.  Buffing might seem like a waste of time but it will help your nail polish last longer!
  2. Apply a base coat.
  3. Apply your base color of choice.  I recommend starting with your lightest shade.
  4. Allow to fully dry.  This could take a while so I usually add a quick drying top coat here so I can get to designing my nails (the fun stuff) right away.
  5. Apply tape and paint the remaining areas.
  6. If you’re doing the puzzle design that I did, take a dotting tool (or a toothpick) and dip it into the polish and then onto your nail on the  opposite color.  Repeat with each square.
  7. Apply a top coat.
  8. Take a picture and post it on Instagram with the tag #EmbracingBeauty so I can see it.  (Really, I want to see!)

I had a great time and I hope you enjoyed reading about my latest nail art adventure.

If you end up catching the “color block bug” feel free to share your art with Sally Hansen on Facebook for a chance to win some great prizes.  Check out the Pinterest Party Walgreens and Sally Hansen are hosting where you could win a year’s supply of Sally Hansen!  You can always purchase Sally Hansen in Walgreens stores but did you know that you can also get it online?  It’s true, you can!  You can also connect with Sally Hansen on Twitter and Walgreens on Twitter.

*UPDATE! I have posted a step by step Puzzle Nail Art Tutorial here for those interested!*

What’s a nail design you would like to try?

*Disclaimer – I am a member of the Collective Bias®  Social Fabric® Community.  This shop has been compensated as part of a social shopper insights study for Collective Bias®  and COTY #cbias #SocialFabric.

Call Me Maybe Nail Art

Call Me Maybe Nails!

These sweethearts whether near or far will always be connected by their love.

Right now, they’re talking on the telephone and he’s making her blush.


One of my good friends, Emily from Live2Save2Live, told me about a nail design contest that Sally Hansen was hosting.  I didn’t really figure I had a shot but I thought it would be fun to play around with polishes to find a design to fit the “Sweethearts” theme they chose.  My final design turned out better than I thought it would so I’ve decided to submit it.  I have titled it, “Call Me Maybe.”  What do you think?  Cute?


To Vote: 

To vote for my design, go to Sally Hansen’s Nail Art Contest to vote for my entry.  Thank you!  {It should pull up my entry automatically but if it doesn’t just search for Ashley Walkup.}


How To Replicate:

To replicate this simple design all you need is a couple basic nail polish pens and a nail polish in your favorite shade.  I recommend practicing once or twice on paper with an ink pen and then once with the polish pen before you dive in.  Also, make sure the polish pen has dried fully before giving it a top coat {if you choose to do so}.

Free Sally Hansen Nail Clippers at Target!

Sally Hansen Clip n Catch

I love Sally Hansen coupons and with their latest coupon you can get Free Sally Hansen nail clippers at Target!

Here is how:

Sally Hansen Treat Your Toes Clippers or Clip ‘n Catch Clippers – $1.99
Use $1/1  Sally Hansen Beauty printable
And use $1/1 – Sally Hansen Item, Target printable
Free after coupons!

Sally Hansen Pedicure Products: $0.08 – $0.24 at Walmart!

Sally Hansen Pedicure Coupon

Here are some of the great deals you can score with this awesome $1 off Sally Hansen coupon:

Sally Hansen Nail Files, $1.08
Use $1/1 Sally Hansen printable
= $0.08

Sally Hansen Foot Rasp, $1.24
Use $1/1 Sally Hansen printable
= $0.24

Sally Hansen Foot Pumice Stone with Handle, $1.24
Use $1/1 Sally Hansen printable
= $0.24

Sally Hansen Toe Spacers, $1.24
Use $1/1 Sally Hansen printable
= $0.24

Go here to like Embracing Beauty on Facebook and share any one of my posts on your wall to enter to win an iPad2!

Walgreens: Free Sally Hansen Tools

Sally HansenWalgreens has a deal this week where you’ll get $5 Register Rewards when you purchase $10 worth of select merchandise (including Sally Hansen beauty products which are already 30% off!).  You can get 3 free Sally Hansen products for FREE after Register Rewards!  Here’s how:

Buy 3 Sally Hansen Clip ‘n Catch Control Grip Nail Clipper (or Sally Hansen Get In Shape Brow Shaper Kit Blue/Orange) for $3.49
Use 3 $2/1 Sally Hansen Beauty Tool products coupon from 07/10 RedPlum insert
Spend $4.47 plus tax out of pocket, Get $5 Register Rewards