Are Anti-Aging Skin Products Effective?

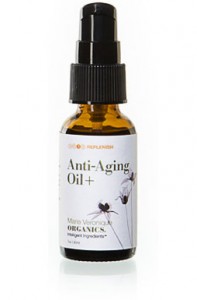
Anti-aging Oil

Aging is something that all of us would avoid if possible and the many anti-aging treatment products on the market are a mute testament to that fact. Unfortunately, many of these products are very expensive so it is always a good idea to look into them before making a purchase. Many women (and men) considering using anti-aging products are looking for a specific effect, so it is also important to look into how well these products work.

Firming and Anti-Wrinkle Creams

Firming and Anti-Wrinkle creams are among the most expensive drugstore anti-aging skin products. These products range in function and title and are often labelled ‘anti-aging cream’ ‘anti-wrinkle cream’ ‘firming cream’ ‘anti-aging lotion’ or etc. Some of the most popular makers include L’Oreal and Olay, although there are literally hundreds of brands. Many also offer different functions so it is always important to look into them. Another consideration is that some are more effective than others. Typically anti-wrinkle creams use collagen fillers, antioxidants and a combination of chemicals and sometimes biological silicone to help firm skin and fill in lines and wrinkles. The down sides include that these treatments are only effective over long term use and the effects will fade after the creams stop being used.

Peels and Dermabrasion

Another anti-aging treatment popular on the market is peels and dermabrasion. Both of these methods use the idea that peeling or stripping away dead skin on the face will result in a younger fresher look. In both cases the effects are real, but can have some downsides as well. Chemical peels which can be applied at home can be effective but can damage the skin over time. Microdermabrasion which is usually done a studio can also be effective, but it can be expensive and effects do fade quickly if you do not take care of your skin afterwards.

Fillers

Fillers include dermal fillers and chemicals, but both are intended to fill lines and wrinkles so that you look younger. Popular options include Juvaderm which is a type of plastic filler. Hylaform is another popular option, it is also filler but is sometimes available in moisturizers so that rather than being injected into the skin, it is built up in lines and wrinkles over time to reduce the size. These fillers can create good looking results but are quite unnatural and can cause complications over time.

Prolonging and Improving Results

Each of these anti-aging treatment options has one major flaw. They often lose effect if not kept up or simply cover problems rather than repairing them. Many dermatologists today are now recommending laser skin rejuvenation as an alternate choice, as well as a method to prolong the effects of creams and dermabrasion.  A facial rejuvenation laser works by targeting skin cells to stimulate collagen growth and improve elasticity. On its own, laser rejuvenation can reduce fine lines and wrinkles, help to improve pigmentation, help to improve conditions including scarring, vascular problems and help to improve skin tone. Importantly, laser skin rejuvenation can be done in a studio, but there also devices that you can use at home to receive the same results over time.

Choosing anti-aging treatment options is up to you, but in any case it is always important to combine your treatments with a moisturizer. Applying moisturizing lotion or creams to the face and hands immediately after showering allows the skin to absorb more of the moisturizer.  Choosing healthy foods, eating or taking antioxidants and avoiding skin damaging lifestyle choices such as smoking can also help to improve the health of your skin so that you look younger.

Suzie Marsh, the author of this post, is a writer who understands that the demand on anti-aging treatments to keep us looking younger has increased dramatically. This demand has led to innovations in anti-wrinkle creams and cosmetic procedures.
Make Up Tips to Hide Allergy Symptoms

Make Up Tips to Hide Allergy Symptoms

It’s beginning!  Allergy season is coming full force!  It’s the time for sneezing, itchy eyes, irritating cough, congestion, and watery eyes.  Pollen is bombarding us daily, outdoor mold is releasing airborne spores, and then there’s grass.  Oh, the grass!  How is a girl to handle these allergy symptoms and ward off that “Are you coming down with something?” look?  I have some ideas that will take just a few extra steps every morning and will combat and conceal allergy symptoms.  These Mary Kay products will keep you from looking as bad as you feel!
Disclosure: I was given several Mary Kay products to review if I chose to and because I love these four products here is my review.  These are 100% my thoughts and no compensation was provided.

– To distract from watery eyes and a red nose:

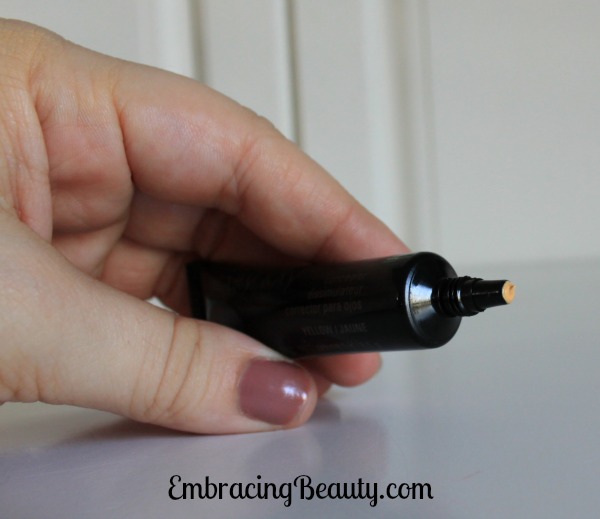
 Mary Kay Concealer

  • – Apply Mary Kay Concealer under the eyes to diminish dark under-eye circles and under the nose to conceal red irritation.  This fabulous concealer comes in six natural shades plus yellow (which is amazing at reducing the appearance of red in the skin tone).  I’ve used a lot of concealers and this is one of my favorites!

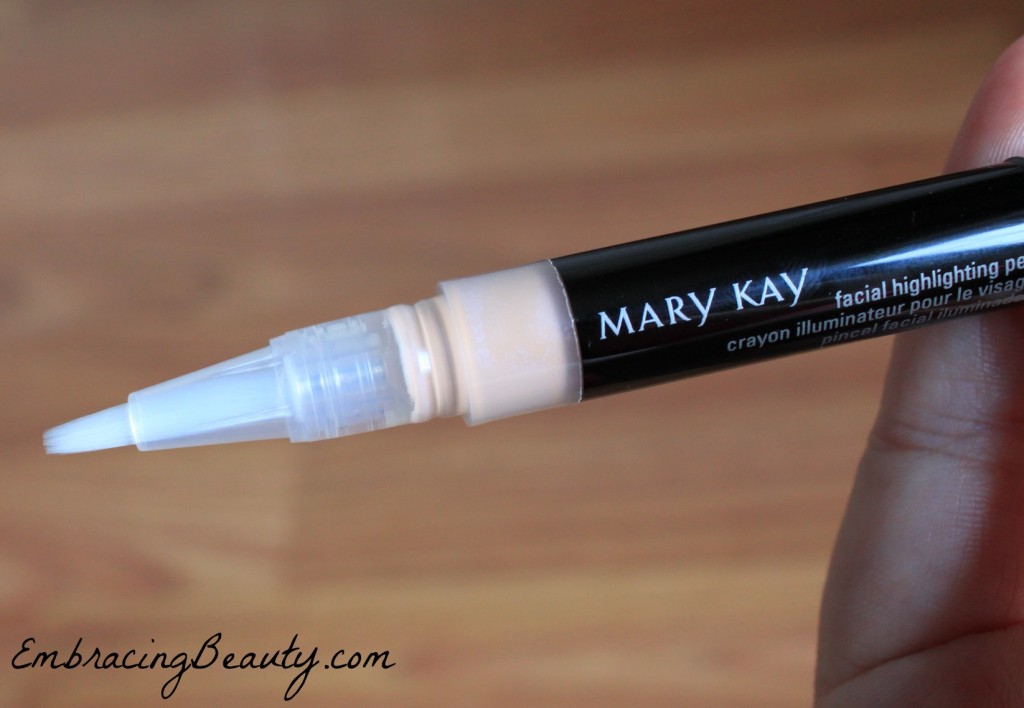
Mary Kay Facial Highlighting Pen

  •  – Use Mary Kay Facial Highlighting Pen on the top of cheekbones and the inner corner of the eyes to brighten the face.  This product is amazing!  I used this product from Mary Kay a few years back and it wasn’t nearly as great as it is now.  They must have improved the formula and I’m sure glad they did!  This pen includes special light-reflecting pigments that optically “lift” the shadowy areas of your face.  The Highlighting Pen comes in four different shades.

 – To relieve discomfort:

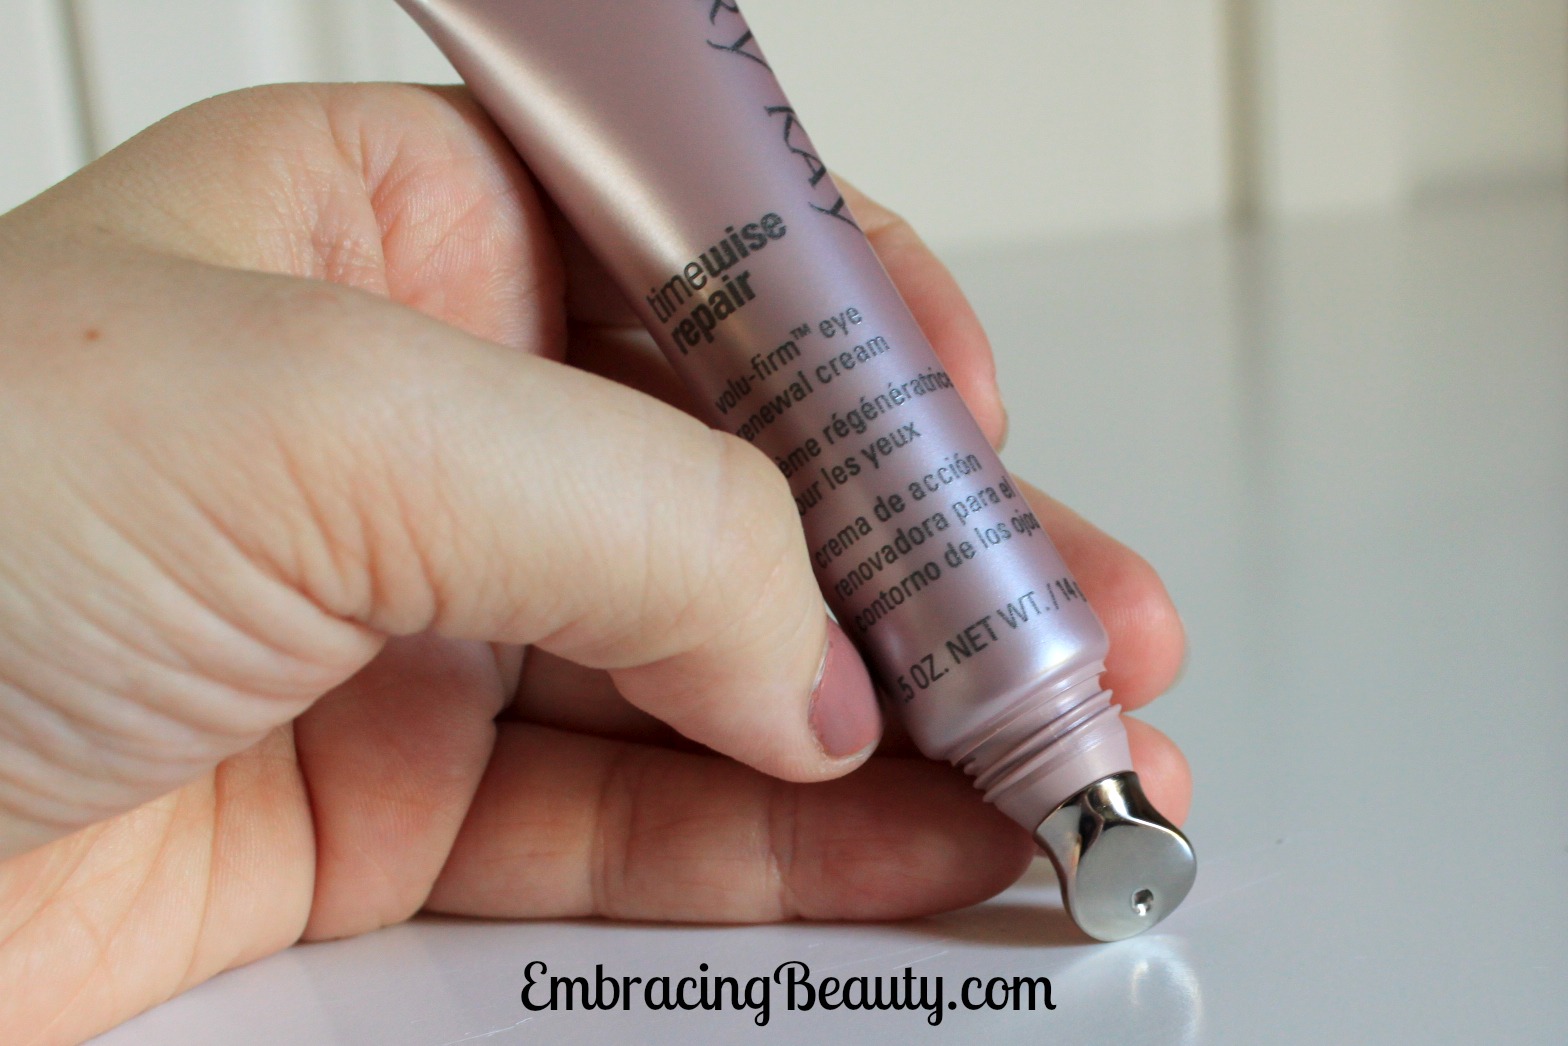
Mary Kay Volufirm Eye Renewal Cream

  • – Soothe puffy eyes with Mary Kay TimeWise Repair Eye Renewal Cream. This cream is designed to reduces dark circles, puffiness, and undereye bags.  What’s not to love?  The unique metal applicator is cool to the touch which not only feels great when applying the cream but it also helps reduce puffiness and provide a fresh look.

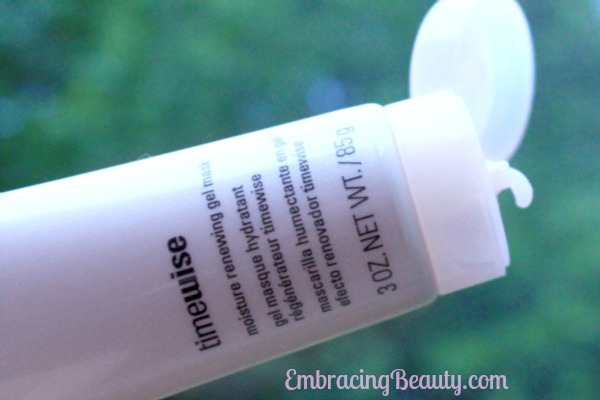
Mary Kay Moisture Renewing Gel Mask

  • – Combat dryness and brighten your complexion with Mary Kay Moisture-Renewing Gel Mask.  I absolutely adore this mask.  I’ve never only used it for 10 minutes and washed it off like one of the suggested uses says but instead I opt for the second suggested use and leave it on overnight for a “pampering experience.”  Seriously, this stuff is good!  It’s a tremendous moisturizer without the weight you would expect from a heavy-duty moisturizer.  The first time I put it on it was hard to quit, I put it all over my face, my neck, around my eyes, then back on the rest of my face.  This will be a product I plan on buying as long as they’ll keep making it.

This mask contains a potent blend of vital skincare essentials, including moisture-loving Sodium Hyaluronate, Vitamin E and B3, and an extract of the super-fruit Acai Berry.  This helps skin feel calm and nourished.

I have extremely dry eyes year round {so much so that I have tear-duct plugs and use two different drops multiple times a day!} but when allergy season hits, with it’s merciless force, my eyes are red, itchy, and DRY!  Because of my eye dryness I’m much more prone to get wrinkles around my eyes so it’s important for me to use a great eye moisturizer day AND night.  I take every precaution to avoid wrinkles by keeping my eyes moisturized, by using glasses when reading to avoid squinting, by gently applying and removing eye make-up and skin care products, and to use an eye treatment product at night.  Because this is such a tremendous moisturizer I plan on using it nightly around my eyes in place of the more expensive eye creams that are available.  If you have dry eyes, or allergies that affect your eyes, this is a product I think you will enjoy.

By the way, I apologize for the quality of this picture!  Because I use this at night, every night, I could never remember to take a picture of it during the day.

While it’s possible to buy Mary Kay products on Amazon and eBay I recommend buying them through a local independent beauty consultant that way you can support a local business and you can trust that the product isn’t outdated or hasn’t been tampered with.

Disney Mickey and Minnie Nail Art

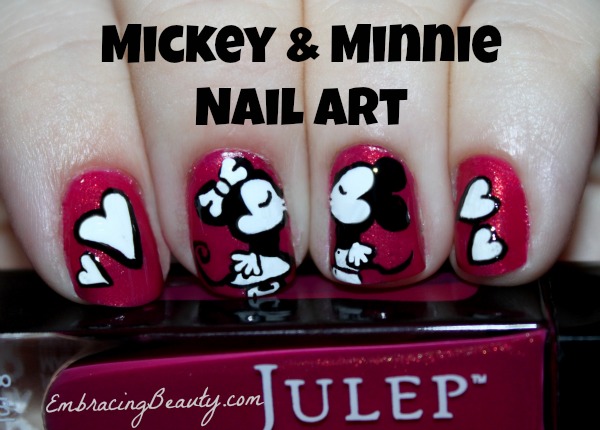
Mickey and Minnie Nail Art

Minnie Mouse is one of my favorite Disney characters!  She’s adorable for little girls and grown up girls too!  I love her sweet face, her relationship with the mouse who started it all, Mickey, and her love of polka dots.  What’s not to like?

If you follow me on Pinterest {and I hope you all do!} you’ve been bombarded with my Minnie Mouse pins lately.  I’m sorry about that!  You see, my little girl is about to turn two and I’m searching for every idea possible to make her Minnie Mouse party a success.  {Check out my DIY Minnie Mouse Halloween costume I made her.}  While browsing and browsing I found quite a few cute Minnie Mouse nail designs {which I pinned on my Pretty Nails board}.  Some were simple and some were far above my skill level.  I chose to do a design that was right in the middle.  It stretched me out of my comfort zone and I’m very pleased with the results.  If you think these are awful, please keep your comments to yourself.  Don’t bust my bubble!

My favorite Mickey and Minnie images are from the 70’s and 80’s.  Do you remember the ones?  Minnie wore a blue dress, yellow shoes, and a hat with a flower in it?  I tried to make my characters look like the ones from back then except that Minnie has a bow instead of a hat.

Have you ever done your own Mickey and Minnie Mouse Nail Art?  If so, I would love to see it!

Products Used:

Here is a list of the products that I used for my Mickey and Minnie Mouse Design:

  • – Julep Polish in a beautiful shade that isn’t available yet….that I got to name!!!  I can finally cross that item off of my bucket list.  This color will be making it’s debut soon.  Don’t you want to buy it?  I think it’s absolutely beautiful!  My poor photography skills make it look a little darker in the picture than it actually is but don’t you love the rose gold flecks in it?  Even if I didn’t have the privilege of picking the color and naming it myself it would still be my favorite polish.
  • White Nail Art Paint (Milani)
  • Dotting Tool
  • Black Polish (Sally Hansen)
  • Base and Top Coat (Julep Base Coat, Julep Polymer Top Coat)

I’m sorry that this isn’t a tutorial post but I don’t think I could do it again if I tried!  I set aside a block of time, figured out what I wanted my design to be, and carefully applied each stroke.  Sometimes I used my dotting tool or my fingernail to remove a little paint if I went a little too far.  After I was happy with my design I sealed it off with a top coat.

Even though this isn’t a tutorial, I would be happy to do my best to try and answer any questions you might have so please feel free to leave them in the comments below.  Plus, feel free to leave a comment here telling Julep what you think of their new polish color!

Vanessa Williams’ Skincare Revitalistic

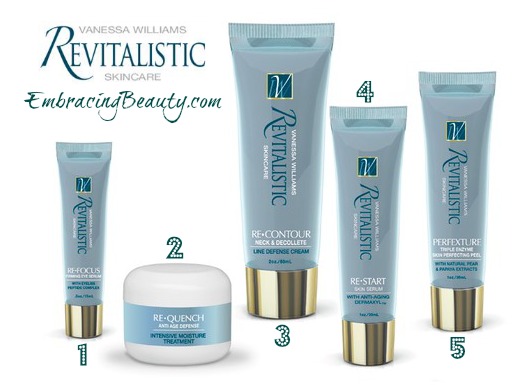
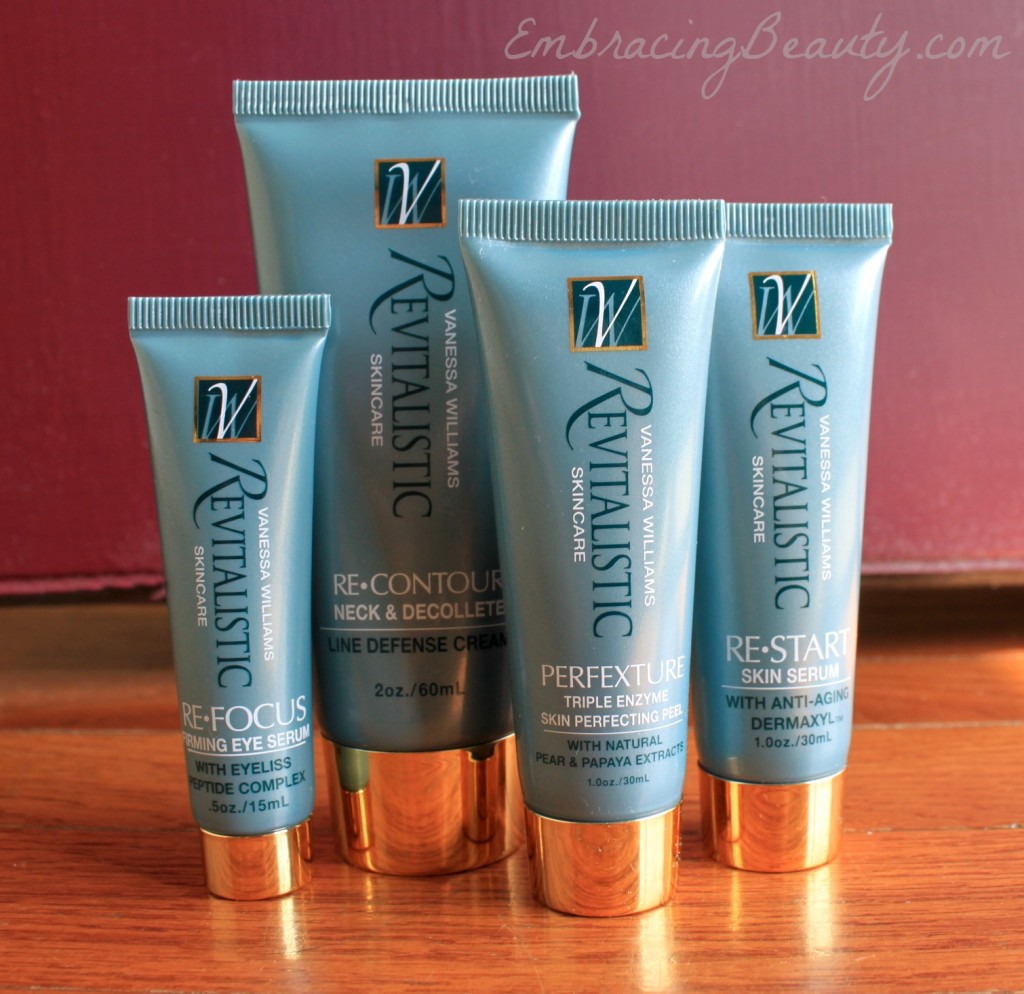
Vanessa Williams Revitalistic Skincare


I was first given the opportunity to review Vanessa William’s Revitalistic SkinCare set two months ago.  I spent over a month reviewing each of the products because I want to thoroughly review a product before promoting it.  After one week of trying the products, I knew I would love them.  By the end of the month, I was already placing orders for a few of the items with my own money.  This is a great set!

To begin with I was a little skeptical because anytime a celebrity puts their name on something I’m extra critical.  I don’t really know why but that’s how my mind works.  Also, I knew that just because Vanessa Williams is amazingly beautiful that these products aren’t what made her that way and they weren’t going to turn me into the next super model.  I was realistic and even a bit negative to begin with.  These products had to be really tremendous to change my mind and they did!

Vanessa Williams Eye Serum

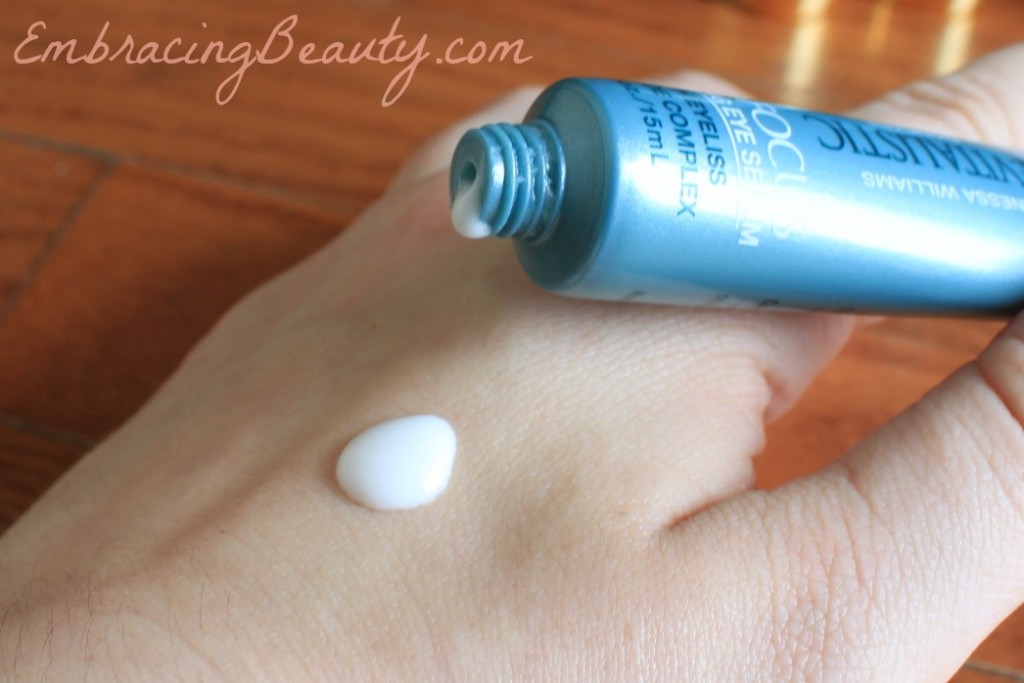
1.) RE-FOCUS Firming Eye Cream

This is an extremely light-weight, almost runny eye cream.  You can wear it day and night without having to worry about putting too much product on and having your make up cake up.  While I liked that about it I wanted a little something more substantial at night.  I guess I’m just used to the thicker creams.  At night I would follow my skin care regimen as normal, pat the eye cream on, and then dab a little Vaseline over top of it to seal it in for the night.  In the morning my eyes would feel so hydrated.  I loved it!

2.) RE-QUENCH Anti-Age Defense

This is a great product!  I feel bad that I don’t have a picture to show you the texture but the truth is I used it all. I did.  I loved it and it’s definitely one of the products I’ll keep buying.  It’s lightweight but not too light and it moisturized wonderfully.

Vanessa Williams Neck and Decollete Cream

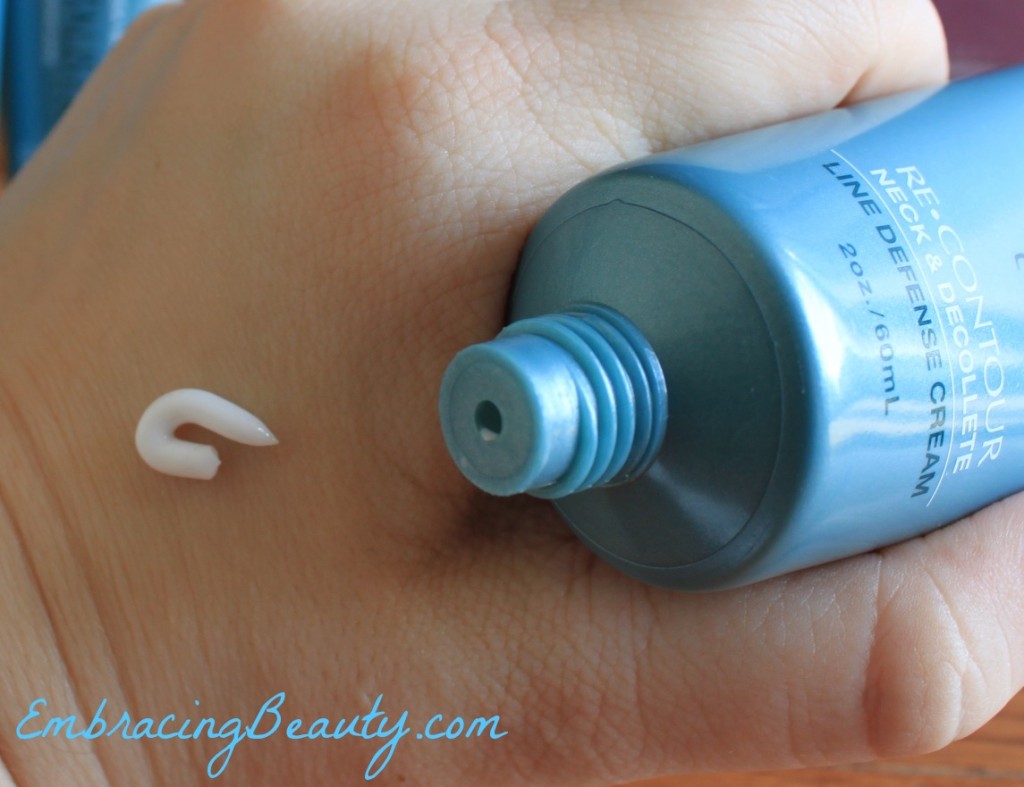
3.) RE-CONTOUR Neck & Decollete Cream

I love a great decollete cream!  I usually use my regular moisturizer over my neck but I use a specialized cream for the area just below my neck, along my collar bone.  This is a thicker cream that feels great on.  I recommend it to everyone because no one wants to have a pretty face and a wrinkly neck.

Vanessa Williams Skincare Skin Serum

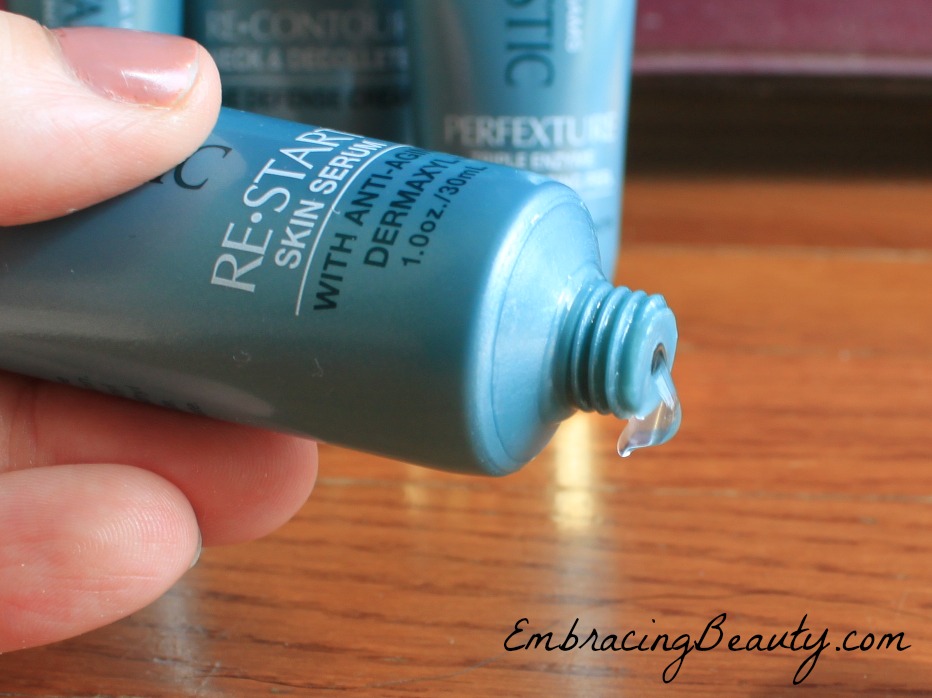
4.) RE-START Skin Serum

I have a love/hate relationship with this product.  Serums are great concentrated products that deliver a lot of bang for your buck however, I’ve never seen a serum quite like this before!  It’s a very greasy feeling product which I didn’t enjoy but by the time it was rubbed it into my skin it wasn’t greasy anymore.  It’s like magic!  All in all, I like this product and would probably buy again.

Vanessa Williams Skin Perfecting Peel

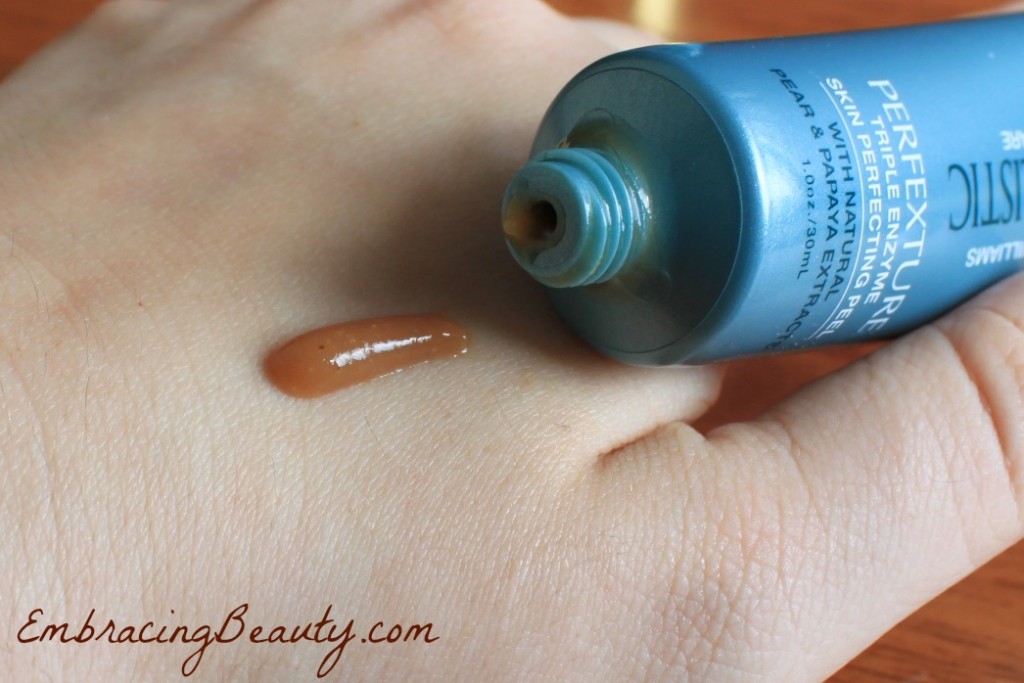
5.) PERFEXTURE Triple Enzyme Skin Perfecting Peel

Last but not least, we have PERFEXTURE, the set’s peel.  THIS. IS. AMAZING!  It’s truly a wonderful product.  The directions say to leave it on for three minutes and then wash it off.  I put it on while in the shower because I wanted a way to wash all the little granules off thoroughly without getting any in my eyes and without overflowing the bathroom sink with water.  I may have left it on a little longer than three minutes but when I washed it off my skin felt brand new.  It sloughs off the old dead skin on top leaving smooth skin underneath.  Once I dried off I applied the other products on top to seal in the moisture and keep my skin feeling soft.  I will be stocking up on this product, there’s no doubt about it!

Vanessa Williams Skincare

This set of skin care products has my approval.  If you’d like to try it out for yourself you can buy it right now on QVC for $52 + shipping.

Until next time,

Have a beautiful day!!

Color Block Puzzle Nail Art with Sally Hansen #IHeartMyNailArt #cbias

 *This post has been sponsored by Social Fabric and Sally Hansen but all opinions remain my own. Full disclosure is at the bottom of the post.

DIY Puzzle Piece Nail Art

I have what some would call an obsession.  I’m a nail polish fanatic.  Hoarder even.  I’m too embarrassed to show you just how many nail polish bottles I actually own.  I love experimenting with nail designs and adding a fun splash of color to my nails to accentuate my outfit.

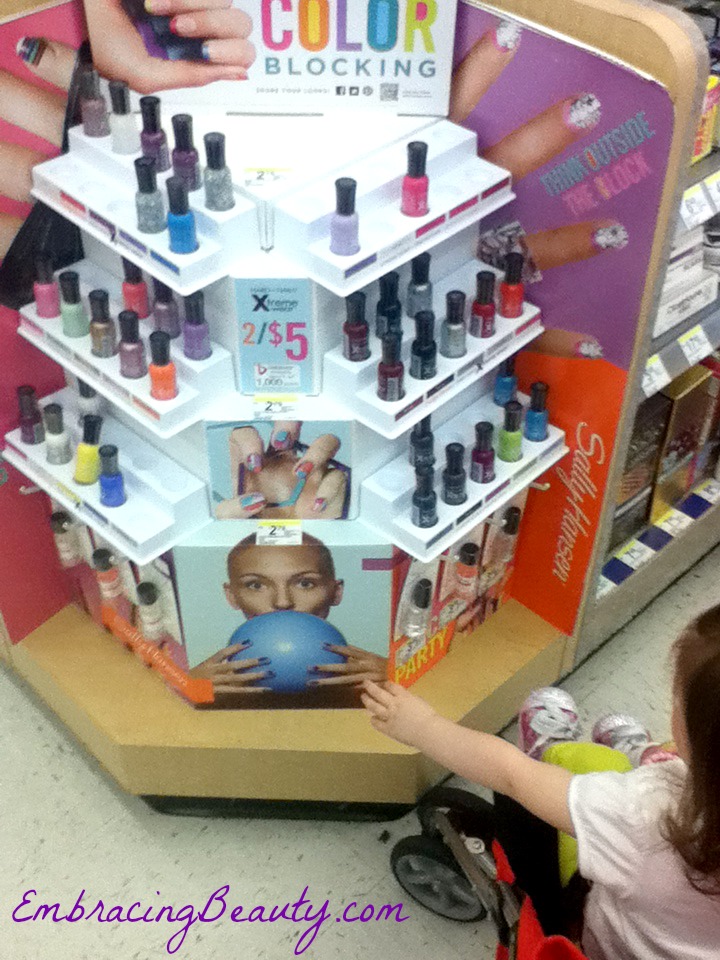
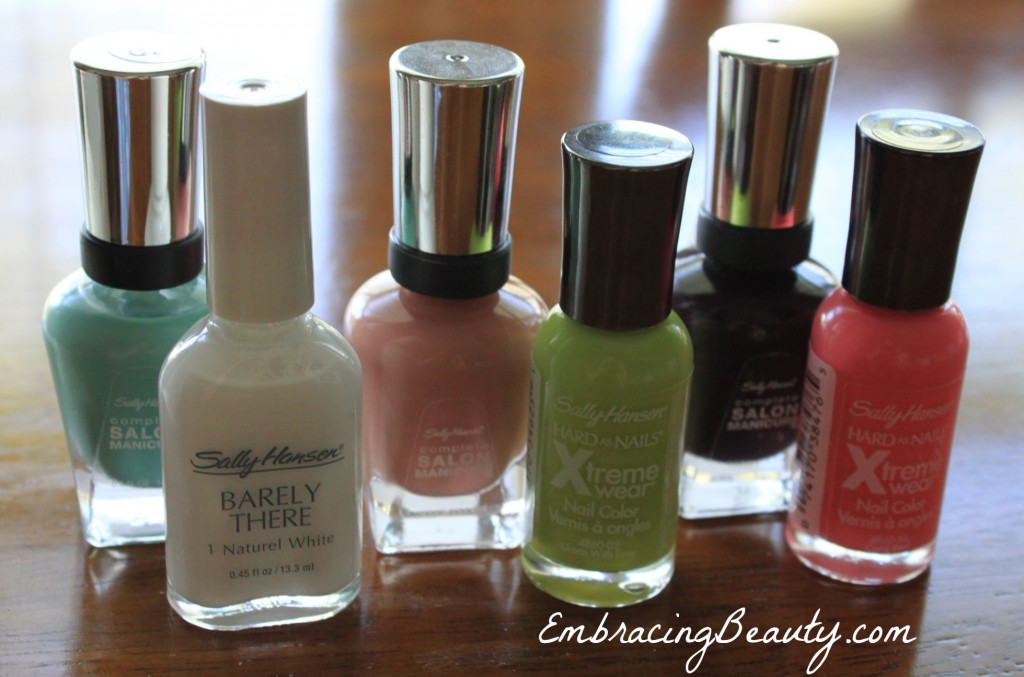
I’ve been eager to try a new design so I set a date, invited friends, and went shopping at Walgreens.  They have the biggest selection of Sally Hansen products that I’ve ever seen!  I was impressed.  I tried to think of what colors I had at home and which ones would be good to buy to match those.  I decided to let my daughter pick out which ones she wanted and I would make it work.  She loved picking them out and holding a few as we went through the store.  You can check out my entire Walgreens shopping trip to see all of the great varieties of Sally Hansen nail polish…and more pictures of my little girl!

Sally Hansen Nail Polish Stand

My little basket was full to the brim with everything I needed to host an excellent manicure party, that is, except for nail design tape.  I knew I could order some online but I wanted it quicker than that.  I searched up and down the isles but I couldn’t find what I was looking for.  I wanted to do color block nail art and to do it neatly I wanted tape.  Scotch tape works but I wanted the good stuff.  I asked a Walgreens associate if she knew if where I could find some.  She immediately stopped what she was doing and joined me in my search.  We could both picture it but we couldn’t find it.  She found some thin craft tape that we thought might fit the bill.  I’m happy to report that it worked wonderfully.  If you’re store is ever out of nail design tape (or you just can’t find it) check the craft isle!

When I got to the check out the cashier told me about two $5 coupons I could have used on my purchase if I had only gone to Coupons.com.  Being a teacher of couponing I felt like smacking myself on my head.  Even though I missed out on the coupons, I did get the 2/$5 deal w/ 1,000 points added to my Walgreens Balance Rewards Card (3/31-4/27).

If you have a smart phone, I recommend downloading their app to your phone.  They have several different handy services they offer including bar-code scanner, coupons, and you can keep track of your Balance Rewards right on your phone.  I really racked up on the reward points during this trip!

Sally Hansen Nail Polish

I had simple snacks for our “block party” so that we could eat while painting our nails.  Yep, you can tell I’m experienced at this!!  We had gummy bears, popcorn, and a few other little goodies.

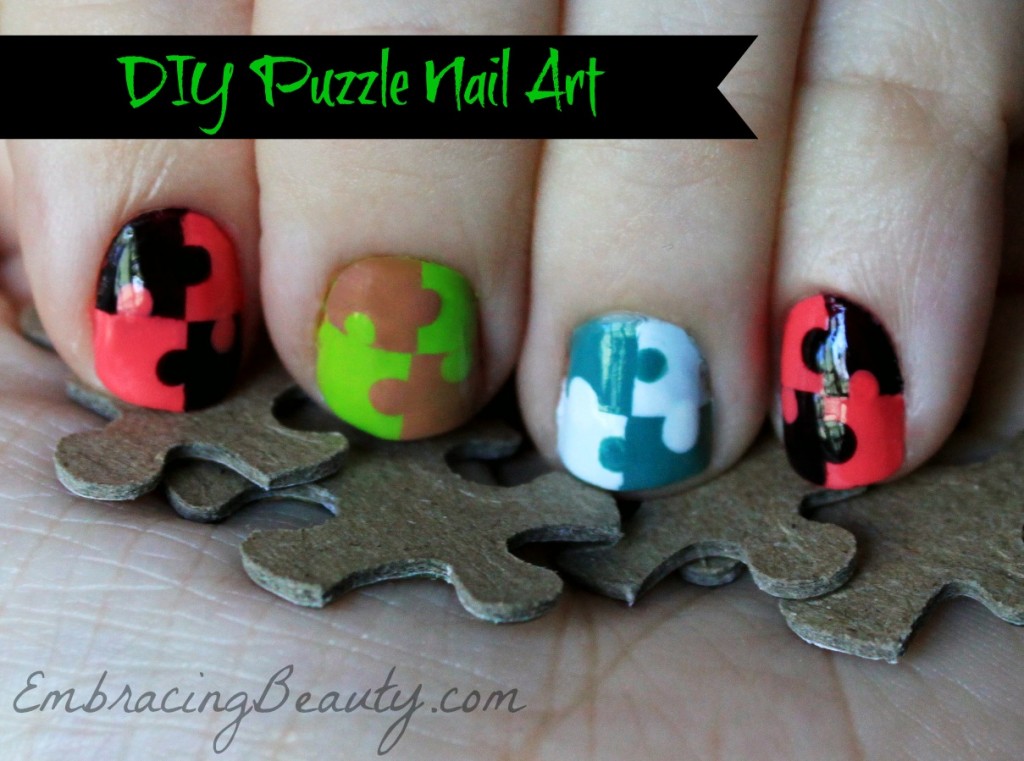
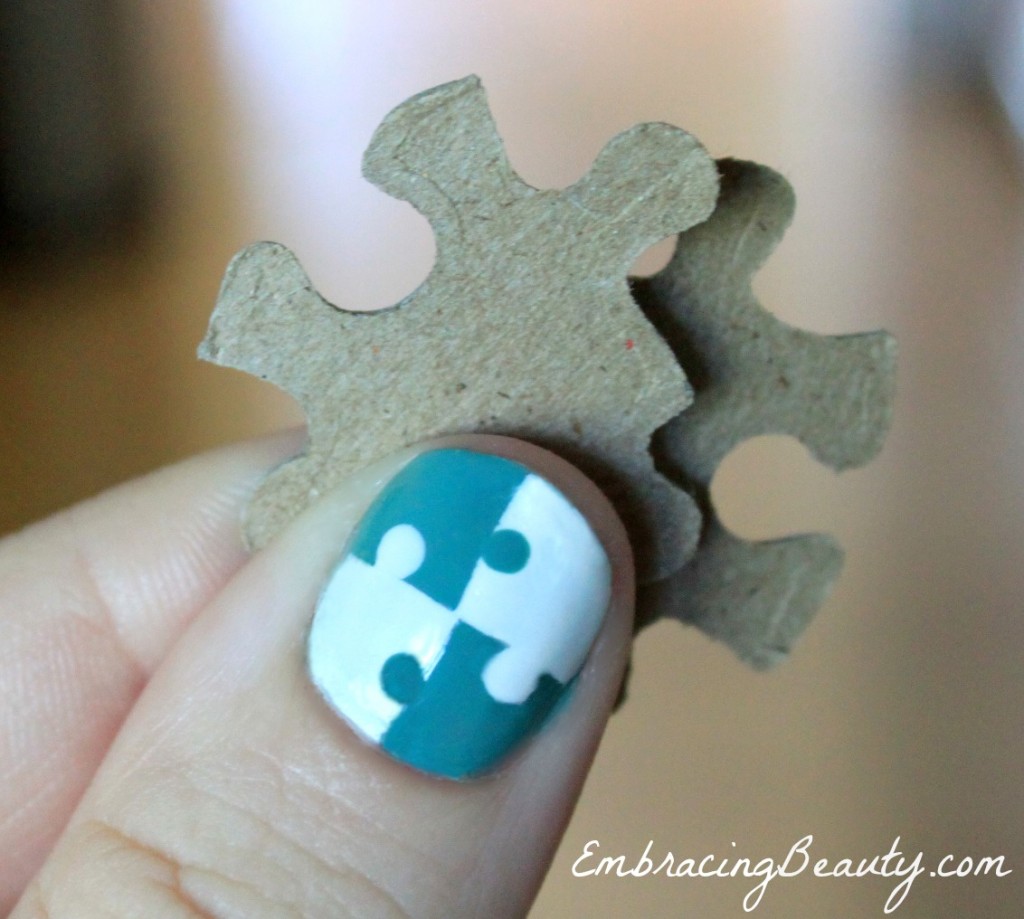
DIY Puzzle Nail Art

The nail designs were so much fun to experiment with.  I wanted to get brave enough to do a complicated design like a stained glass window or a bunch of bricks each with a different color.  I decided to mix it up a little and do puzzle piece nail art.  Not too complicated but still kind of classy.

DIY Striped Nail Art

This simple stripe design was made using our craft tape.  It held strong enough not to let the paint bleed through but not strong enough to pull off the original color.

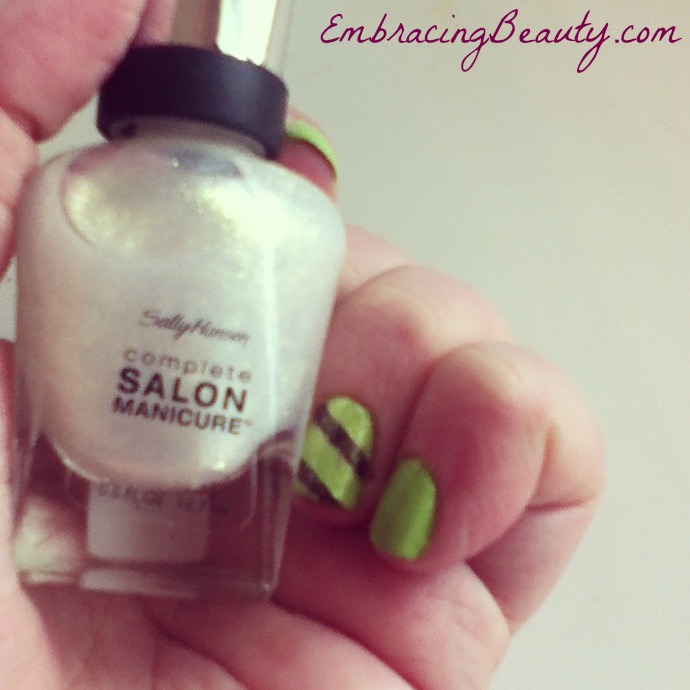
Sally Hansen Stripes

Here is a diagonal stripe with the most amazing sparkle polish over top!  Trust me, this photo doesn’t begin to show it’s beauty.

Here are a few simple steps that I think make for a great at home manicure:

  1. Trim, file, buff, & push back cuticles.  Buffing might seem like a waste of time but it will help your nail polish last longer!
  2. Apply a base coat.
  3. Apply your base color of choice.  I recommend starting with your lightest shade.
  4. Allow to fully dry.  This could take a while so I usually add a quick drying top coat here so I can get to designing my nails (the fun stuff) right away.
  5. Apply tape and paint the remaining areas.
  6. If you’re doing the puzzle design that I did, take a dotting tool (or a toothpick) and dip it into the polish and then onto your nail on the  opposite color.  Repeat with each square.
  7. Apply a top coat.
  8. Take a picture and post it on Instagram with the tag #EmbracingBeauty so I can see it.  (Really, I want to see!)

I had a great time and I hope you enjoyed reading about my latest nail art adventure.

If you end up catching the “color block bug” feel free to share your art with Sally Hansen on Facebook for a chance to win some great prizes.  Check out the Pinterest Party Walgreens and Sally Hansen are hosting where you could win a year’s supply of Sally Hansen!  You can always purchase Sally Hansen in Walgreens stores but did you know that you can also get it online?  It’s true, you can!  You can also connect with Sally Hansen on Twitter and Walgreens on Twitter.

*UPDATE! I have posted a step by step Puzzle Nail Art Tutorial here for those interested!*

What’s a nail design you would like to try?

*Disclaimer – I am a member of the Collective Bias®  Social Fabric® Community.  This shop has been compensated as part of a social shopper insights study for Collective Bias®  and COTY #cbias #SocialFabric.

Under Eye Issues: How To Use Concealer and Color Corrector Correctly

How to Use Concealer & Color Corrector Correctly

Most of us have some type of under eye issues. The most common problems include bags or dark circles under the eyes. Contrary to popular belief, these ‘dark circles’ are not always black or brown in color, although this can certainly be the case. Some ‘dark circles’ can be blue, red, pinkish, or even purple in color. It usually depends on your skin tone, and just how long you have been without sleep or have been really stressed out. But what do you do about these problems? How can you fix them so you don’t look like a zombie? The answer is simple. You use concealer and color corrector. Today we are going to show you how you can use either of these nifty tools correctly.

Color Corrector

Before you begin, you need to know just a few things about the color basics. First, the color green will neutralize red, so people who have a lot of redness on their face should use a green corrector before adding their foundation or concealer. Lighter skin tones will be the ones who benefit the most with these types of correctors. Darker skin tones have hyper-pigmentation and discoloration. They need oranges and bisques. Sallow skin will need a lavender or lilac type of corrector to brighten the skin.

Remember that darker skin tones will need darker tones, and lighter skin tones need lighter tones. It’s very simple. A little bit of trial and error will show you what the exact perfect shade for you is.

Using a color corrector is actually very simple. Simply apply a dab of the corrector on your skin- in this case, beneath the eyes, and rub in. Make sure you rub it in completely so that you don’t come out with a fake, caked on look. That’s it! Done!

When looking for a concealer, you need to find one that matches your natural skin tone- just like if you were searching for foundation or powder. A concealer should work to ‘conceal’ your blemishes and dark circles so that your skin appears even, smooth, and youthful looking. It should not look caked on, overly tan, super pale, etc. Remember that natural is beautiful, so pick a color that works best with your skin tone- whether that be light or dark.

You use concealer just like color corrector. Apply a bit to the area where you need it, and rub it in. It’s actually very simple to use, it’s the part about finding the right shade that tends to be so difficult.

Proper Way To Apply

There is a set order when applying your face makeups, and if you do not adhere to this strict order, you will not be able to come up with the natural looking desired results. So, for your convenience, we have listed them out in the correct order so that you can be sure to achieve that perfect look you have been trying to hard to get.

1 Color Corrector
2 Concealer
3 Foundation
4 Powder
5 Bronzer (if using)
6 Blush (if using)

You do not have to feel as though you must use all six face makeups. Some people will only be using foundation and powder, while others may actually be using all six. It all depends on your personal preference, and the look you are trying to achieve.

I hope that you found this to be insightful, and that you now understand how to get rid of those dark circles under your eyes…the correct way. Have something to tell us? Do you have tips or tricks, or a favorite product you like using? Let us know all about it in the comments below! We can’t wait to hear what you have to say!

Author Bio: Amanda is a skincare fanatic and the author of SkincareHQ.org which recently featured an article on The Best Foundation For Oily Skin. Aside from skincare, Amanda loves to travel and dreams of one day going to Italy. If you have any questions or comments for Amanda, feel free to reach out to her @Skincare_HQ on Twitter!

Piggy Paint – Non-Toxic Nail Polish & Giveaway Ends 4/9/13

I’m so very excited that I don’t really know where to begin.  I guess I’ll start at the beginning!  Mom Central asked me if I wanted to participate in a campaign they were hosting for Piggy Paint.  I jumped at the chance because 1) I love nail polish, 2) I love Piggy Paint nail polish!

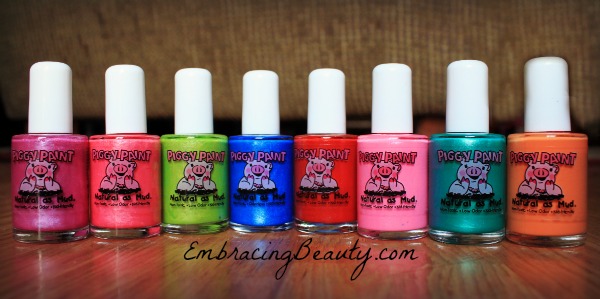
Piggy Paint Colors

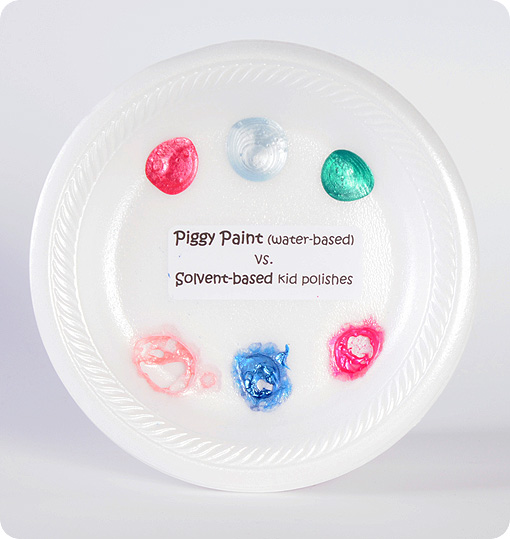
If you haven’t heard of Piggy Paint nail polish let me tell you all about it.  It’s incredible!  It was made by moms for moms.  Once upon a time, a mom was painting her daughters nails on a styrofoam plate and she noticed that the nail polish that spilled on the plate actually ate through the plate.  It was at that time that she decided to research nail polish and make her own nail polish for her kids.  That lady was Melanie Hurley and her nail polish is Piggy Paint.

Piggy Paint vs Solvent Nail Polish

Piggy Paint is a water-based polish that is specially formulated of natural ingredients. Finally, a kid-friendly, pregnant-mama polish!  They say it’s as natural as mud!  It is free of formaldehyde, toluene, phthalates, biphenyl A, ethyl acetate and acetone…and it’s made in the USA!  Check out their cute new spring colors:

Piggy Paint

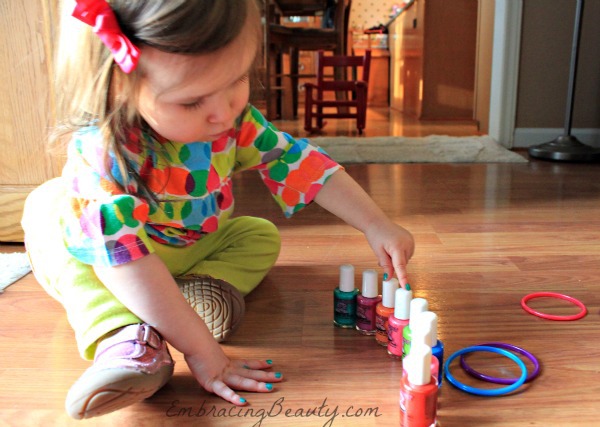
(From left to right)  Girls Rule, Forever Fancy, Dragon Tears, Tea Party for Two, Sometimes Sweet, Jazz it Up, Ice Cream Dream, & Mac-n-Cheese Please.  Aren’t those cute names?  Speaking of cute…check out my little girl!

Cuteness Nailed!

I think she’s cute but I might be more than a bit biased.  She loved having her nails painted!  I was worried because I’ve never painted them before.  We played with the bottles all week and worked on her colors with them.  (So far she can say them all except orange!)  Then on Saturday I got my hair dryer out and sat in the floor.  She sat in her little red rocking chair and held perfectly still while I painted each nail.  Then I held her hand and sang the ABC song twice while I blew her nails dry.  The song and hair dryer helped keep her distracted and she was happy the whole time.  I occasionally blew it in her face and she liked that.  Then we painted the other hand and repeated the drying process.  Perfect nails without a smudge!  The bottle recommends two coats but one coat covered well and I didn’t want to press my luck.

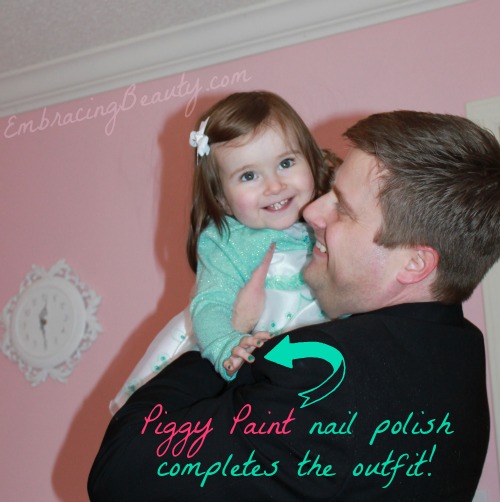
Piggy Paint Completes the Outfit

Here’s a picture of my little princess with her Daddy.  Her nail polish matched her Easter dress perfectly and everyone at church commented on her nails.  I was surprised how well the nail polish stayed on considering it’s a water-based polish.  It stayed on for two good days before it began chipping at all which is all I would expect anyway.  I think there’s going to be a lot of fingernail painting in our future…and I’m excited about it!

Want to buy?

You can buy Piggy Paint at Walmart and at PiggyPaint.com. To save 15% off your order enter “PiggyFun” at checkout.  This code expires April 30, 2013.

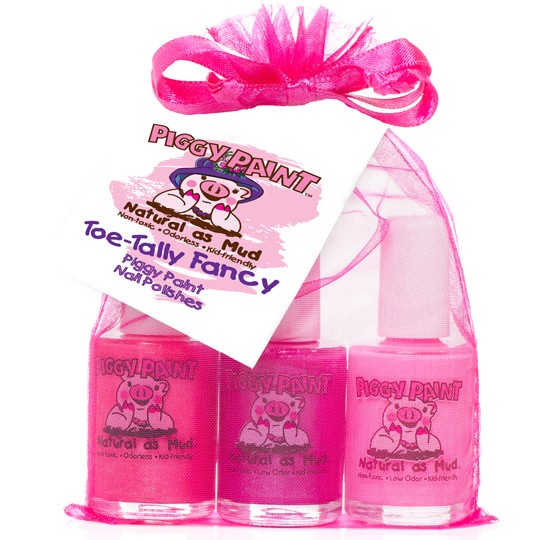
Toe-Tally Nail Polish Set

Want to win?

I have one “Toe-Tally Fancy” 3 polish set to giveaway to one lucky reader.  This is a $24.99 value!  Enter via the Rafflecopter code below.  Winners must be 18 years or older and from the continental United States.  Good luck!
a Rafflecopter giveaway

I participated in a campaign on behalf of Mom Central Consulting for Piggy Paint. I received a product sample to facilitate my review and a promotional item to thank me for participating.

Dazzle Dry Nail Polish & Easter Egg Nails

4 Steps to Dazzling Nails

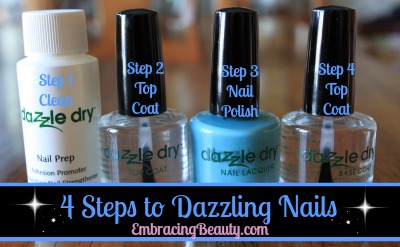
If you’ve never tried Dazzle Dry’s 4 steps to dazzling nails then you are missing out!  It delivers a glorious shine that lasts and lasts as long as  your nail polish does.

Step 1 – Nail Prep gently cleans and conditions your nails.

Step 2 – Top Coat dries in 2 minutes flat and helps your nail color stay put for the long haul.

Step 3 – Nail Polish goes on smoothly in just one coat but the bottle recommends two.

Step 4 – Top Coat goes on and dries in a breeze leaving you with shiny, gorgeous, dazzling nails!


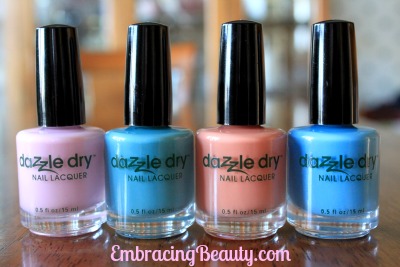
Dazzle Dry Nail Polish

Check out these four new beautiful spring colors Dazzle Dry just came out with.  Aren’t they lovely?


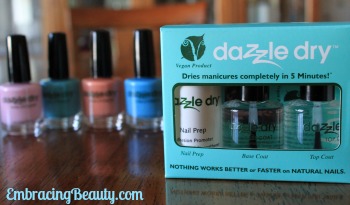
Dazzle Dry

Dazzle Dry says that they’ll dry manicures completely in 5 minutes and it’s true!  It takes longer than 5 minutes for all the steps and for the painting itself but once painted they dry very fast.


Base Coat Tip

I’ve used Dazzle Dry for years ever since my mom bought be my first set.  When I received this set in the mail, compliments of Dazzle Dry, I noticed that the base coat looked different than it usually did.  I thought it was just a new formula but as I was reading the small instruction booklet that came with it I found out that my base coat had actually turned to gel in the cold weather.  I’m glad I had read about it before trying to apply it like that!  The weather should be turning warm soon but I just wanted to post this and warn anyone who may be purchasing these in the future and who may receive a gelled base coat in the mail.  It’s a simple fix, all I had to do was soak it in warm water for just a few minutes and it turned back to liquid again.


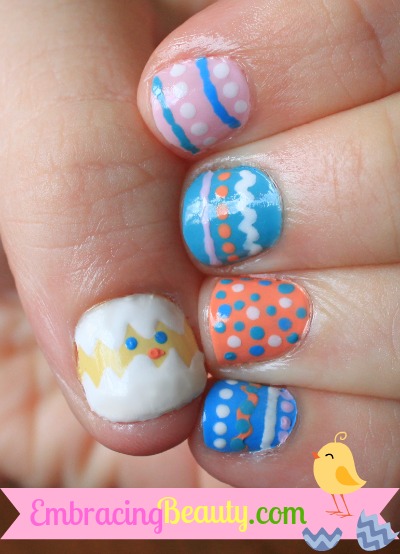
Easter Egg Nails

Check out these Easter egg nails I painted in celebration of spring!  For the full step by step tutorial you can visit Shore Savings with Patti.

All in all, I highly recommend this set to anyone who is serious about beautiful nails.  It holds the color for a long time and the shine is unsurpassed!

It Works! Giveaway

A few months ago, I heard about a company called It Works! that boasted an unbelievable claim.  They said they could shrink the fat right off your body using nothing but a body wrap and less than an hour of your time.

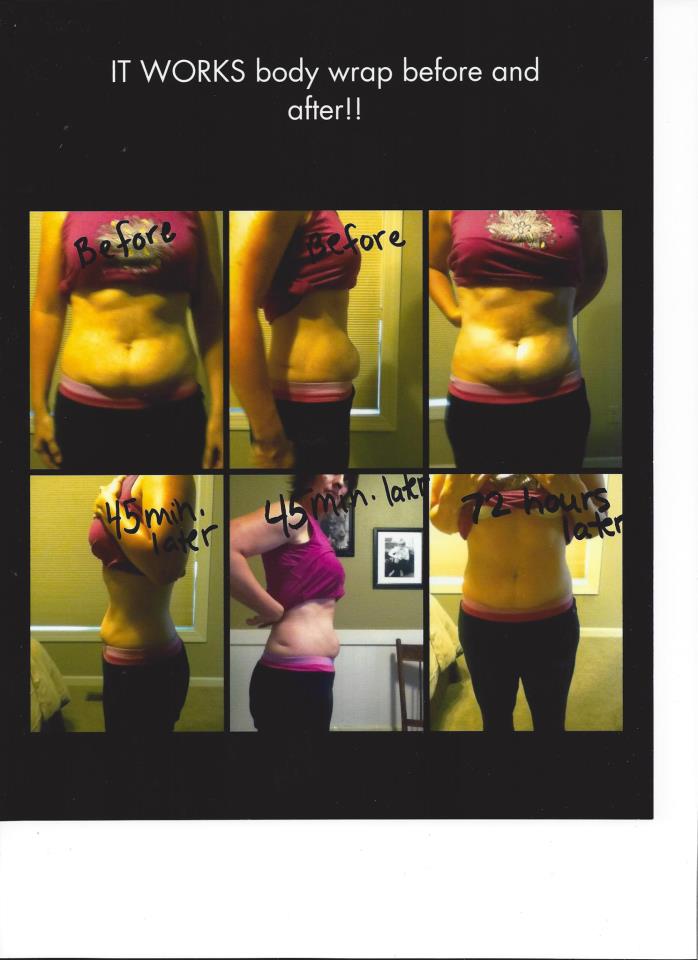
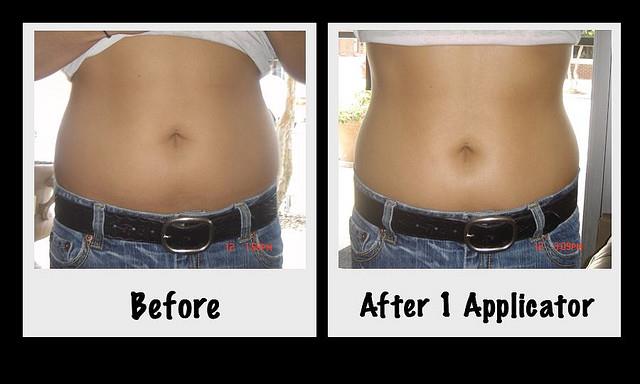
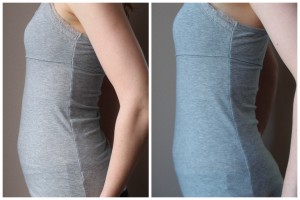
Their claims seemed so outrageous, especially when coupled with photos like this:

It Works!  Testimonial

An actual customer of Heidi’s lost over 5″ after one body wrap application

The first thought that entered my mind was, “I wonder if that really works?” Because I’ve had twins, people, and even though I work out and eat healthy, I still have a bit of a baby pooch that wasn’t there before.

Not only that, but the skin on my stomach looks like a sock that’s been stretched out one too many times.  I don’t have stretch marks, which is a miracle, but I also don’t look like I’m in high school anymore.

Imagine that.

So when I had the opportunity to try an It Works! body wrap myself, I jumped at the chance.  Even though I was skeptical, I hoped this kind of magic was real because so far, the garden gnomes and kitchen elves have been a huge disappointment.

Saundra and her daughter Heidi, two independent It Works! consultants, sent me one individual It Works! Ultimate Body Wrap.  I was kind of hoping for a vat of the stuff but apparently they don’t sell vats.  Yet.  However, the Ultimate Body Wrap comes in packs of four so you can plaster them all over yourself if you’d like, although you should try to restrain yourself to only two at a time just to be safe.

Since I only had one wrap, I had to decide where to put it.  You can use the Ultimate Body Wrap anywhere from the neck down.  But, my baby tummy had to be the first to go.

The body wrap was very easy to apply.  I simply unfolded it and wrapped it around my stomach area, magic-lotion side down.  It smelled a little like Vicks Vapor Rub and tingled a little like it too.  That’s because it is loaded with botanical ingredients like menthol, camphor, and eucalyptus.  The tingling sensation dies down as the lotion soaks in.

One wrap doesn’t go all the way around unless you’re a twig, but I was happy to see that even though I’ve very tall, it was able to cover the majority of my stomach and my hate-handles (let’s be real, people–there is no love there).

The directions said to wrap myself up in Saran Wrap to keep the lotion in place.  My husband found this part of the process highly entertaining.  Not in a, “Wow, Baby, you’re so sexy” kind of way but more like a “Ha ha hahahahahahah!” kind of way.

He’s so precious.

Even with my midsection wrapped up like yesterday’s pizza, I was able to walk around, wrangle children, and waste time on Facebook like usual.

The directions said to leave the wrap on for at least 45 minutes.  It also cautioned against leaving it on longer if this was your first time wrapping in case your skin was sensitive.  So, I tried to behave even though I kind of wanted to spend all day wrapped up in magic lotion, just in case the extra time made my backside smaller too.  It was a long shot.

It Works!  Testimonial

Another actual customer shows significant loss after 1 application.

When it was time to take the wrap off, I rubbed the remaining lotion into my skin, as per the directions, and went about my day, making sure to drink plenty of water.  Saundra told me to drink half my body weight (in pounds) in ounces of water for 72 hours to assist the herbs in drawing toxins out of my body.  If I weighed 120 pounds (stop laughing) then I’d drink 60 oz. of water.

I drink a lot of water anyway, but it was encouraging to see that the It Works! products weren’t trying to make me skinny by drawing water out of my system so I’d shrink like a raisin.  Nope.  I was staying well hydrated.

By the evening of the first day (sounds biblical, right?) I was already noticing an improvement in the tone and texture of my skin.  My stomach felt like butter.  Anywhere the wrap touched was super-hydrated and springy like baby skin.  Even the little wrinkles around my belly-button (thanks, twins) had almost vanished.

I could hardly wait for the 72-hour mark to take my measurements.  I took three: one at my belly button, one two inches above the belly button, and one two inches below.  I didn’t notice any difference in the measurement above my belly button, but that’s understandable because I’m pretty much all ribs right there.

But, as I’ve aged, the Great Migration has started to happen so it made sense that I’d notice the biggest difference in the areas that are a bit more…south.  I lost 1” at my belly button and 1 ¾” two inches below my belly button!  Wow!  That’s not bad especially since the biggest differences are normally seen after more than one application.  I was pretty thrilled!  In fact, I’d have to say it works!

It Works!  Side view

My own side profile pictures didn’t really do the wrap justice since I wasn’t quite willing to bare my belly for all of you. But You can already see how flat my stomach is becoming after just one application!

In fact, I think It Works! is the perfect thing to help get ready for all those summer events like weddings, graduations, and swim suit shopping expeditions.  You know.  Stuff.

So, we’re offering an It Works! giveaway so you can try the products yourself!  Heidi and Saundra got together and put together a prize package that’s almost as good as a vat of It Works! magic.  One winner will receive 1 Ultimate Body Wrap, 1 Facial Applicator (to tighten and tone the entire face), and 1 mini Defining Gel.  That’s a $60 retail value!

Click on the Rafflecopter link to enter.

a Rafflecopter giveaway

Restoring Your Skin, Hair, and Nails After Chemotherapy

Restoring your skin, hair, & nails after chemotherapy


Today I got a note from one of our readers named Wendy.  She said,


“I have breast cancer and I just got done with chemo, I was just hoping you could help me with some products that I could use for my skin and nails. Thank you!”


Wendy,


I have a good friend who is now half way through her treatments for breast cancer and it just breaks my heart.  It’s a shame that anyone has to go through this.  I have to say that seeing her strength, courage, and dependence on the Lord through this time is an encouragement to me.  Congratulations on staying strong and finishing chemo!!!  We all know that isn’t an easy accomplishment.  Thank you for writing and I’ll do my best to answer your question.


God Bless,


Ashley


Chemo can wreck havoc on your skin, hair, and nails but there are a few things you can do to help take care of yourself before, during, or after chemo.


  • Avoid long, hot showers that dry out your skin.
  • Drink a lot of water.
  • Use creams instead of lotions.  Apply right after you shower and before bed.  Reapply cream each time after you wash your hands.
  • Massage cream into your nails and nail beds to help promote healthy cuticles and regrowth.
  • Wear gloves when you wash the dishes or are around other chemicals to avoid an infection.
  • Use an oily polish remover to avoid drying out your nails even further.
  • Avoid hand creams with alpha hydroxy or beta hydroxy acids.
  • Push back cuticles rather than cutting them.
  • If you notice an infection around your nails consult with your doctor who could give you a few different prescription options.
  • For dry brittle nails, use Nailtiques Formula 2 Plus. It goes on like a polish but it’s a nail protein.  It helps smooth ridges, stop splitting, strengthens nails and helps them grow.  You can use it daily until you get the results you want and then once a week.  It’s expensive but I personally swear by this stuff!  {I’ve also heard that Nail Envy by OPI works well.  It’s even more costly though!}
  • Because your immune system is likely to be compromised by treatment, try to avoid any injury to the nails or cuticles that might lead to infection. If you must have your nails done professionally you should make your manicurist aware of this.
  • Ask your doctor first and if allowed try taking a prenatal vitamin.  They are known to do wonders for hair and nails.
  • Eat a well-balanced diet and make sure you’re getting plenty of protein and iron.
  • If your skin is very dry, use an ammonium lactate cream to help increase moisture retention. These creams are available over-the-counter as well as by prescription.
  • Some chemotherapy drugs make skin more susceptible to sunburn. Use a sunblock with at least an SPF 30 and choose one that protects against both UVA and UVB rays.
  • Use gentle fragrance-free soaps and laundry detergent.


Here are some other great beauty resources worth checking out:

  • www.lookgoodfeelbetter.org
    This is a free, national public service program dedicated to teaching women cancer patients beauty techniques to help restore their appearance and self-image during cancer treatment. Trained beauty professionals teach beauty techniques in skin care, make-up, hair care and nail care. There program also includes demonstrations in the use of wigs, hats, turbans and scarf-tying techniques. Look Good Feel Better is sponsored by the Cosmetic, Toiletry & Fragrance Association, The American Cancer Society and the National Cosmetology Association.
  • www.shopwellwithyou.org
    A body image resource for women surviving cancer including suggestions on what to wear and a clothing and accessory directory.