Chevron Nail Art With Jamberry #ManiMonday

Chevron Nails
Happy Tuesday!  I hope your weekend was as enjoyable as mine was.  I had this post planned to be a #ManiMonday post but yesterday but my day didn’t quite go as planned.  I tried to put my son to sleep unswaddled for the first time and he was having none of it.  That threw him off his schedule and I said goodbye to  my “Mommy time.”  Such is life!

Being in the summer sun has me craving pretty toes and fingernails!  Do you get that way too?

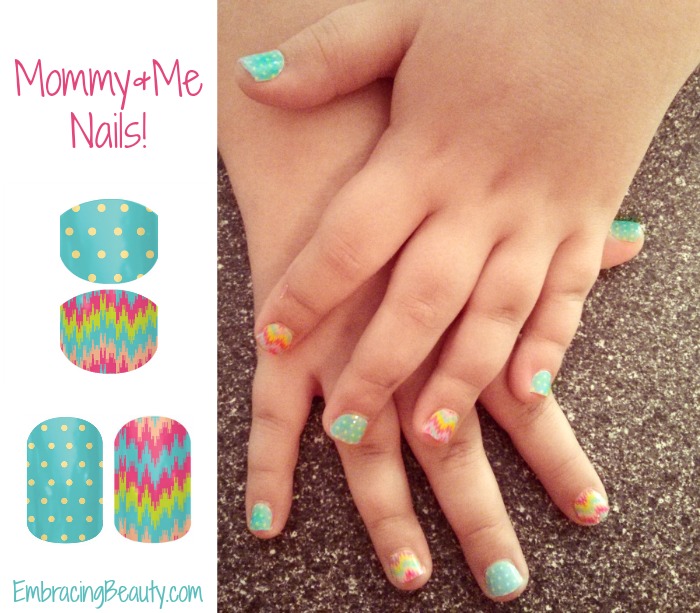
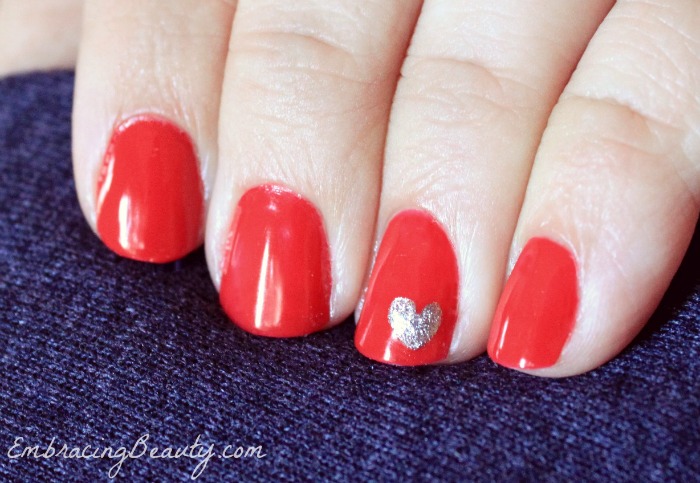
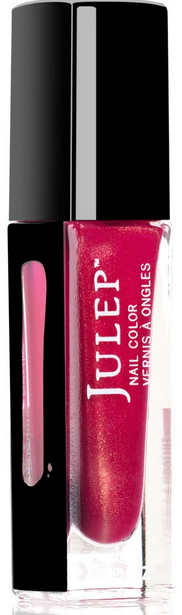
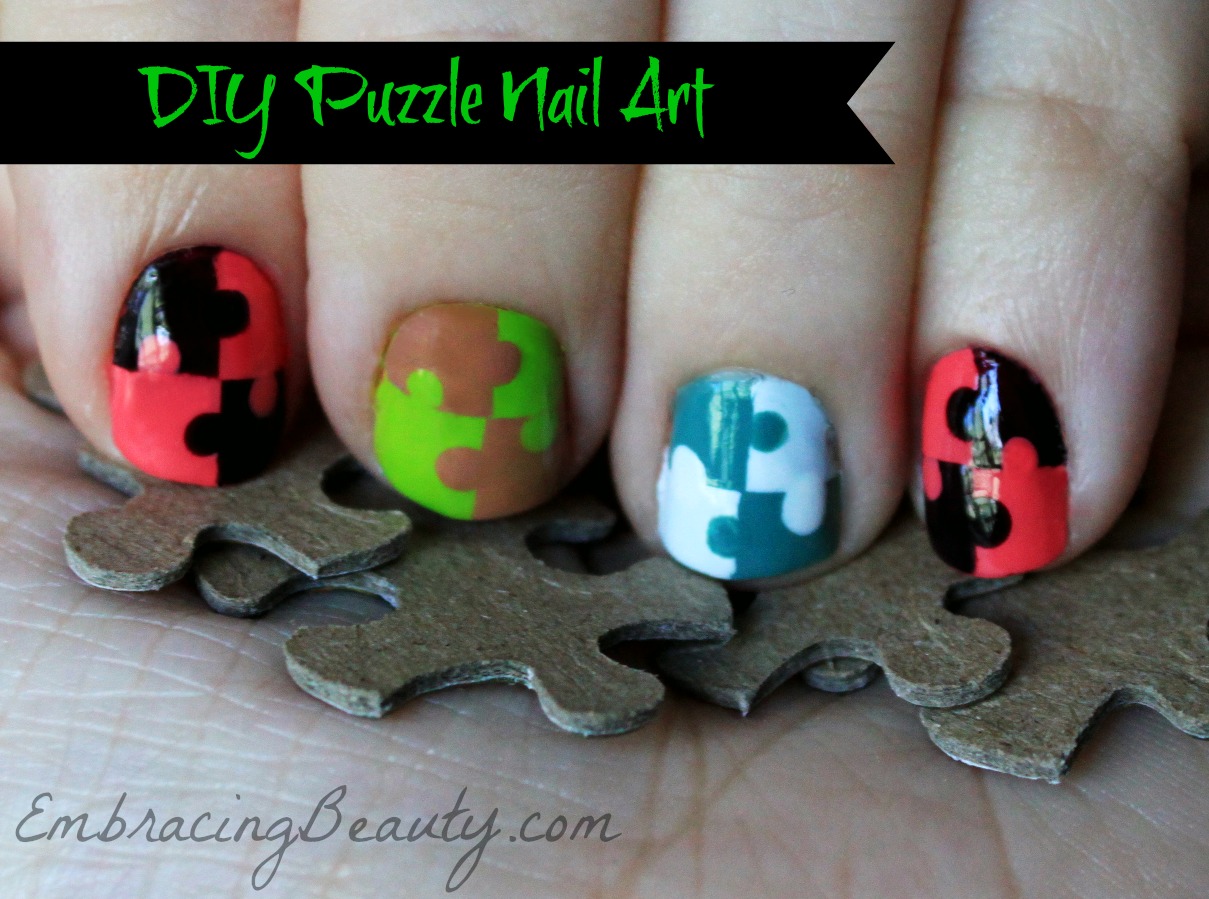
This manicure features Dazzle Dry’s polish and Jamberry’s nail wraps.  I think they make a great summer combo.  This is one of my favorite manicures I’ve had in a long time!

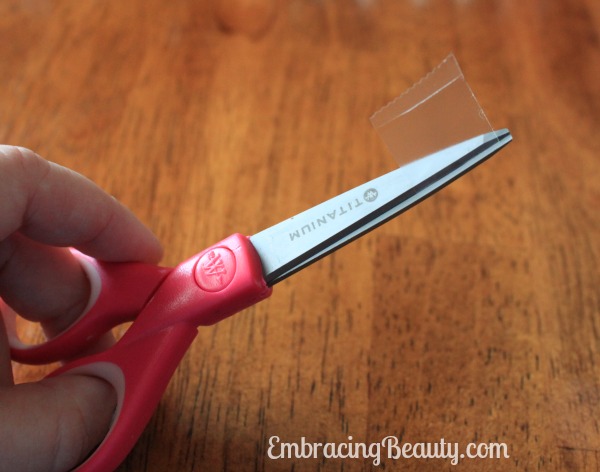
Outside of the Dazzle Dry’s five minute dry time and the trimming of the Jamberry wraps it was a pretty fast and painless process.

Have you picked up any of the Jamberry summer colors yet?  What do you think of this manicure, is it a technique you would try at home?  If you recreate this look, tag me on Instagram, Twitter, or Pinterest. I’d love to see your take on it!

Disclosure: Affiliate links appear in this post. When you purchase through an affiliate link, you help support this site (or my friend’s Jamberry business that I make no profit from).

Pamper Your Piggies: Mommy & Me Manis

This little piggy went to… the nail salon?  My little piggies haven’t danced in the door of a nail salon since my technician buffed away too much skin and left me with a painful raw spot.  He covered it with a liquid band aid but it hurt to walk on it for weeks.  While I miss the massage chair, pretty polish designs, and overall pampering I’m not a glutton for punishment.  There is no way I’m going to tote my toddler to the salon for the same reasons.  Not to mention the cost for a polish that will chip off her nails in a matter of days!

Daddy painting daughter's nails

BUT my daughter loves to have her nails painted.  I mean loves it!  She’ll point them out to the cashier at the grocery store.  A stranger at the mall.  Anyone who will listen!  If you follow me on Instagram you may have saw the picture I posted last night of her daddy “painting” her nails.  He was using a clear, glittery, oily type of pretend polish.  He’s not brave enough to try with the real stuff and I don’t blame him!    

Piggy Paint Colors

Even when we use real, safe, kid-friendly polishes they still manage to chip ever so sightly within a few days.  My semi-OCD daughter will have none of that so we end up painting her nails over and over and over before we finally remove it completely and leave her with bare nails for a few weeks.  Which makes me sad because she enjoys painted nails so much and she likes to “look like Mommy.”

Mommy and Me Jamberry Nails

I may have found the perfect solution for her nail obsession. Mommy & Me nail wraps by Jamberry!  Now, I haven’t tried this myself yet but I’ve ordered them and I can’t wait to!  The picture above is of a friend’s daughter trying them out for the first time.  Cute, right?  My friend just started selling these wraps and because they look so great on her that I had to buy some for myself.

Gingham Nails

Check out the ones I ordered called Gingham and Berries.  Can you picture these on tiny toes running through the grass this summer?  So stinking cute!

I’ll update you with pictures of my daughter’s new fancy mani-pedi soon and quite a few nail wrap combinations of my own too.  I couldn’t help but buy a bunch, they look so fun!  If you want to have a little Mother/Daughter time for Mother’s Day this looks like a great, affordable way to do so.  Plus, I hear that they’ll last for weeks on little one’s toes and a few weeks on fingers.  You can’t beat that!

Here’s my friend’s website {that I’m not making any commission on what-so-ever!}: Jamberry Nails.

Happy early Mother’s Day!!

Julep’s Maven Beauty Box – Now Fully Customizable!

(This post contains affiliate links)

Julep Customized Boxes!

Did you know that Julep’s very popular monthly beauty box just got even better? Yes! Maven subscriptions can be customized to fit your style, your likes and your favorites even more now. Each month, Julep Mavens get:

  • – A fully customized monthly delivery of over $40 in nail polish and beauty products for $24.99 a month, or just $19.99 a month if you sign up for the 3 month option
  • – Flexibility to try one of five beauty styles each month or upgrade to get them all
  • – 20% off and free shipping on other products at Julep.com
  • – Exclusive access to the Secret Store each month
  • – First dibs on monthly Mystery Boxes and the opportunity to win one, too

Julep Maven

Not sure you want to be a Maven yet or know what style you are? Take the Maven Style Quiz and then use the code FREEBOX to get your first box free. Your box will ship for free and you are signing up for the monthly subscription service, however you can cancel at any time by simply contacting Julep Customer Service.  I’ve been signed up for 2 years now and I love it.  I look forward to my box every month!

Julep also makes a great gift. The Gift of Maven is perfect for birthdays, Mother’s Day, Graduation, your best friend’s birthday or any occasion. The Gift of Maven is available in 2, 4 or 6 month increments and does not auto-renew.

Become a Maven today!

How to Get a Perfect Manicure

Steps to a Perfect Manicure

Ever since I tried my hand at nail art two years ago I’ve received numerous comments and emails asking me questions about basic nail polish techniques.  How do you avoid getting it on your fingers? Do you need a top coat?  How do you care for your cuticles?  They are basically asking, “How do you get a perfect manicure?”

The biggest tip I can give anyone is to practice but I also want to share with you the steps I go through for the perfect manicure.  I hope you’ll find this helpful and not too overwhelming!  Remember, you don’t have to change everything at once.  Just pick a few new tricks to add to your routine.

Clean Under Nails

Step 1:  Wash your nails thoroughly with soap and water to remove any dirt/oil/etc.  You could also opt to soak a cotton ball in rubbing alcohol and rub over your nails to help your polish adhere better and last longer.  I usually skip the alcohol but it does work!

Make sure all remnants of your old polish is removed.  A nail brush {or a tooth brush} soaked in your favorite nail polish remover is a great way to scrub off stubborn polish.

Don’t forget to clean under your nails too!  You could use a nail tool to clean under there in addition to using a nail brush.  I don’t know about you but I’m always a bit paranoid about the dirt and germs under there!

Pushing Back Cuticles!

Step 2: Push back your cuticles.  You can grab a cheap cuticle pusher at a number of locations.  When cuticles are pushed back they leave an even surface for you to paint.

Trimming Nails

Step 3:  Trim your fingernails to your desired length.  Don’t worry about shaping them here, just focus on the length.

How to get even nails

A great way to make sure your manicure ends up nice is to make sure your nails are all roughly the same length when you begin.  If they’re not, clip them again or you can spend extra time filing.

Glass Nail Files - I love them!

Step 4:  File your nails to your desired shape.  Mine are naturally square, while others are naturally round, but I try to file mine somewhere in between.  If you use an old emery board file only in one direction.  However, if you use a glass file you can freely file in both directions.  I’m a huge fan of glass nail files because they are gentle on your nails, more hygienic than emery boards, they’re easily sterilized, they never dull, and they file quicker than emery boards.

Buffing Nails

Step 5: Buff your nails. You don’t have to spend a fortune on a good buffing block.  The ones at Target that are around a dollar work lovely.

Nail Buffing Block - Removes ridges and adds shine!

Think of a buffing block like sandpaper.  You don’t want to use it too often or your nails will become very thin but using it once in a while will give your nails a healthy, smooth, and youthful appearance.  The buffing block I use is a foam block that has four different colored sides labeled File, Buff, Smooth, & Shine.

Side one: File – This would replace a nail file so I skip this side.

Side two: Buff – Rub this coarse side back and forth over your entire nail to help buff away ridges and peeling.  Don’t be excessive on this step or you could damage your nails.

Side three: Smooth – This side uses a finer “sandpaper” to help smooth down any small imperfections the buffing left behind.

Side four: Shine – This final step will leave a beautiful shine to your nails.  They’ll look gorgeous with or without polish!  {If I leave my nails bare I’ll often redo this step every few days to maintain my nails’ shine.}

How to Remove Hangnails!!

Step 6: Remove hangnails.  Use cuticle trimmers to quickly and painlessly remove any hangnails you may have.  This will not only leave your nails looking much nicer but also save you from the discomfort and frustration that hangnails bring.

Step 7: Apply a base coat to your nails to help your polish last longer.  My current favorite is OPI’s Nail Envy but Sally Hansen’s Strong as Nails is a close second.

How to paint fingernails!

Step 8: Paint your nails.  This is the fun part and is also the step that most people skip ahead to.  It’s not always necessary but don’t your nails look so much nicer at this point when you take the time to do a little prep work?  I think so.

When I paint my nails I start by painting one stroke down the center of my nail and then one on each side.  This is what works for me and is how I’ve painted my nails since I was in grade school but that doesn’t mean it will work for you.  Practice a variety of applications and soon you’ll find a technique that works for you and leaves your nail polish smooth and even.

If you have an opaque shade of polish you may need to apply a second coat.

Step 9: Add a top coat for a lasting, chip-resistant finish, and if you use the top coat I do it will leave you with a high gloss shine.  I can’t say enough good things about Julep’s Polymer Top Coat.  I LOVE this stuff.  I’ve told Julep that if they ever stop selling it they have to tell me in advance so I can buy a lifetime supply from them.  Yes, it’s that good!  Allow your polish to dry for 2-3 minutes then apply Julep’s Polymer Top Coat and let set for 3-5 minutes in indoor lighting {Nothing fancy, just a regular fluorescent bulb}.  Then your nails will be completely dry and smudge-proof.

Dip a paintbrush in acetone to remove stray polish - genius!

Step 10:  Clean up.  This is a trick I learned while going through an artsy stage in high school.  Cleaning up the left over nail polish around my nail drove me nuts because nothing seemed to work.  As careful as I tried to be there was always just a teensy bit of polish where I didn’t want it.  Then one day the answer dawned on me!  I dipped one of my smallest art brushes in nail polish remover then rubbed it on the skin around my nail.  It worked wonders and I felt like a genius.

I think I’m the only one in the beauty world who doesn’t like a gap between my polish and my cuticle.  I want it right up to the edge without crossing over.  However, if you’re in the vast majority who like this new gap trend you could take a tiny brush and swirl it around the inside of your cuticle to give you that look.

You can pick up a brush at your local craft store for a few bucks and it will last you years and years.  I’m still using that brush I first experimented with in high school and I don’t want to think about how many years ago that’s been!

Silver Heart - Valentine's Day Nails!

There you have it, folks!  Those are the ten steps I take when I want to achieve a perfect manicure.  What steps do you take when you attempt a perfect DIY manicure?

Fall Nail Art

Fall Nails - So cute!!


These nail designs are perfect to welcome in fall.  A pretty pumpkin, a warm cup of joe (or apple cider!), and a sweet candy corn.  Choosing what colors I was going to use took me longer than the actual nail designs did.  I’m pretty sure that anyone with basic nail painting abilities and a tooth pick can pull this off.

It’s hard to believe that it’s been a year since I posted my first nail art design.  First, there was the Halloween Nail Fail post and the next week I posted even more Halloween Nail Art.

What are your favorite fall hues?

Breast Cancer Awareness Nails

Breast Cancer Awareness Nails It’s that time of year again…time for Breast Cancer Awareness Month.  This annual campaign not only helps to increase awareness of the disease (because most people are aware anyway) but it’s a time to encourage everyone to take steps to detect the disease in its early stages.

In honor of Breast Cancer Awareness month I wanted to do a little nail art.  I picked up the ribbon stickers at a discount party store this summer when they were on clearance but I’m sure a quick Google search will tell you where else you could purchase them from.  The white nail polish featured is the color Kate from the Julep line and the pink is the color Strawberry Macaron from the Dazzle Dry line.  I use Kate in just about every nail art project I attempt and you can see Strawberry Macaron featured in my Easter egg nail art.

(Also see: Restoring Your Skin, Hair, & Nails After Chemotherapy)

In what ways are you promoting Breast Cancer Awareness Month?

Julep Giveaway 14 Polishes in 14 Days

I have a very exciting giveaway for you!  Starting today, you can enter for a chance to win a brand new Julep color before it comes out.  How exciting!  Plus, since I did choose the color myself I have to tell you how absolutely gorgeous it is. : )

Fourteen lucky winners will each receive a Julep nail polish in the shade Evie. Approximate retail value is $14 each.  One winner will be chosen each day until this giveaway ends.

Julep nail polish offers sophisticated, classic colors to beautifully compliment any look as well as bright and fun colors to liven up any outfit.  Its long-lasting formula provides days of chip-resistant wear.  Julep is a 4-Free polish meaning that it doesn’t include 4 nasty toxins that some other brands do.  Julep is toluene-, phthalate- and formaldehyde, and formaldehyde resin free.  If you haven’t tried Julep polishes before now is a great time to do so!  Plus, if you love nail polishes as much as I do you might want to consider their Maven program where you pay a small fee and have polishes shipped to you monthly.  I’m a big fan!

Mickey and Minnie Nail Art

The color Evie was featured in my Mickey and Minnie Nail Art that I featured a few months back.  The color is a tad lighter than the picture portrays it.  It’s much lovelier in person, trust me.

Evie Julep Nail Polish

Here is a picture that Julep just put up on their website and I think it portrays the color much better.  You can purchase the color Evie by going to Julep.com.  Yay!  I’m so excited to see my nail polish for sale online.  Go buy it…then enter our giveaway which is ending very soon!

We’ll have the same Rafflecopter form throughout the giveaway and I’ll choose a winner each day and announce the winner below.

Winner #1: Lisa Marie

Winner #2: Daisy T.

Winner #3: Beeb A.

Winner #4: John H.

Winner #5: Julie B.

Winners 6-14 have yet to be determined.  Enter below to win.  Good luck!

a Rafflecopter giveaway

Disney Mickey and Minnie Nail Art

Mickey and Minnie Nail Art

Minnie Mouse is one of my favorite Disney characters!  She’s adorable for little girls and grown up girls too!  I love her sweet face, her relationship with the mouse who started it all, Mickey, and her love of polka dots.  What’s not to like?

If you follow me on Pinterest {and I hope you all do!} you’ve been bombarded with my Minnie Mouse pins lately.  I’m sorry about that!  You see, my little girl is about to turn two and I’m searching for every idea possible to make her Minnie Mouse party a success.  {Check out my DIY Minnie Mouse Halloween costume I made her.}  While browsing and browsing I found quite a few cute Minnie Mouse nail designs {which I pinned on my Pretty Nails board}.  Some were simple and some were far above my skill level.  I chose to do a design that was right in the middle.  It stretched me out of my comfort zone and I’m very pleased with the results.  If you think these are awful, please keep your comments to yourself.  Don’t bust my bubble!

My favorite Mickey and Minnie images are from the 70’s and 80’s.  Do you remember the ones?  Minnie wore a blue dress, yellow shoes, and a hat with a flower in it?  I tried to make my characters look like the ones from back then except that Minnie has a bow instead of a hat.

Have you ever done your own Mickey and Minnie Mouse Nail Art?  If so, I would love to see it!

Products Used:

Here is a list of the products that I used for my Mickey and Minnie Mouse Design:

  • – Julep Polish in a beautiful shade that isn’t available yet….that I got to name!!!  I can finally cross that item off of my bucket list.  This color will be making it’s debut soon.  Don’t you want to buy it?  I think it’s absolutely beautiful!  My poor photography skills make it look a little darker in the picture than it actually is but don’t you love the rose gold flecks in it?  Even if I didn’t have the privilege of picking the color and naming it myself it would still be my favorite polish.
  • White Nail Art Paint (Milani)
  • Dotting Tool
  • Black Polish (Sally Hansen)
  • Base and Top Coat (Julep Base Coat, Julep Polymer Top Coat)

I’m sorry that this isn’t a tutorial post but I don’t think I could do it again if I tried!  I set aside a block of time, figured out what I wanted my design to be, and carefully applied each stroke.  Sometimes I used my dotting tool or my fingernail to remove a little paint if I went a little too far.  After I was happy with my design I sealed it off with a top coat.

Even though this isn’t a tutorial, I would be happy to do my best to try and answer any questions you might have so please feel free to leave them in the comments below.  Plus, feel free to leave a comment here telling Julep what you think of their new polish color!

Puzzle Nail Art Tutorial

DIY Puzzle Nail Art

Last month, I told you about my puzzle nail art and how I created it.  I was excited about my puzzle nails and I’m glad to know that you liked them too!  I’ve received numerous comments and emails requesting pictures to show the tutorial step by step so I’m here to hopefully visually explain with pictures what I tried to explain with words before.  I hope this helps clear any confusion but as always, if you have any questions please feel free to contact me!

Here are a few simple steps that I think make for a great at home manicure:

  1. Trim, file, buff, & push back cuticles.  Buffing might seem like a waste of time but it will help your nail polish last longer!
  2. Apply a base coat.  Let dry.
  3. Apply your base color of choice.  I recommend starting with your lightest shade (even though I forgot to do this myself!).
  4. Allow to fully dry.  This could take a while so I usually add a quick drying top coat here so I can get to designing my nails (the fun stuff) right away.
  5. Apply tape and paint the remaining areas.
  6. If you’re doing the puzzle design that I did, take a dotting tool (or a toothpick) and dip it into the polish and then onto your nail on the  opposite color.  Repeat with each square.
  7. Apply a top coat.
  8. Take a picture and post it on Instagram with the tag #EmbracingBeauty so I can see it.  (Really, I want to see!)

Scissors and tape

One you’ve got your lightest color applied and fully dry cut two pieces of tape to use.

Color Blocking 101

Apply the two pieces of tape to your nail.  You want the two corners to meet in the middle and barely touch.  Make sure you use the smooth sides of the tape and not the ridged edge where you tore it off…unless you’re not doing puzzles and you’re going for that look.  Smooth the tape down with another finger nail to make sure there are no air pockets underneath where polish might seep.  Then carefully apply your darker color over your light one.  While your nail polish is still tacky and not fully dry begin sloooowly peeling the tape off.  Wait until your polish is fully dry before moving on to the next step.

Nail Polish Dotting

Grab your favorite dotting tool and bottle of polish.  I use the cheapo dotting tools from Amazon {and love them!} but be warned they take a few weeks to ship.  Right now they are selling for $1.86 shipped but the price could always change.  You could also use a toothpick or a mechanical pencil.  For this dotting technique I chose a wider end than I usually use.

Taking your brush from your bottle of polish dab some out on your work surface.  I always use the back of a magazine I have laying around.  Screw the lid on quickly and dip your dotting tool in the polish and then on your nail.  Don’t wait too long because the polish gets tacky and hard to work with when it’s drying.  Apply one dot of your darker color onto the square of the lighter color polish.  Repeat with the other light colored square.

Nail Tool Dotting

Repeat with your lighter color on top of your darker color.  As you can tell by this picture the paint is thick and bubbled up – that’s okay!  Once it’s dry it will be flat and look perfectly like a puzzle piece.  Just be careful not to touch your nails for a while because it will take a little longer to dry this way.  You can also add a top coat to help seal your manicure after your polish dries.

I think that’s it!  If you got a little polish on your fingers you can remove that with nail polish remover.  I find that an old art paint brush dipped into acetone works great for scrubbing off those pesky stray smudges of polish.

If you try out these puzzle nails I would love to see the results!  Please email them to me or share them on Instagram with the tag #EmbracingBeauty so I can see it.

Happy Painting!

Color Block Puzzle Nail Art with Sally Hansen #IHeartMyNailArt #cbias

 *This post has been sponsored by Social Fabric and Sally Hansen but all opinions remain my own. Full disclosure is at the bottom of the post.

DIY Puzzle Piece Nail Art

I have what some would call an obsession.  I’m a nail polish fanatic.  Hoarder even.  I’m too embarrassed to show you just how many nail polish bottles I actually own.  I love experimenting with nail designs and adding a fun splash of color to my nails to accentuate my outfit.

I’ve been eager to try a new design so I set a date, invited friends, and went shopping at Walgreens.  They have the biggest selection of Sally Hansen products that I’ve ever seen!  I was impressed.  I tried to think of what colors I had at home and which ones would be good to buy to match those.  I decided to let my daughter pick out which ones she wanted and I would make it work.  She loved picking them out and holding a few as we went through the store.  You can check out my entire Walgreens shopping trip to see all of the great varieties of Sally Hansen nail polish…and more pictures of my little girl!

Sally Hansen Nail Polish Stand

My little basket was full to the brim with everything I needed to host an excellent manicure party, that is, except for nail design tape.  I knew I could order some online but I wanted it quicker than that.  I searched up and down the isles but I couldn’t find what I was looking for.  I wanted to do color block nail art and to do it neatly I wanted tape.  Scotch tape works but I wanted the good stuff.  I asked a Walgreens associate if she knew if where I could find some.  She immediately stopped what she was doing and joined me in my search.  We could both picture it but we couldn’t find it.  She found some thin craft tape that we thought might fit the bill.  I’m happy to report that it worked wonderfully.  If you’re store is ever out of nail design tape (or you just can’t find it) check the craft isle!

When I got to the check out the cashier told me about two $5 coupons I could have used on my purchase if I had only gone to Coupons.com.  Being a teacher of couponing I felt like smacking myself on my head.  Even though I missed out on the coupons, I did get the 2/$5 deal w/ 1,000 points added to my Walgreens Balance Rewards Card (3/31-4/27).

If you have a smart phone, I recommend downloading their app to your phone.  They have several different handy services they offer including bar-code scanner, coupons, and you can keep track of your Balance Rewards right on your phone.  I really racked up on the reward points during this trip!

Sally Hansen Nail Polish

I had simple snacks for our “block party” so that we could eat while painting our nails.  Yep, you can tell I’m experienced at this!!  We had gummy bears, popcorn, and a few other little goodies.

DIY Puzzle Nail Art

The nail designs were so much fun to experiment with.  I wanted to get brave enough to do a complicated design like a stained glass window or a bunch of bricks each with a different color.  I decided to mix it up a little and do puzzle piece nail art.  Not too complicated but still kind of classy.

DIY Striped Nail Art

This simple stripe design was made using our craft tape.  It held strong enough not to let the paint bleed through but not strong enough to pull off the original color.

Sally Hansen Stripes

Here is a diagonal stripe with the most amazing sparkle polish over top!  Trust me, this photo doesn’t begin to show it’s beauty.

Here are a few simple steps that I think make for a great at home manicure:

  1. Trim, file, buff, & push back cuticles.  Buffing might seem like a waste of time but it will help your nail polish last longer!
  2. Apply a base coat.
  3. Apply your base color of choice.  I recommend starting with your lightest shade.
  4. Allow to fully dry.  This could take a while so I usually add a quick drying top coat here so I can get to designing my nails (the fun stuff) right away.
  5. Apply tape and paint the remaining areas.
  6. If you’re doing the puzzle design that I did, take a dotting tool (or a toothpick) and dip it into the polish and then onto your nail on the  opposite color.  Repeat with each square.
  7. Apply a top coat.
  8. Take a picture and post it on Instagram with the tag #EmbracingBeauty so I can see it.  (Really, I want to see!)

I had a great time and I hope you enjoyed reading about my latest nail art adventure.

If you end up catching the “color block bug” feel free to share your art with Sally Hansen on Facebook for a chance to win some great prizes.  Check out the Pinterest Party Walgreens and Sally Hansen are hosting where you could win a year’s supply of Sally Hansen!  You can always purchase Sally Hansen in Walgreens stores but did you know that you can also get it online?  It’s true, you can!  You can also connect with Sally Hansen on Twitter and Walgreens on Twitter.

*UPDATE! I have posted a step by step Puzzle Nail Art Tutorial here for those interested!*

What’s a nail design you would like to try?

*Disclaimer – I am a member of the Collective Bias®  Social Fabric® Community.  This shop has been compensated as part of a social shopper insights study for Collective Bias®  and COTY #cbias #SocialFabric.