Summer Saving Tips: How to Holiday on a Shoestring

How to Holiday on a Shoestring

If you want to get away this summer, but don’t fancy spending a fortune – fear not! There are plenty of ways to vacation (or holiday if you want to sound fancy) on a shoestring, so take a look at these money-saving tips.

Pay with a low interest credit card

These days, many people pay for flights and accommodation electronically – be it online or over the phone. If you do this, however, remember to use a low rate credit card to make the transaction as this will keep your borrowing costs down. You’ll accrue less interest if you fail to pay back the total sum on time and should be able to clear your outgoings quicker.

Shop around for the best deal

With the economy in a fragile situation, a significant number of holiday companies have slashed their prices in a bid for business. There are some pretty great deals out there at the moment, so always shop around for the best offers. Compare hotel prices online, look for low budget packages and see if you can visit your dream destination on the cheap. Of course, if it seems too good to be true it might just be, so read all the terms and conditions before booking.

Fly off peak

If you’re willing to fly off peak, you might be able to get a reduced airfare. Prices tend to drop during unsociable hours, so be as flexible as you can with your travel times. Look for early morning or late night flights if possible and don’t be afraid to book outgoing and return flights with different providers. What’s more, you’re likely to get a better deal during winter, so if you can delay your summer break by a month or two you could make a significant saving.

Think about your commute

Getting to an airport or port is one thing, but paying for the commute is another. Public transport is not always cheap, so think about booking a rail ticket in advance or searching around for the most affordable taxi company. If you have friends or relatives living nearby, ask if they can help or convince your siblings to drive if they have a license. Getting a lift could save you a lot of money and will help you avoid high airport parking fees.

If you’ve not been away for a while, it can be tempting to take out a loan or apply for a credit card in order to fund your trip, but there’s no need to rack up additional debt if you don’t have to.

Vanessa Williams’ Skincare Revitalistic

Vanessa Williams Revitalistic Skincare


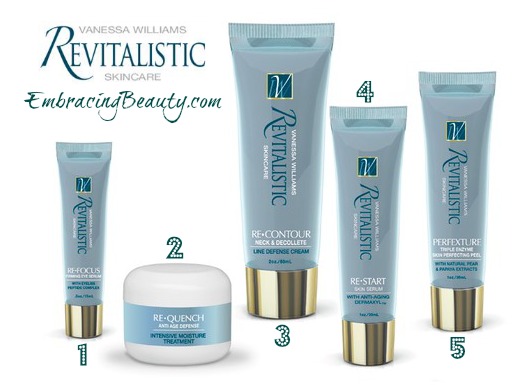
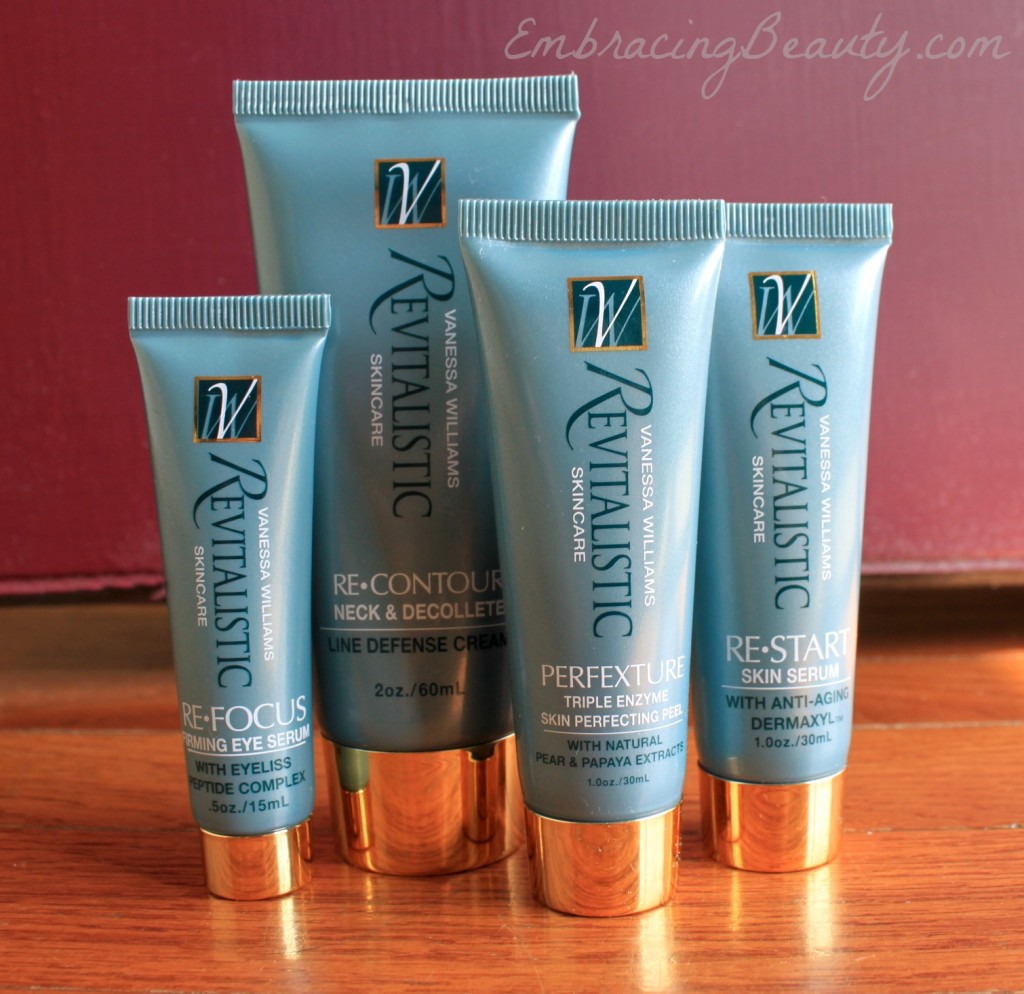
I was first given the opportunity to review Vanessa William’s Revitalistic SkinCare set two months ago.  I spent over a month reviewing each of the products because I want to thoroughly review a product before promoting it.  After one week of trying the products, I knew I would love them.  By the end of the month, I was already placing orders for a few of the items with my own money.  This is a great set!

To begin with I was a little skeptical because anytime a celebrity puts their name on something I’m extra critical.  I don’t really know why but that’s how my mind works.  Also, I knew that just because Vanessa Williams is amazingly beautiful that these products aren’t what made her that way and they weren’t going to turn me into the next super model.  I was realistic and even a bit negative to begin with.  These products had to be really tremendous to change my mind and they did!

Vanessa Williams Eye Serum

1.) RE-FOCUS Firming Eye Cream

This is an extremely light-weight, almost runny eye cream.  You can wear it day and night without having to worry about putting too much product on and having your make up cake up.  While I liked that about it I wanted a little something more substantial at night.  I guess I’m just used to the thicker creams.  At night I would follow my skin care regimen as normal, pat the eye cream on, and then dab a little Vaseline over top of it to seal it in for the night.  In the morning my eyes would feel so hydrated.  I loved it!

2.) RE-QUENCH Anti-Age Defense

This is a great product!  I feel bad that I don’t have a picture to show you the texture but the truth is I used it all. I did.  I loved it and it’s definitely one of the products I’ll keep buying.  It’s lightweight but not too light and it moisturized wonderfully.

Vanessa Williams Neck and Decollete Cream

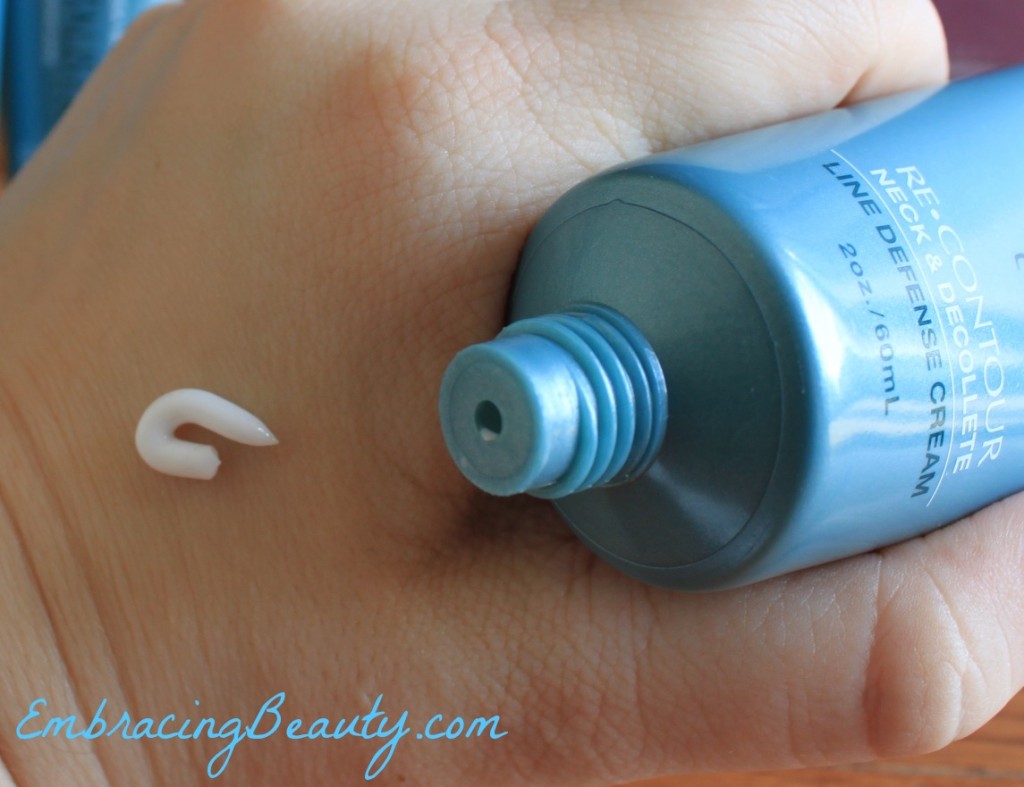
3.) RE-CONTOUR Neck & Decollete Cream

I love a great decollete cream!  I usually use my regular moisturizer over my neck but I use a specialized cream for the area just below my neck, along my collar bone.  This is a thicker cream that feels great on.  I recommend it to everyone because no one wants to have a pretty face and a wrinkly neck.

Vanessa Williams Skincare Skin Serum

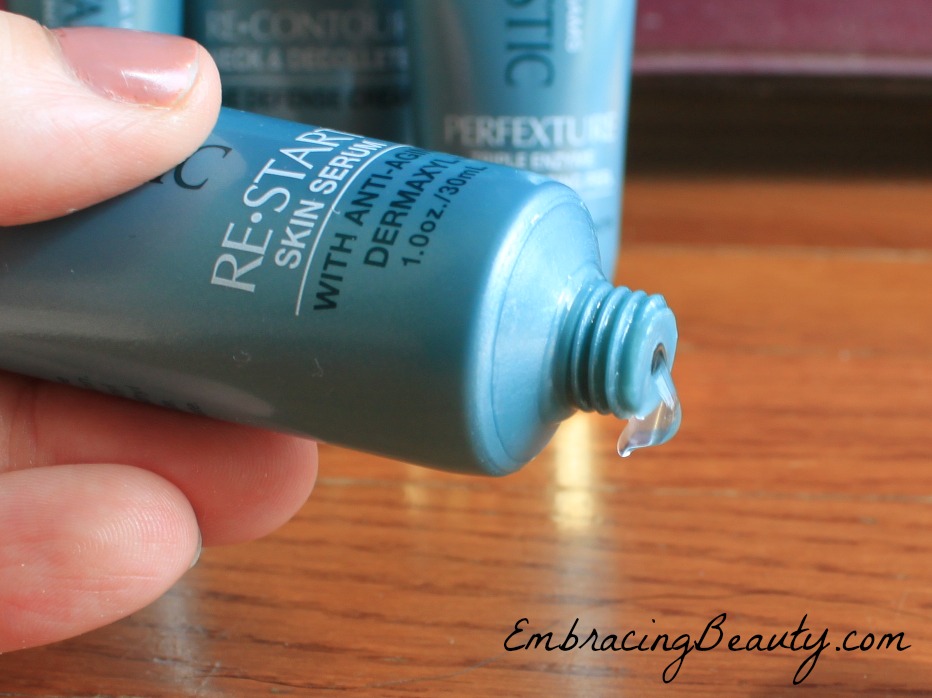
4.) RE-START Skin Serum

I have a love/hate relationship with this product.  Serums are great concentrated products that deliver a lot of bang for your buck however, I’ve never seen a serum quite like this before!  It’s a very greasy feeling product which I didn’t enjoy but by the time it was rubbed it into my skin it wasn’t greasy anymore.  It’s like magic!  All in all, I like this product and would probably buy again.

Vanessa Williams Skin Perfecting Peel

5.) PERFEXTURE Triple Enzyme Skin Perfecting Peel

Last but not least, we have PERFEXTURE, the set’s peel.  THIS. IS. AMAZING!  It’s truly a wonderful product.  The directions say to leave it on for three minutes and then wash it off.  I put it on while in the shower because I wanted a way to wash all the little granules off thoroughly without getting any in my eyes and without overflowing the bathroom sink with water.  I may have left it on a little longer than three minutes but when I washed it off my skin felt brand new.  It sloughs off the old dead skin on top leaving smooth skin underneath.  Once I dried off I applied the other products on top to seal in the moisture and keep my skin feeling soft.  I will be stocking up on this product, there’s no doubt about it!

Vanessa Williams Skincare

This set of skin care products has my approval.  If you’d like to try it out for yourself you can buy it right now on QVC for $52 + shipping.

Until next time,

Have a beautiful day!!

Under Eye Issues: How To Use Concealer and Color Corrector Correctly

How to Use Concealer & Color Corrector Correctly

Most of us have some type of under eye issues. The most common problems include bags or dark circles under the eyes. Contrary to popular belief, these ‘dark circles’ are not always black or brown in color, although this can certainly be the case. Some ‘dark circles’ can be blue, red, pinkish, or even purple in color. It usually depends on your skin tone, and just how long you have been without sleep or have been really stressed out. But what do you do about these problems? How can you fix them so you don’t look like a zombie? The answer is simple. You use concealer and color corrector. Today we are going to show you how you can use either of these nifty tools correctly.

Color Corrector

Before you begin, you need to know just a few things about the color basics. First, the color green will neutralize red, so people who have a lot of redness on their face should use a green corrector before adding their foundation or concealer. Lighter skin tones will be the ones who benefit the most with these types of correctors. Darker skin tones have hyper-pigmentation and discoloration. They need oranges and bisques. Sallow skin will need a lavender or lilac type of corrector to brighten the skin.

Remember that darker skin tones will need darker tones, and lighter skin tones need lighter tones. It’s very simple. A little bit of trial and error will show you what the exact perfect shade for you is.

Using a color corrector is actually very simple. Simply apply a dab of the corrector on your skin- in this case, beneath the eyes, and rub in. Make sure you rub it in completely so that you don’t come out with a fake, caked on look. That’s it! Done!

When looking for a concealer, you need to find one that matches your natural skin tone- just like if you were searching for foundation or powder. A concealer should work to ‘conceal’ your blemishes and dark circles so that your skin appears even, smooth, and youthful looking. It should not look caked on, overly tan, super pale, etc. Remember that natural is beautiful, so pick a color that works best with your skin tone- whether that be light or dark.

You use concealer just like color corrector. Apply a bit to the area where you need it, and rub it in. It’s actually very simple to use, it’s the part about finding the right shade that tends to be so difficult.

Proper Way To Apply

There is a set order when applying your face makeups, and if you do not adhere to this strict order, you will not be able to come up with the natural looking desired results. So, for your convenience, we have listed them out in the correct order so that you can be sure to achieve that perfect look you have been trying to hard to get.

1 Color Corrector
2 Concealer
3 Foundation
4 Powder
5 Bronzer (if using)
6 Blush (if using)

You do not have to feel as though you must use all six face makeups. Some people will only be using foundation and powder, while others may actually be using all six. It all depends on your personal preference, and the look you are trying to achieve.

I hope that you found this to be insightful, and that you now understand how to get rid of those dark circles under your eyes…the correct way. Have something to tell us? Do you have tips or tricks, or a favorite product you like using? Let us know all about it in the comments below! We can’t wait to hear what you have to say!

Author Bio: Amanda is a skincare fanatic and the author of SkincareHQ.org which recently featured an article on The Best Foundation For Oily Skin. Aside from skincare, Amanda loves to travel and dreams of one day going to Italy. If you have any questions or comments for Amanda, feel free to reach out to her @Skincare_HQ on Twitter!

Disney’s Toy Story Zing ‘Ems Review

Toy Story Zing Ems

When Disney contacted me to review one of their latest toys I jumped at the chance.  When I got the package in the mail I was a little puzzled by what exactly Zing ‘Ems were.  After playing around with the toy myself I quickly found out why they were called that….they zip, ride, and zing along!  Disney phrases it much better though, they say,

“Zing ‘Ems are an action-packed, completely new way to play with everyone’s favorite Toy Story characters, and the Rocket Rumble playset is one of Buzz Lightyear’s most action-filled adventures yet. The galaxy’s greatest Space Ranger needs your help to take on Zurg (figure sold separately). Use the attack launcher to send Buzz zinging and zooming around the playset, crashing through the deadly Zurgbot and tumbling through the treacherous asteroid field. Succeed, and it’s time to take on Zurg! Will you break through the obstacles and save the day? Or will you be defeated by the asteroid field and Zurgbot? Includes play set and 1 exclusive Buzz Lightyear Zing’ems figure. Collect all your favorite Zing’ems figures, each sold separately.”

Buzz Lightyear Zing Toy

Check out how cute Buzz Lightyear is!


Baby with Toy Story Zing Ems

My little girl loved playing with all of the pieces but she especially loved Woody.  He’s always been my favorite too!


Baby and Toy Story Zing Ems

While she’s not big enough yet to pull the lever back that sends them flying (as you’ll see demonstrated in a video later on) she enjoyed pushing the button that made them jump from spot to spot and of course she loved driving them around the track herself.  And around the entire house.  I don’t mind though, I love these little guys.


Woody and Buzz Zing 'Ems

Check em out!  Woody and Buzz, the best of friends!  Each figure rolled easily along with just the slightest push and they always popped back up to standing position.  They kind of remind me of the old Weebles I played with as a kid but better because these roll!

I made a quick  YouTube video to show you exactly how the Toy Story Zing ‘Ems works.  I hope you enjoy this short little YouTube Toy Story Zing ‘Ems demonstration!

You can purchase Toy Story Rocket Rumble Playset & Figure Assortment set for yourself your kids at Amazon.com.  Right now they are selling for $21.99 but as you know, prices could change at anytime!

Nielsen Homescan: Now Accepting Applications!

Nielsen Homescan has opened up new opportunities in hundreds of new zip codes nationwide. Go here to Nielsen Homescan to fill out a brief survey to see if you’re one of the lucky ones who qualify. If you do, you’ll be sent a scanner and you’ll earn points for recording your store purchases. With each shopping trip you scan items you’ll earn more points that are redeemable from their huge gift catalog.  Some readers have reported earning some great items but I won’t list them because reward items may change at any time.  Plus, if you’re accepted you’ll also be entered in a drawing to win $500!

Here are a few of the details:

  • It’s absolutely free to join! If you ever decide to stop participating, you’ll have a postage paid envelope to return the scanner. You are never obligated to participate.
  • Scanner comes with USB cable, instruction manual and installation disc. Once you’ve installed the disc and followed the simple set up directions you’re ready to get going.
  • Keep the scanner handy to scan your purchases as you bring them in the house.
  • Once a week, hook your scanner up to the computer using the USB cable. The data will automatically be uploaded. Voila! It’s that simple!
  • I’ve heard that you could expect to spend 30-45 minutes on average PER MONTH scanning items and uploading data.
  • You’ll earn 3,000-6,000 points on average per month which obviously depends on how much shopping you do. Gift catalog items start at around 9,000 points.

If you’ve participated in the Nielsen Homescan program I would love to hear your thoughts!

Piggy Paint – Non-Toxic Nail Polish & Giveaway Ends 4/9/13

I’m so very excited that I don’t really know where to begin.  I guess I’ll start at the beginning!  Mom Central asked me if I wanted to participate in a campaign they were hosting for Piggy Paint.  I jumped at the chance because 1) I love nail polish, 2) I love Piggy Paint nail polish!

Piggy Paint Colors

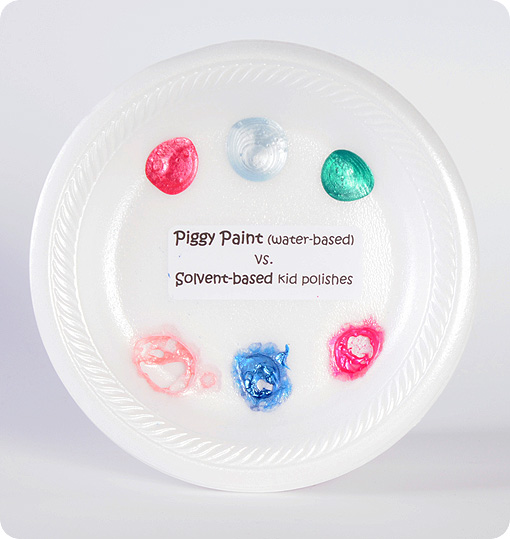
If you haven’t heard of Piggy Paint nail polish let me tell you all about it.  It’s incredible!  It was made by moms for moms.  Once upon a time, a mom was painting her daughters nails on a styrofoam plate and she noticed that the nail polish that spilled on the plate actually ate through the plate.  It was at that time that she decided to research nail polish and make her own nail polish for her kids.  That lady was Melanie Hurley and her nail polish is Piggy Paint.

Piggy Paint vs Solvent Nail Polish

Piggy Paint is a water-based polish that is specially formulated of natural ingredients. Finally, a kid-friendly, pregnant-mama polish!  They say it’s as natural as mud!  It is free of formaldehyde, toluene, phthalates, biphenyl A, ethyl acetate and acetone…and it’s made in the USA!  Check out their cute new spring colors:

Piggy Paint

(From left to right)  Girls Rule, Forever Fancy, Dragon Tears, Tea Party for Two, Sometimes Sweet, Jazz it Up, Ice Cream Dream, & Mac-n-Cheese Please.  Aren’t those cute names?  Speaking of cute…check out my little girl!

Cuteness Nailed!

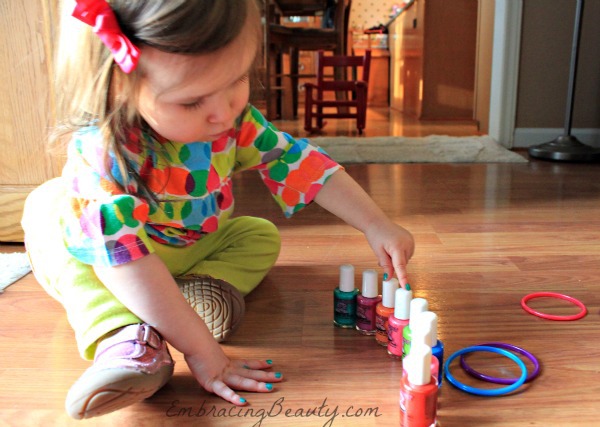
I think she’s cute but I might be more than a bit biased.  She loved having her nails painted!  I was worried because I’ve never painted them before.  We played with the bottles all week and worked on her colors with them.  (So far she can say them all except orange!)  Then on Saturday I got my hair dryer out and sat in the floor.  She sat in her little red rocking chair and held perfectly still while I painted each nail.  Then I held her hand and sang the ABC song twice while I blew her nails dry.  The song and hair dryer helped keep her distracted and she was happy the whole time.  I occasionally blew it in her face and she liked that.  Then we painted the other hand and repeated the drying process.  Perfect nails without a smudge!  The bottle recommends two coats but one coat covered well and I didn’t want to press my luck.

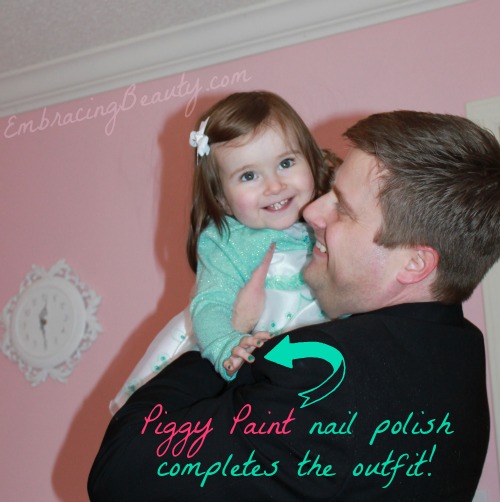
Piggy Paint Completes the Outfit

Here’s a picture of my little princess with her Daddy.  Her nail polish matched her Easter dress perfectly and everyone at church commented on her nails.  I was surprised how well the nail polish stayed on considering it’s a water-based polish.  It stayed on for two good days before it began chipping at all which is all I would expect anyway.  I think there’s going to be a lot of fingernail painting in our future…and I’m excited about it!

Want to buy?

You can buy Piggy Paint at Walmart and at PiggyPaint.com. To save 15% off your order enter “PiggyFun” at checkout.  This code expires April 30, 2013.

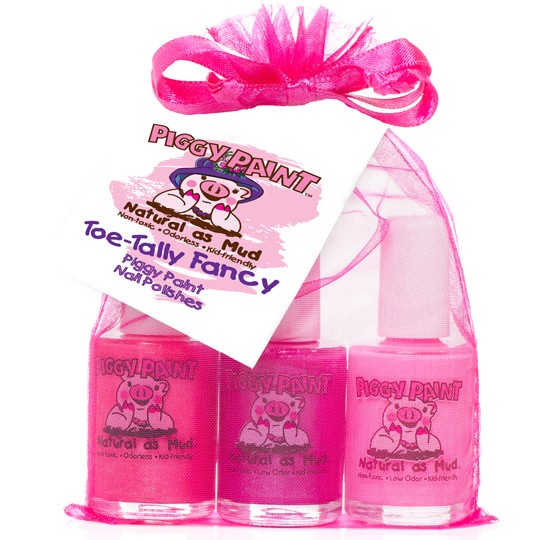
Toe-Tally Nail Polish Set

Want to win?

I have one “Toe-Tally Fancy” 3 polish set to giveaway to one lucky reader.  This is a $24.99 value!  Enter via the Rafflecopter code below.  Winners must be 18 years or older and from the continental United States.  Good luck!
a Rafflecopter giveaway

I participated in a campaign on behalf of Mom Central Consulting for Piggy Paint. I received a product sample to facilitate my review and a promotional item to thank me for participating.

KidKraft Kitchen Review

Why We Love Our KidKraft Kitchen

When my husband and I decided to buy my little girl a kitchen for Christmas last year, I didn’t know it then but, I had my work cut out for me.  There are dozens, probably hundreds of models to choose from.  There are wooden ones, plastic ones, non-gender ones, girly ones, ones with grills attached, and ones with seating attached.  There are kitchens that transition with age.  There are some that offer a lot of storage and some that have very little.  Some come with electronic sounds and some have old fashion knobs that click when you turn them.  The options were overwhelming!!!  Don’t get me started on accessories.  You know?  The play food, plates, blenders, toasters, dish towels, aprons…Ahhh!!!

From the picture above you can tell that I did finally decide on a kitchen.  It took weeks of researching and weighing the pros and cons.  This was the only big present we got her for Christmas and we only gave a few small other gifts so we shelled out the money for a new, fancy pants, wooden, KidKraft kitchen.  We love it!  Absolutely love it!

Because I’ve posted pictures with my daughter playing with her kitchen on Instagram and on Facebook I’ve had probably a dozen or so people ask me where I got it.  Requests keep coming in so today I decided to write a post and tell everyone about the kitchen we bought and why we love it.  For disclosure, I was not paid by any company to write about this product but I have included my affiliate links in this post so I can maybe buy a coffee with the proceeds from people who buy through my link.  It won’t cost anyone a penny more!

Now, here’s the kitchen I bought.  It’s called the KidKraft Uptown Espresso Kitchen.

Why I like it:

  1. It’s wooden and built well so it will last.  Plus, it’s heavy enough that it won’t fall over on her (but it does come with wall brackets just in case!).
  2. It doesn’t take batteries so there’s no need to replace them and no annoying noises.
  3. It’s non-gender so if we have a son later down the road he can play with it too (I know boys play with pink things all the time but I figure why plan for it when it can be avoided?).
  4. It’s attractive enough to have in our living room without looking like an eyesore.
  5. It’s not a primary color and it doesn’t have to have matching accessories to look nice (Things like that bother me. Maybe I’m the only one!).
  6. The sink was removable for cleaning. Nice bonus!
  7. It had a towel rack and pegs for hanging towels or utensils (What can I say? I like details!).
  8. It has a chalk board on the freezer and a water dispenser in the fridge.
  9. The fridge has a shelf inside so you can put two large baskets inside to hold food.
  10. The oven has a slide out cookie sheet that is removable (Two levels of storage inside!).
  11. The dishwasher’s shelf is removable too (Two levels of storage inside!).
  12. There is a detachable phone on the side of the fridge.
  13. There is a small amount of counter space for food prep.
  14. There is space behind the sink for accessory storage (We have a toaster and salt and pepper there).
  15. There is a shelf above the sink for extra storage.
  16. The sink head rotates and the handle moves up and down.
  17. The stove and range knobs click when you turn them but that’s all the noise this kitchen makes.
  18. The oven doors open to the left and the dishwasher to the right so you can play in both at once.
  19. My daughter (who was 18 months when we bought it) can play with the lower parts now and the upper areas when she gets older.  This will be a toy she can play with for a long time.

To buy it:

If you’re interested in buying this KidKraft Uptown Espresso Kitchen you can buy it online at Amazon.com.  I bought mine from Walmart.com but they’re currently sold out of this kitchen at the moment.

The accessories:

KidKraft Cookware Set

We chose to go with different pots and pans but if you are wanting to hang utensils on the pegs in the back of this kitchen, this KidKraft Cookware Set is the only one with handles wide enough to fit.  It’s on sale right now at Walmart.com for $20.34 but keep in mind that those prices could change.


Step 2 Cookware Set

We have the Step2 Cooking Essentials 10-piece Stainless Steal Set.  It’s adorable!  I love that I she could really cook with them later on and we can throw them in the dishwasher when they’re dirty.  Isn’t the little stock pot just adorable?  We hung the two pot holders from the pegs in the kitchen and store the other pots and pans in the dishwasher when not being used.  Amazon.com currently sells this set for $29.77 + Free Super Saver Shipping.


Play Food

I bought plastic play food so it would be quieter play than if I had chosen wooden food.  It’s much cheaper too!  You can read about how I got a great deal on my play food at Aldi here.


Kidkraft Play Dishes

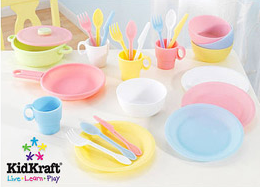
I hope to buy these plastic KidKraft play dishes soon for my daughter’s second birthday.  Walmart.com has them on sale right now for $15 and Amazon.com for $18.48 but the prices are always fluctuating.

6 Month Update: We still love our kitchen and recently reviewed out KidKraft Baking Set if you want to check that out here.

Well, I think that’s it!  I hope I gave you enough information without boring you to tears.  If you have any questions at all please feel free to ask!

Dazzle Dry Nail Polish & Easter Egg Nails

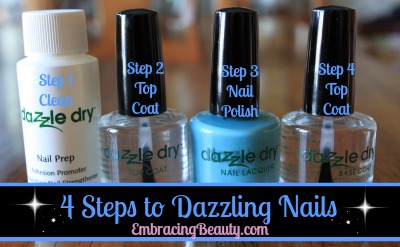
4 Steps to Dazzling Nails

If you’ve never tried Dazzle Dry’s 4 steps to dazzling nails then you are missing out!  It delivers a glorious shine that lasts and lasts as long as  your nail polish does.

Step 1 – Nail Prep gently cleans and conditions your nails.

Step 2 – Top Coat dries in 2 minutes flat and helps your nail color stay put for the long haul.

Step 3 – Nail Polish goes on smoothly in just one coat but the bottle recommends two.

Step 4 – Top Coat goes on and dries in a breeze leaving you with shiny, gorgeous, dazzling nails!


Dazzle Dry Nail Polish

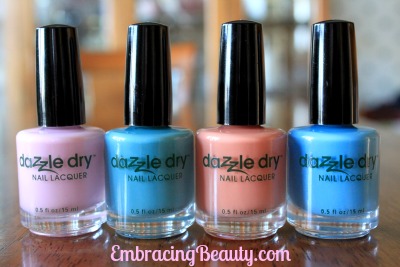
Check out these four new beautiful spring colors Dazzle Dry just came out with.  Aren’t they lovely?


Dazzle Dry

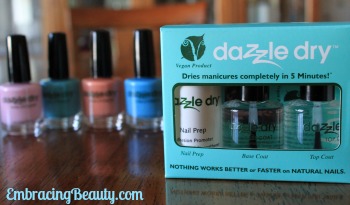
Dazzle Dry says that they’ll dry manicures completely in 5 minutes and it’s true!  It takes longer than 5 minutes for all the steps and for the painting itself but once painted they dry very fast.


Base Coat Tip

I’ve used Dazzle Dry for years ever since my mom bought be my first set.  When I received this set in the mail, compliments of Dazzle Dry, I noticed that the base coat looked different than it usually did.  I thought it was just a new formula but as I was reading the small instruction booklet that came with it I found out that my base coat had actually turned to gel in the cold weather.  I’m glad I had read about it before trying to apply it like that!  The weather should be turning warm soon but I just wanted to post this and warn anyone who may be purchasing these in the future and who may receive a gelled base coat in the mail.  It’s a simple fix, all I had to do was soak it in warm water for just a few minutes and it turned back to liquid again.


Easter Egg Nails

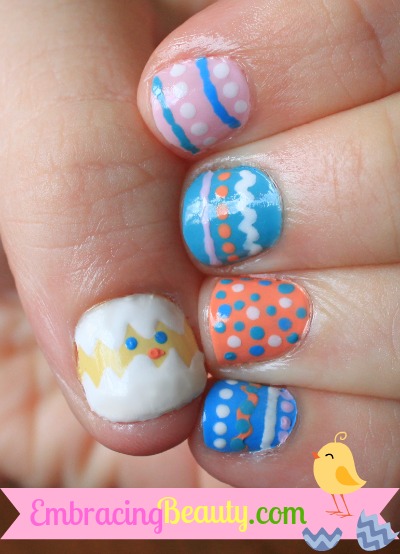
Check out these Easter egg nails I painted in celebration of spring!  For the full step by step tutorial you can visit Shore Savings with Patti.

All in all, I highly recommend this set to anyone who is serious about beautiful nails.  It holds the color for a long time and the shine is unsurpassed!

The Rising Popularity of Gowns for Rent

Rent the Runway

Most people like to be elegantly dressed on their wedding day but the cost of wedding gowns are such that many couples opt to get a beautiful gown for rent rather than actually purchasing it. If you are looking for a budget wedding renting a gown can save a lot of extra expenses on your wedding. The cost effectiveness is certainly the reason for the rising popularity of gowns for rent. However one need to look at the pros and cons or leasing a wedding gown.

Without a question, the number one cause to consider leasing a marriage dress is the cost. It will definitely be a more reasonable choice than buying a similar gown. For some brides, the idea of spending additional cash for a dress to be used one time is just too hard to stomach. Renting a gown could furthermore be a good option for a bride who likes to wear two gowns for her marriage instead of just one. This is a very common practice among the couples in Asia, where brides may wear customary attire for their wedding ceremony and then swap to a white American style marriage dress for the greeting or for pictures.

Some brides also like the idea of renting a bridal gown for a destination marriage so they do not have to deal with inconvenience of carrying large number of dresses on a plane. This is particularly popular amidst Vegas brides. All they have to do is load their bridal jewelry sets and grab their fiancé on their way to the plane. In detail, there are even some locations which offer one halt shopping: tuxedo rental, wedding gown rental, and marriage venue all rolled into one.

Although the rising popularity of gowns for rent is a growing phenomenon couples need to look at the other aspect. Rental dress mostly comes in standard sizes so there is much the likelihood that may not fit you well. Some rental services offers modifications but with additional charges. You may have to settle on a dress that is alright, rather than having the experience of wearing your dream wedding gown.

Not every bride will be joyous with that. One of the few other things that a couple considers before renting a gown is the condition of the wedding dress. It will not be emblem new when it comes to you, so there is always the possibility that it may not be flawless. Furthermore there is always a thought in your in brain that you must return the wedding gown in the condition in which you had received it. If somebody spills a glass of red wine on your gown, you will end up paying extra amount.

Don’t overlook the sentimental facets of marriage gowns either. For many brides, their marriage gowns, bridal jewelry sets and veils become cherished mementos from their weddings; would it make you miserable not to have your bridal gown to someday pass down to your female child? The rising popularity of gowns for rent can be a very practical reason for most but, obviously it is not a good idea for every bride.

Saving for a Better Future with #MassMutual

Ever since I was a little kid I knew how to work hard and save for what I wanted.  I can explicitly remember cleaning family members houses  to earn money for a new Barbie doll.  In elementary school they encouraged us to open a savings account and we could add our money to it each week by bringing it to our teacher.  It was fun to see that money add up over time and the more it grew the more I wanted to contribute to it.  It was a great feeling of accomplishment for a small child.

When I was in high school I got my first job and I made $6.50 an hour.  It was a great job just starting out and there was opportunity to earn more through incentives.  I worked hard and earned over $12 an hour.  I gave my tithes out of each paycheck and the rest of that money went into a savings account.  I didn’t spend even a penny on anything for myself.  After I graduated I bought a laptop with the money I had saved and the rest of that money went toward my tuition.

Fast forward a few years and now I’m married and a mom to a beautiful little girl.  My husband has a good job that has allowed me to stay at home.  We’re so grateful for his job!  For several years now I’ve been blogging and that has helped bring in an extra income while staying at home and caring for my family.  It’s a win-win!  It’s something I love doing and it feels great to be able to contribute to the family’s finances a bit.

A few years after we were married we went through Dave Ramsey’s Financial Peace University together and we absolutely loved it.  It has transformed the way we think about money and it has enabled us to make wise financial decisions together.  We not only want to have our needs provided for in the here and now but we also want to plan for our future.

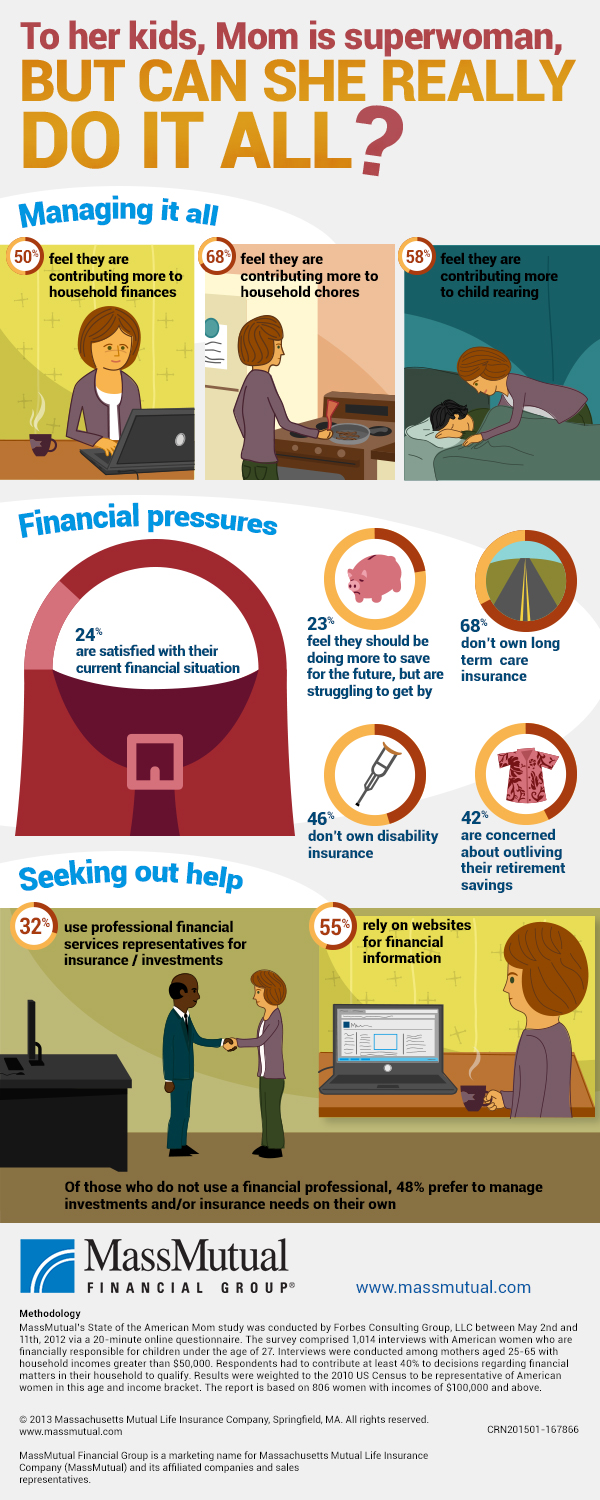
A new research study, MassMutual’s State of the American Mom, found that many moms have strong hopes and convictions about providing financially for their families, but given the multiple demands of the life of a mom, many also find it hard to achieve.  I think we can all relate to that, right?  College savings, saving for retirement, managing day-to-day expenses and educating yourself and children all rank as top priorities, yet some moms shared that they may feel overwhelmed about ways to start thinking about all of them.

Mom Research Study Infographic

My husband and I are doing our best to plan for our future.  We’ve agreed to cut back on certain budget areas like clothing, vacations, and entertainment until we get to the financial state we want to be.  We have been putting money into retirement regularly now for a good number of years.  We have life insurance policies set up for each of us just in case.  We don’t have a college savings plan for our kid(s) yet but we’re waiting a while to start that until we get to where we want to be financially.

As busy parents it’s easy to focus on the immediate and put off thinking about the future until it’s too late.  It’s far better to be prepared than to be hurting later.  MassMutual has created a handy new quiz to help moms start thinking about their financial future and gives them tips on how they can take small steps to plan for their financial futures.

Take the Quiz


I took the quiz and it labeled me as a “successful planner,” and I think that’s a fair assessment.  I feel fairly optimistic about our financial situation but it’s always a good idea to revisit our plans every year.

Where are you at financially?  What steps are you taking to ensure a financially secure future?

If you are seeking guidance concerning your financial state, MassMutual has a family finances page with some helpful resources for financial planning, ideas for teaching your kids about money, and even how to find a financial professional in your area.  You can also like MassMutual on Facebook and follow MassMutual on Twitter.


I wrote this post as participation in in a blog tour for Mom Central on behalf of MassMutual and received compensation in the form of an Amazon gift code to thank me for taking the time to participate.