Chef Boyardee: Think Outside Of The Can

Chef Boyardee

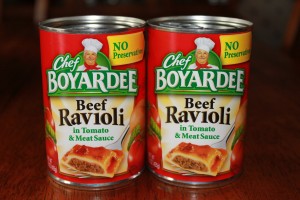
As a kid I LOVED Chef Boyardee.  I loved their pizza (still do!) and occasionally I got their ravioli as a special treat for dinner.  Even though I now have kids of my own I still enjoy their food.  As a busy mom, who likes simple, healthy meals I was excited when when Mom Central asked me to be a part of their latest Chef Boyardee campaign.


They sent me a huge box full of items to help me prepare a Chef Boyardee party.  It included a a bunch of colorful nesting mixing bowls, a Curious Chef measure and prep kit, Le Creuset bakeware, Chef Boyardee coupons and some fun Chef Boyardee brand goodies (matching aprons, a chef’s hat, & notepads).  We had just about all we needed for a great dinner party!


Chef Boyardee Recipe

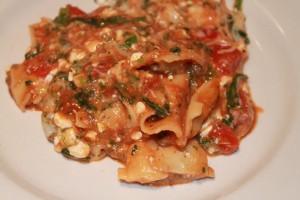
 In one dish we made the Ravioli Lasagna.


Chef Boyardee

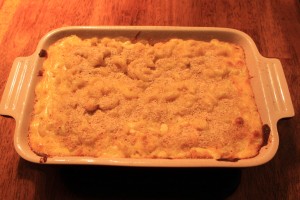
In the other we made my own creation.  It was Chef Boyardee’s Beefaroni covered with my favorite baked macaroni and cheese recipe.  It was yummy!


I have to say that I love Chef Boyardee recipes because they are so simple to make!  Both recipes were a huge hit with everyone who was over that night and I know my family can’t wait to try some of the other Chef Boyardee recipes.


Enter to Win FREE Groceries for a Year!  Here’s how:


Enter the Make it Boyardeelicious Recipe Contest on the Chef Boyardee Facebook page for a chance to win a grand prize of free groceries for a year.


Now through March 11, 2012, submit an original recipe that uses Chef Boyardee as an ingredient (anything your mind can dream up!), upload a photo of your recipe, and about share why your family loves it.  Each week there will be a winner chosen based on creativity, all-family appeal, ease of preparation, and palatable appeal by an expert of panel judges.Those winners will get $500 as well $75 in Chef Boyardee coupons. If you don’t win one week,  you can re-enter again the next week.  At the end of the promotion one of the 10 weekly winners will win the GRAND prize – free groceries for a year! I don’t know about you, but I would LOVE to win free groceries for a year!!!!  The winner will be chosen based on taste points and votes.


The voting period lasts March 26-April 8, 2012. Don’t forget to check back to vote because voters get entered into a daily sweepstakes for the chance to win $100


For more information, visit www.chefboyardee.com. You can also find Chef Boyardee on Facebook. {Don’t forget to follow Embracing Beauty on Facebook too!}


“I wrote this review while participating in a In Home Party campaign by Mom Central Consulting  on behalf of Chef Boyardee and received product samples to facilitate my party and review, and a promotional item to thank me for participating.”

2K Two-Channel Thermocouple With Alarm

Well, the people at ThermoWorks have done it again…they got me to write another blog post!  I have enjoyed my Thermapen so much that I was thrilled with the opportunity to review another product and the TW8060 two-channel thermocouple was another winner.


As I mentioned in my Thermapen review I have been reading some great grilling tips on www.amazingribs.com.  A key underlying theme of this grilling blog by Craig “Meathead” Goldwyn is the importance of a fast, reliable meat thermometer and an accurate grill/oven thermometer.  The Thermapen proved to be an exceptional meat thermometer, both incredibly fast and accurate to within less than 1 degree F.  However, as many uses as the Thermapen has, it is not meant to be used as a grill/oven thermometer or as a leave-in thermometer.  But the people at ThermoWorks have these areas covered with the TW8060.


The TW8060 is a 2-channel thermocouple alarm thermometer that works with a large variety of K type probes sold by ThermoWorks.  What does this mean exactly?  Well the TW8060 isn’t like the Thermapen where the probe, thermometer, and display are combined into one piece.  The TW8060 is the thermometer and display (and other functions) and the probes are detachable and interchangeable.  ThermoWorks sells hundreds of different types of probes you can choose from depending on the intended use.  You can use up to two probes at once and monitor the temperatures of each on the display.  As an example, you could use the smokehouse probe as a leave in thermometer to measure the temperature of a thick cut of meat such as a brisket or ham and then use another probe like the crocodile clip probe to measure the temperature of your grill, smoker, or oven.  Each of these probes has a thin wire that connects to the TW8060 so you can leave the door shut while monitoring the temperatures.  Right now ThermoWorks is offering a bundled deal with these two popular probes that is $30 cheaper than what you’d pay for the TW8060 and the probes separately.  Take a look at how many degrees my grill thermometer was off.  121 degrees can make a big difference when grilling!  Not only can the grill’s thermometer be off but also that it is at the top of the grill and the meat is much lower.  The thermometer probably isn’t really off by that much, it’s a combination of the location and an inferior thermometer.


TW0860

The TW8060 does more than just display the current temperature of the two probes connected to it.  It also will keep track of the minimum and maximum temperatures for each probe as long as they are plugged into the thermometer (even if the thermometer is powered off).  One example of the usefulness of this functionality is cold weather grilling/smoking.  You want to know the highest temperature that your meat has reached to avoid overcooking (meat does not “uncook” but a cold breeze when you open the lid to check the meat could make the temperature drop so you want to know the highest temperature that has been achieved).  Also on channel 1 (whichever probe you have in the left-most plug is channel 1) you have the capability of setting an alarm for a range of temperatures so you can be alerted when either your meat has reached its desired “doneness” or if your cooker has left the set temperature threshold and the heat needs to be adjusted.  In addition to this you also have the option of using Fahrenheit or Celsius and there is a back light that you can use when lighting is poor.TW0806 

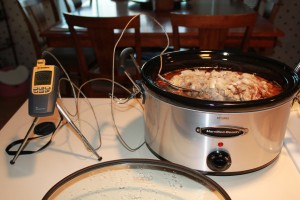
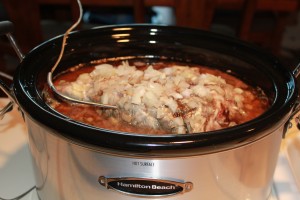
There are hundreds of probes to choose from so there are hundreds of different uses for the TW8060.  I had the smokehouse probe and the crocodile clip probe and found several uses for just these two.  The first test for mine was a Boston Butt for some eastern Carolina style pork BBQ.  The weather was not cooperative so I used a slow cooker.  I only used the smokehouse probe since the slow cooker temperature is fairly stable and there isn’t much I could do about it anyhow.  I inserted the probe into the center of the meat, staying away from the bone, covered it, and plugged the probe into the TW8060.  I set an alarm for 180F and the alarm went off a little over 8 hours.  The leave in probe is great for monitoring the meat as it was cooking but the probe can only measure the temperature in one location so after the alarm sounded I used the Thermapen to check the temperature in other locations to make sure that it was done.  Then I shredded the  pork and splashed on some sauce and enjoyed!


Boston Butt


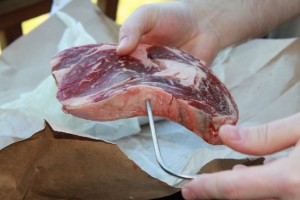
Next up was something you might not expect would utilize a tool like this, thick ribeyes.  I like to use Meathead’s technique for cooking thick steaks that he calls a “reverse sear”.  As the name implies, it is backward of how steaks are probably most often prepared in back yards.  Check out the link for the details and great information in general but the general gist is you start the steaks off on indirect low heat and then when it is up to 110F-115F or so (depending how done you want it) you move it over to high heat to sear at the end.  It really makes some unbelievably good steaks but it does rely on temperatures.


Grilling Steaks

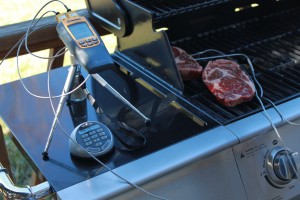
I used my crocodile clip at the beginning to maintain the 225F grill temperature for the low and slow step.  It was pretty windy so I stayed by it the whole time and kept tweaking my dials to maintain the 225F.  The TW8060 was perfect for this!  With the exception of my flip, I was able to keep that lid shut (and the heat in!) the whole time.  I actually used the smokehouse probe in this step as well to get a rough idea of when to flip and when to move over for the sear.Steak

The smokehouse probe isn’t really the best for this as it is designed more for large cuts of meat and the width of the probe was a bit much for the ribeye probably (this isn’t a criticism, I was using a probe for something it wasn’t really intended)  but it worked just fine.


Searing steaks


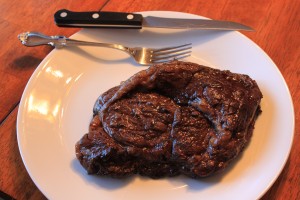
I took it out for the searing but it gave me a pretty good idea of when to move through the different steps without having to open the lid.  I did check with the Thermapen to confirm these temps and used only the Thermapen during the searing stage.  I would say that both probes worked great.  I will also say Meathead knows his stuff!  Great steaks–try it!


Great steaks


I’ve been really into sourdough breads lately.  I bought some sourdough starters from www.sourdo.com and it has been a really fun hobby.  I’d recommend trying it out for some delicious breads and pizzas that use naturally fermented yeasts.  It is a bit of work though activating your culture for use and it is another area of cooking in which almost every step involves temperature.  Once again, the TW8060 came through.  The first step is to activate your yeast and the flavorings and amounts of leavening are dependent on time and temperature.


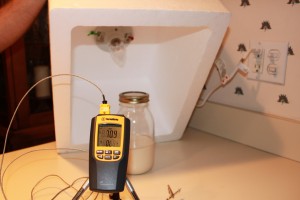
Yeast Proofing Box


I built a proofing box [pictured above] designed and described by Dr. Ed Wood in his book, Classic Sourdoughs (I’d recommend the book highly if you want to get into baking with sourdough).  The box is basically just a styrofoam cooler with a 25 watt bulb on the inside and a dimmer switch connected to it.  I added the TW8060 to this design to make it even better!  Now I can not only see the temperature inside the box without lifting it up, I can even set alarms to alert me when the temperature inside goes out of range so I don’t have to keep checking it.  It was really a helpful addition to Dr. Wood’s design.  The Thermapen was useful for checking the temperature of the water that I added to the yeast when feeding it and then the TW8060 plays another role in the actual baking, monitoring the temperature of the oven.


Pizza


The only thing I didn’t really use it for was for pizza baking.  I bake pizzas on a quarter inch thick sheet of steel to simulate the science going on in a wood fire oven (a cool tip I found from Modernist Cuisine).  I can use the TW8060 to measure the temperature in the oven but I’d really need an infrared thermometer to check the temperature of the steel sheet.  Of course, ThermoWorks sells those too!  I haven’t tried one yet but I’m loving this company and have no doubt that they work well and are of high quality.


The last use I had was one that certainly wasn’t planned for.  While playing around with it after I first got it for this review I noticed my oven wasn’t getting above 250F even when it was cranked up.  I thought something must be wrong with my TW8060 but after I tried to bake some rolls later that day I found that the problem was my oven!  My bake element had died on me.  I was able to fix it though and test the accuracy of my oven with the new element.  And, repaired oven or not, this is a great use for the TW8060–oven calibration.  Our oven does not have digital oven temperature control so for us it’s not really even an issue of calibration, it’s more essential since eyeballing the temperature dial is pretty hard to do very accurately.  We pretty much use it every time we use our oven.


All in all, I am very happy with the TW8060.  I’m also quite happy with this company.  I have called them anonymously and they have been incredibly friendly and helpful.  And they just make good, quality products.  If I had one complaint, it would be the relatively short battery life of 10 hours.  And that isn’t really a complaint that I had an issue with since I have yet to change my batteries since I got it, and I have used it a lot to test it out for this review in the past couple of weeks.  I think it would only be an issue if you were doing overnight smoking or something but for day-to-day use, it has been my experience that 10 hours is more than it sounds like.  If you were going to use it for smoking I would recommend getting some rechargeable batteries and having 2 sets to rotate in and out.  The other thing I would add to the wish list would be an alarm for both channels but at this point I’m really just getting spoiled!  I’m incredibly excited to have this and my Thermapen and I am already super pumped to use them both on my Easter ham…and bring on those holiday turkeys next season!  OK, back to Ashley again…I only write about awesome thermometers!

The Venerable Turkey Sandwich: 5 Terrific Turkey Recipes

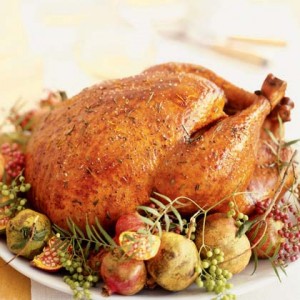
turkey


Aside from Thanksgiving, turkey doesn’t get a whole lot of media coverage. Most people look forward to filling their bellies with tender, moist turkey and stuffing (or dressing) on Turkey Day. But once the holiday is over, they are typically ‘turkeyed’ out. The thought of preparing another turkey months later or, worse, creating new twists on leftover turkey can seem almost unbearable. The trick, however, to eating turkey throughout the year is simple: transform it into irresistible turkey recipes.


If you’re looking for ways to turn ordinary turkey into something that makes your taste buds melt, check out the following turkey recipes. Whether you use leftover turkey or the deli cuts, you’ll be amazed what can be done to the traditional turkey sandwich. From avocado and cranberries, to artichoke hearts and green olives, to fresh basil and spinach, there are all sorts of creative ways to spruce up turkey.


1) Santa Fe Turkey Sandwich
Servings: 1


Ingredients
2 slices whole grain bread, toasted
1 Tbsp. Kraft chipotle-flavored reduced-fat mayonnaise
6 slices deli turkey breast
1 slice Colby Jack cheese
1/4 avocado, thinly sliced
1 lettuce leaf
1 thin red onion slice


Directions
Spread toast slices with mayonnaise.
Fill with remaining ingredients.


2) Leftover Turkey Sandwich
Servings: 4


Ingredients
1 round bread loaf (1 lb.)
1/4 cup mayonnaise
1/2 cup dried cranberries
1/2 lb. leftover cooked turkey breast, sliced
1 cup shredded mozzarella cheese
1/4 cup thinly sliced onions
2 cups lightly packed baby spinach leaves


Directions
Heat oven to 400°F.
Cut 1/2-inch-thick slice off top of bread loaf; set aside. Remove center of loaf, leaving 1/2-inch-
thick shell. Reserve removed bread for making croutons or another use.
Spread inside of bread shell with mayo. Fill with layers of remaining ingredients; cover with top
of bread. Wrap in foil.
Bake 30 minutes or until sandwich is heated through and cheese is melted. Let stand 10
minutes before cutting to serve.


3) Tuscan Turkey Wrap
Servings: 2


Ingredients
2 whole wheat tortillas (8 inch)
2 Tbsp. cream cheese
12 slices deli turkey breast
1/2 cup thinly sliced cucumbers
1 carrot, shredded
2 Tbsp. Shredded Italian Cheese Blend
2 Tbsp. Kraft Tuscan House Italian Dressing and Marinade


Directions
Spread tortillas with cream cheese.
Top with remaining ingredients; roll up.


4) Turkey and Vegetable Focaccia Sandwich
Servings: 8


Ingredients
1 can (14 oz.) artichoke hearts, drained, coarsely chopped
1 red pepper, chopped
1 cucumber, chopped (about 3/4 cup)
1/3 cup stuffed green olives, chopped
1/3 cup Kraft Tuscan House Italian Dressing and Marinade
1 focaccia bread (10 inch), split
2 pkgs. Hillshire Farm Oven-Roasted Turkey Breast
5 mozzarella cheese slices


Directions
Combine first 5 ingredients.

Fill bread halves with layers of half the turkey, vegetable mixture, remaining turkey and cheese.


5) Turkey Bruschetta Panini
Servings: 1


Ingredients
2 slices Italian bread
4 slices deli turkey breast
1 slice mozzarella cheese slice
2 fresh basil leaves
2 thin tomato slices
1 Tbsp. mayonnaise


Directions
Heat panini grill.
Fill bread slices with turkey, cheese, basil and tomatoes.
Spread outside of sandwich with mayo.
Grill 3 minutes or until golden brown.

Blueberry and Lemon Cream Parfait Recipe

This is one of the few diabetic diet recipes I know that is super delicious and super easy!  Let me know if you like it and if you have any recipes you would like to share with our readers.
Blueberry and Lemon Cream Parfait Recipe

Serves 4


Ingredients:

  • 6 oz. low-fat, vanilla yogurt sweetened with low-calorie sweetener
  • 4 oz. fat-free cream cheese
  • 1 tsp. honey
  • 2 tsp. freshly grated lemon zest
  • 3 c. fresh blueberries, rinse and drain well


Directions:

  1. Drain liquid from the yogurt. In a medium bowl, combine the yogurt, cream cheese and honey.
  2. Using an electric mixer, beat at high speed until the yogurt mixture is light and creamy.
  3. Stir in the lemon zest.
  4. Layer the lemon cream and blueberries in dessert dishes.


Note:  If not serving immediately, cover and refrigerate.


Nutritional information per serving: Calories 125, Protein 7 g, Carbohydrate 22 g, Total fat 1 g, Monounsaturated fat 2 g, Cholesterol 3 mg, Sodium 180 mg, Fiber 3 g

Weight Watchers points: 2

How to Store Pantry Food & Maximum Shelf Life

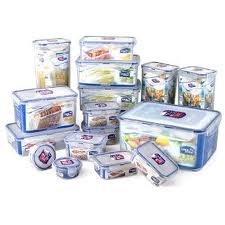
Lock & Lock
I’m sure we’re all aware of the benefits of a well-stocked pantry.  It’s essential for menu planning organization, it helps maintain a diet full of real foods, and saves you a lot money by allowing you to stock up on foods when they hit their rock bottom price.  (See our printable price list).


But if food is not stored properly it spoils and loses all value.  That is why it is imperative to know the proper way to store pantry food & maximum shelf life.


The food wasted in the average North American kitchen is enormous.  Way too much food (and money) are being thrown away!  The numbers are shameful.  Is your kitchen contributing to the problem?  If so, I have some suggestions to help you save more and throw away less.


Food spoilage occurs when:

  • Food is low quality and/or damaged when purchased.
  • Food items are old, older, and embarrassingly old!
  • Food is stored incorrectly, allowing for contamination to occur.


What damages food? Air. Heat. Cold. Light. Moisture. Smells. Tiny critters.  Any of these factors could damage your hard-earned food but they can be prevented!


Ever since I discovered my entire stockpile overtaken with mice I have taken no chances with my pantry items.  I kept my overflowing stockpile in our garage.  What was I thinking?  I had two tables stacked on top of one another and a blanket between the two and flowing down the back so they wouldn’t get scratched.  We had dozens of tiny little mice in just about everything.  It was so painful to throw away garbage bags of food.  Thankfully, we have learned our lesson and now keep all food indoors.


I didn’t just stop at bringing food items indoors.  In my home items are rarely left in their initial packaging and great care is taken to store them properly.  I have became a fan of Lock & Lock bins and glass jars for storage.  I don’t consider plastic bags or cardboard boxes effective for long term food storage.  Thankfully we don’t have any rodents in our home but if we did it would be no problem for them to gnaw through cardboard.   All dry ingredients need to live in a hard container like glass, hard plastic or metal and I use a combination of all three.  These containers also help combat against moisture and air.


Here is what I do personally but you may have a different solution that works well for you.


Glass Jars

Most of my dry pantry items are stored in glass jars. So are a lot of fridge and freezer items, for that matter. They are a great option because they are inexpensive, recyclable, and airtight.


Food I store in glass jars: Tea bags, grains, legumes, seeds, nuts, dried herbs, pasta and more.


Plastic Storage Containers

My favorite storage container of choice is Lock & Lock.  They are durable, airtight, and come in a variety of shapes and sizes to fit any food item.  Some friends I know prefer Tupperware because they have a lifetime guarantee.  Now, don’t quote me on that!  This is just hearsay from my friends. : )


I label the outside of my containers with a cutout from the original package and cover with scotch tape.  It’s not ultra classy but it gets the job done.


Food I store in Plastic Containers: Flours, sugars, cereal, pasta, chocolate, crackers, bread crumbs, oatmeal, pancake mix, and more.


Tins

Tins are ideal for containing small, easily scattered items like nuts or yeast packets. Tins also offer a dry, dark, and airtight space.  The obvious drawback to tins is that you can’t see what is inside and I rarely use tins for food for this reason.  For me, what’s out of site is out of mind with me and I’m not careful enough to make sure items don’t spoil.


Foods/items I store in tins: Coffee, dried chilies, yeast, gelatin, and more.


Pantry Items to Store in the Freezer

Several foods can be kept in the freezer to extend storage life, especially during the humid months.

  • Flours
  • Nuts
  • Spices – especially ground spices
  • Grains such as wheat germ and flax
  • Seeds – sunflower, sesame, etc
  • Vitamins (I don’t know if the freezer preserves them any better but it’s what my grandma always told me)


I’ve read that ground spices keep their condition and quality best when stored in an airtight container in the freezer.


Food for Thought: Share Your Bounty with Others

When so many people live daily around us with so little, we’re fortunate to have a stocked pantry.  Don’t forget to share your extras with local shelters, food banks, or churches to help feed those in need around you.


Is there anything wasting away in your pantry right now?


Free Food on the Table Menu Planning Service


Right now you can use the coupon code FEBFREE to get a free lifelong subscription to Food on the Table Menu Planning Service!  Absolutely free, how awesome is that?


Thanks, reader Amy for the heads up!

Bunk Beds Are Not Just a Utility Anymore

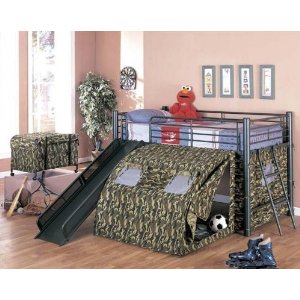
bunk bed

Twin bunk bed with a tent and a slide.  From Amazon on sale for  $979.02 $437.45  & Free Shipping!

There are two things that seem to be true about how we all live, regardless of where we are, how we got there, or what we do to stay there. We all seem to greatly enjoy a good comfortable night sleep, and we all enjoy having the most amount of space we can in the limited areas we occupy.


One of the challenges that we sometimes run into is the problem that arises when we combine these two ideas. There are a number of circumstances that we run into such as when we go off to collage, we need to consolidate space, or the economy has forced us to adjust how we are living. We often will need to reduce the contents of the area that we are living in, and in order to do this some people have found that using bunk beds is a great option that allows them to get the most out of their space, but still have a good bed.


The trouble with this idea is that for many people the concept of bunk beds is something that is just for children. We don’t think of bunk beds as being something that is comfortable, we think of them as a utility to solve a problem. They work well to ensure that your children have their own space, that a large group of people, such as campers or soldiers have a place to sleep, or a guest has a bed rather then the couch.


The truth is however, we are actually living in a time of amazing possibilities and you may be surprised to learn that bunk beds have come a long way. You can now find them fitted with highly comfortable mattresses, large frames, and they even offer expandable options.


Futon bunk beds  may seem like a fairly new invention to match our contemporary high speed society, but this is far from the truth. Although you may be able to think of how they could have easily evolved through the needs of military or utility functions, the age of some of the first bunk beds may completely surprise you. There are some experts who have claimed that the first of these beds were crafted in ancient Egypt.


There are now some wonderful things you can do with bunk beds. For example, you can now get bunk beds that can have the addition of a desk, a set of drawers, shelving, or even a closet like space. The sky seems to be the limit and when it comes to just the simple flexibility of the stand alone bunk beds they can offer you even more. If you run into a situation where you may need multiple beds but in separate areas, buying two beds can be expensive. But, most bunk beds are able to detach and separate to create a number of additional options.


When it comes time to consider whether or not you need bunk beds, remember they are not just a handy way of reducing size, but also an investment into conquering the needs of the future.

*Hot!* Get UPS My Choice for FREE!


I cannot tell you how much I love this freebie!  A while ago I signed up for UPS My Choice Alerts because I thought it might come in handy every once in a while.  I am receiving messages about once a week or at least every other week and it is so nice to know when packages are coming.  I get my UPS notice far before the company’s email telling me when it should arrive (if they send one at all).  I love this service and I really can’t believe that it’s free!


Here’s a look at the email they send:


This notice alerts you that the shipment listed below is scheduled for delivery tomorrow.


Scheduled Delivery Date: Thursday, 01/22/2012


If the scheduled delivery needs to be changed, select the Tracking Number below or log on to ups.com to request a delivery change from the tracking detail.


Shipment 1


Tracking Number: 1Z328976039776564
Shipper: MARY KAY INC.


Approximate Delivery Time: between 2:00 PM and 6:00 PM
UPS Service: UPS Ground


It’s short and sweet!  It gives me the option to change the address or to delay the shipping a few days if I’ll be out of town.  If you ever order packages, you should sign up for UPS My Choice!


This is “sponsored content” meaning that I get paid a tiny bit for everyone that signs up but I would not promote it if I didn’t use it myself.  I’ve promoted it before when I didn’t get paid a penny so you know that I honestly believe it’s a great service.

Centrum ProNutrients Review & Giveaway Ends 1/21/12

ProNutrients Centrum


Congratulations to our winner Danielle F.!

When I was growing up I loved taking my Flintstones vitamins every morning but as I got older the habit slowly faded.  When I began wanting to have a baby I began taking prenatal vitamins but after the baby (and my prescription ran out) I’ve had to switch to a different type of vitamin, an over the counter prenatal vitamin.


I always associated Centrum with One-a-Day vitamins.  In fact, I can still hear the commercial voice in my head say “Centrum One-a-Day.”  As it turns out, there are a lot more vitamins in the Centrum family than just One-a-Day!  They have a new line of dietary supplements called ProNutrients.  The line includes Omega-3, Probiotic, and a Fruit & Veggie one.


More info:

  • New ProNutrients Omega-3 provides two of the most scientifically studied Omega-3s (according to Eicosapentaenoic Acid/EPA and Docosahexaenoic Acid/DHA standards) in an ultra-concentrated MiniGel.  Since the MiniGels are smaller than the sizes of most brands’ softgels, they are easy to swallow. They help support heart health, brain structure and eye structure.*  The retail value of the 50-unit package is $12.99, and the 100-unit package is $19.99.
  • ProNutrients Fruit & Veggie each MiniTab of new harnesses the power equal to a serving of a blend of fruits and vegetables. It is 100 percent naturally sourced from grapes, blueberries, raspberries, plums, carrots and tomatoes.  Each MiniTab helps support cell protection and general health.*  The retail value for the 50-unit package is $11.99, and the 100-unit package is $19.99.
  • New ProNutrients Probiotic is a unique blended powder containing two of the most scientifically studied probiotics.  The individually wrapped packets are designed to ensure the bacteria arrive active and ready to work in the digestive tract.  ProNutrients Probiotic helps support immune health and digestive balance.*  The retail value for the 14-unit package is $18.99, and the 28-unit package is $29.99.


They also have a “Specialist” line including prenatal, vision, energy, and heart. Centrum sent me a package of their newest supplements a month or so ago so I could give them a try myself.  I can’t honestly say if my new energy came from the vitamins because it may be a result of my new exercise routine or a combination of the two.  Either way, I feel good taking vitamins that build up my immune system and help keep me as healthy as I can be!


Coupon: Centrum is offering a great $5 coupon for you to give Centrum ProNutrient vitamins a try yourself!


Giveaway: I also have a giveaway for one lucky Embracing Beauty reader!  One winner will be selected from the comments using random.org to win a Centrum ProNutrient product of their choice. This gveaway ends on Saturday,  January 21st at midnight EST. Click here to read the full giveaway rules.


To enter: Go and take a very quick Centrum survey.   It takes less than three minutes in total and there is no registration necessary.  After you enter your basic health info, it will give you simple ways to incorporate more of what you’re missing in your diet and/or lifestyle.  After you take the test, come back and tell me what is one thing that you were missing.  Each comment counts as one entry in the giveaway and the winner gets a free Centrum product of their choice.  Good luck!


Disclosure: I am participating in a Centrum ProNutrients campaign hosted by One2One Network. I received nutritional product and compensation. While all opinions stated are my own, I make no claims about Centrum ProNutrients as a product or it’s effectiveness.

Salted Caramel-Chocolate-Peanut Butter Pie Recipe

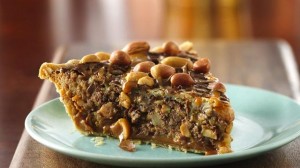
salted caramel chocolate peanut butter pie

Check out this yummy Salted Caramel-Chocolate-Peanut Butter Pie!  You will love this caramel mixture filled salted chocolate-peanut butter pie!  I found this recipe from Pillsbury and I loved it so much that I just had to share it with you.

Ingredients:


Crust
1 Pillsbury® refrigerated pie crust, softened as directed on box
Filling
1 bag (14 oz) caramels, unwrapped
1/4 cup milk
1 1/2 cups Spanish peanuts
1 can (14 oz) sweetened condensed milk
1 egg, beaten
1/3 cup peanut butter
8 oz miniature chocolate-covered peanut butter cup candies, unwrapped, chopped
Topping
1 bar (1.55 oz) milk chocolate candy, melted
1/4 cup Spanish peanuts
1/4 teaspoon kosher (coarse) salt

Directions:


  1. Heat oven to 450°F. Bake pie crust as directed on box for One-Crust Baked Shell, using 10-inch glass pie plate. Cool completely on cooling rack, about 15 minutes.
  2. Meanwhile, in medium microwavable bowl, microwave caramels and milk uncovered on High 1 to 2 minutes or until melted; stir until smooth. Reserve 2 tablespoons melted caramel. Stir 1 1/2 cups peanuts into remaining caramel. Pour caramel mixture into baked pie crust.
  3. Reduce oven temperature to 350°F. In large bowl, stir condensed milk, egg and peanut butter until smooth. Stir in chopped peanut butter cups. Pour in crust over caramel mixture. Bake 30 to 35 minutes or until filling is set. Refrigerate 1 hour. Drizzle melted candy bar and reserved caramel over top of pie. Sprinkle with 1/4 cup peanuts. Lightly sprinkle with kosher salt. Cover and refrigerate any remaining pie.


For this pie’s nutritional information {yea, right!} or for more yummy recipes, visit Pillsbury.com.