Ever since I tried my hand at nail art two years ago I’ve received numerous comments and emails asking me questions about basic nail polish techniques. How do you avoid getting it on your fingers? Do you need a top coat? How do you care for your cuticles? They are basically asking, “How do you get a perfect manicure?”
The biggest tip I can give anyone is to practice but I also want to share with you the steps I go through for the perfect manicure. I hope you’ll find this helpful and not too overwhelming! Remember, you don’t have to change everything at once. Just pick a few new tricks to add to your routine.
Step 1: Wash your nails thoroughly with soap and water to remove any dirt/oil/etc. You could also opt to soak a cotton ball in rubbing alcohol and rub over your nails to help your polish adhere better and last longer. I usually skip the alcohol but it does work!
Make sure all remnants of your old polish is removed. A nail brush {or a tooth brush} soaked in your favorite nail polish remover is a great way to scrub off stubborn polish.
Don’t forget to clean under your nails too! You could use a nail tool to clean under there in addition to using a nail brush. I don’t know about you but I’m always a bit paranoid about the dirt and germs under there!
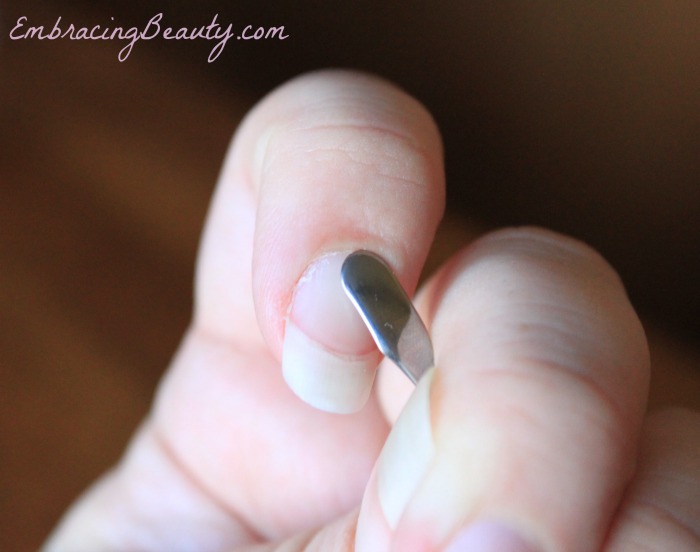
Step 2: Push back your cuticles. You can grab a cheap cuticle pusher at a number of locations. When cuticles are pushed back they leave an even surface for you to paint.
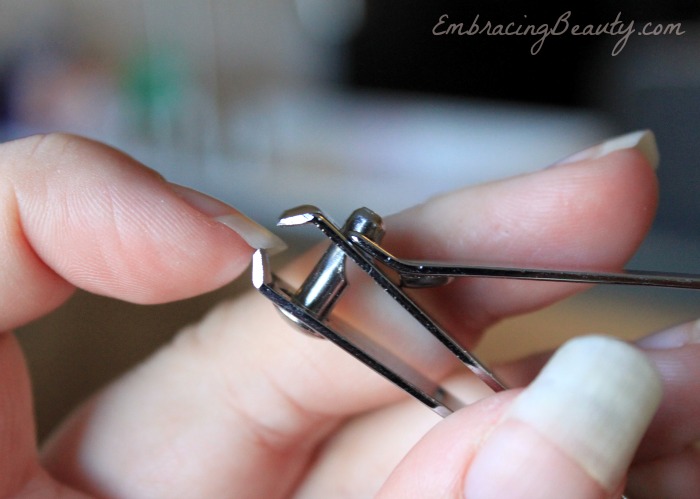
Step 3: Trim your fingernails to your desired length. Don’t worry about shaping them here, just focus on the length.
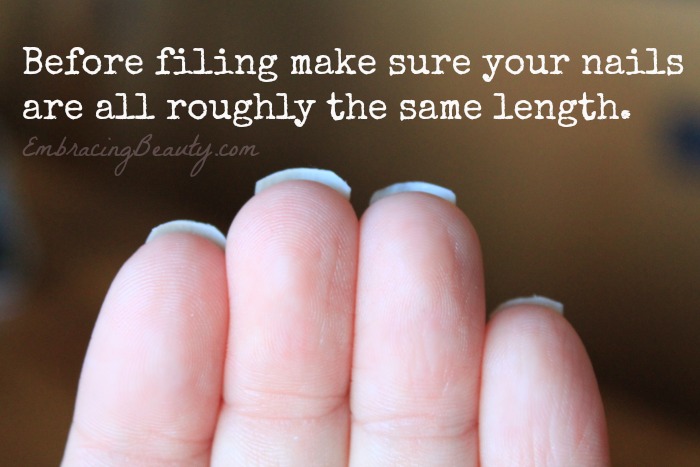
A great way to make sure your manicure ends up nice is to make sure your nails are all roughly the same length when you begin. If they’re not, clip them again or you can spend extra time filing.
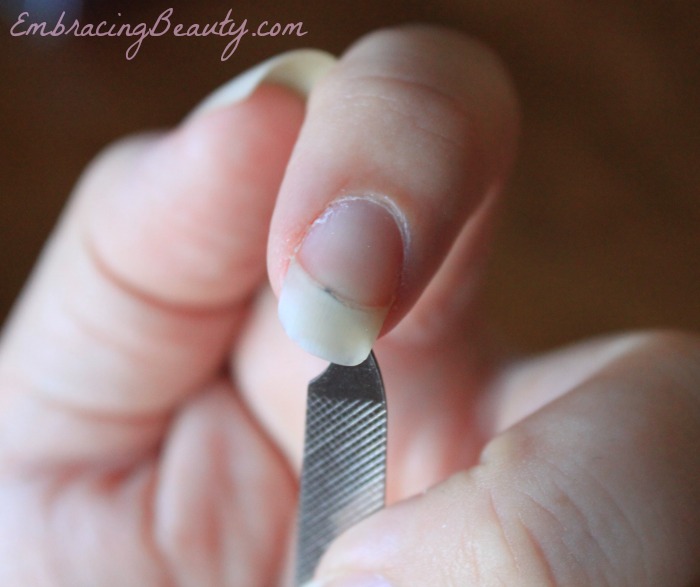
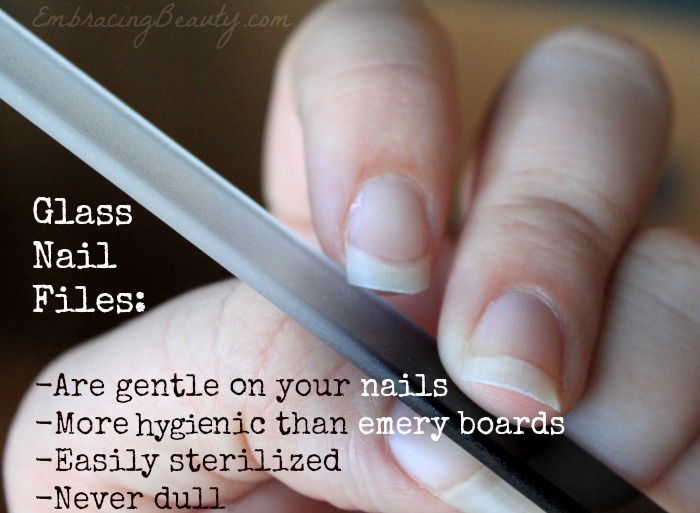
Step 4: File your nails to your desired shape. Mine are naturally square, while others are naturally round, but I try to file mine somewhere in between. If you use an old emery board file only in one direction. However, if you use a glass file you can freely file in both directions. I’m a huge fan of glass nail files because they are gentle on your nails, more hygienic than emery boards, they’re easily sterilized, they never dull, and they file quicker than emery boards.
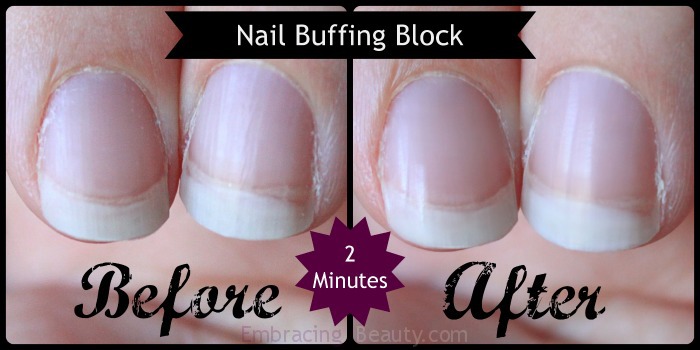
Step 5: Buff your nails. You don’t have to spend a fortune on a good buffing block. The ones at Target that are around a dollar work lovely.
Think of a buffing block like sandpaper. You don’t want to use it too often or your nails will become very thin but using it once in a while will give your nails a healthy, smooth, and youthful appearance. The buffing block I use is a foam block that has four different colored sides labeled File, Buff, Smooth, & Shine.
Side one: File – This would replace a nail file so I skip this side.
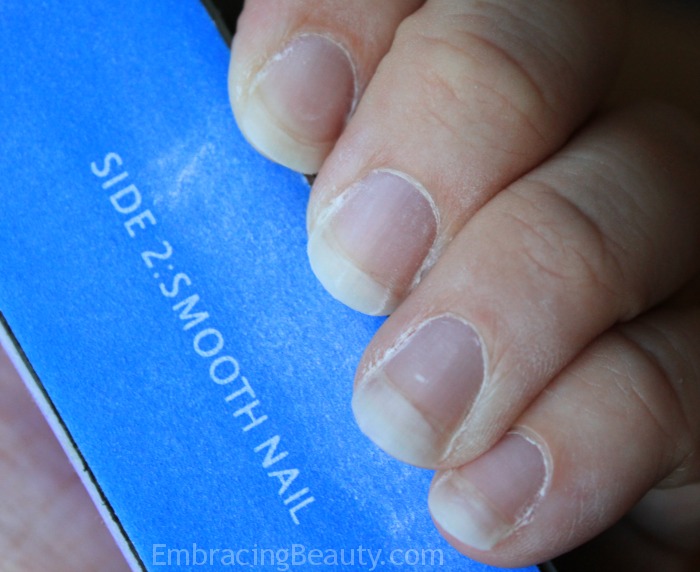
Side two: Buff – Rub this coarse side back and forth over your entire nail to help buff away ridges and peeling. Don’t be excessive on this step or you could damage your nails.
Side three: Smooth – This side uses a finer “sandpaper” to help smooth down any small imperfections the buffing left behind.
Side four: Shine – This final step will leave a beautiful shine to your nails. They’ll look gorgeous with or without polish! {If I leave my nails bare I’ll often redo this step every few days to maintain my nails’ shine.}
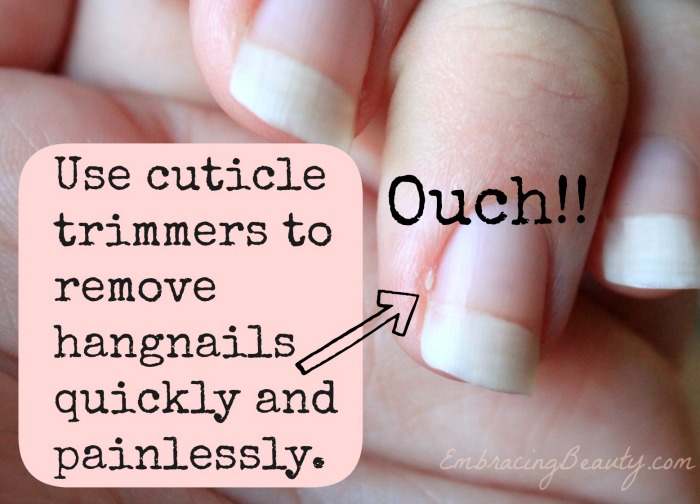
Step 6: Remove hangnails. Use cuticle trimmers to quickly and painlessly remove any hangnails you may have. This will not only leave your nails looking much nicer but also save you from the discomfort and frustration that hangnails bring.
Step 7: Apply a base coat to your nails to help your polish last longer. My current favorite is OPI’s Nail Envy but Sally Hansen’s Strong as Nails is a close second.
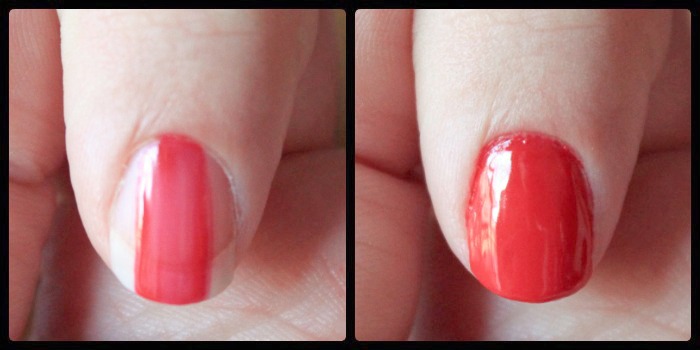
Step 8: Paint your nails. This is the fun part and is also the step that most people skip ahead to. It’s not always necessary but don’t your nails look so much nicer at this point when you take the time to do a little prep work? I think so.
When I paint my nails I start by painting one stroke down the center of my nail and then one on each side. This is what works for me and is how I’ve painted my nails since I was in grade school but that doesn’t mean it will work for you. Practice a variety of applications and soon you’ll find a technique that works for you and leaves your nail polish smooth and even.
If you have an opaque shade of polish you may need to apply a second coat.
Step 9: Add a top coat for a lasting, chip-resistant finish, and if you use the top coat I do it will leave you with a high gloss shine. I can’t say enough good things about Julep’s Polymer Top Coat. I LOVE this stuff. I’ve told Julep that if they ever stop selling it they have to tell me in advance so I can buy a lifetime supply from them. Yes, it’s that good! Allow your polish to dry for 2-3 minutes then apply Julep’s Polymer Top Coat and let set for 3-5 minutes in indoor lighting {Nothing fancy, just a regular fluorescent bulb}. Then your nails will be completely dry and smudge-proof.
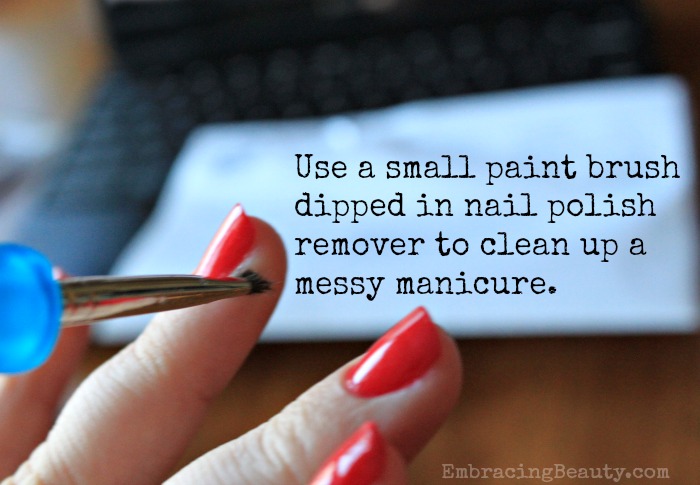
Step 10: Clean up. This is a trick I learned while going through an artsy stage in high school. Cleaning up the left over nail polish around my nail drove me nuts because nothing seemed to work. As careful as I tried to be there was always just a teensy bit of polish where I didn’t want it. Then one day the answer dawned on me! I dipped one of my smallest art brushes in nail polish remover then rubbed it on the skin around my nail. It worked wonders and I felt like a genius.
I think I’m the only one in the beauty world who doesn’t like a gap between my polish and my cuticle. I want it right up to the edge without crossing over. However, if you’re in the vast majority who like this new gap trend you could take a tiny brush and swirl it around the inside of your cuticle to give you that look.
You can pick up a brush at your local craft store for a few bucks and it will last you years and years. I’m still using that brush I first experimented with in high school and I don’t want to think about how many years ago that’s been!
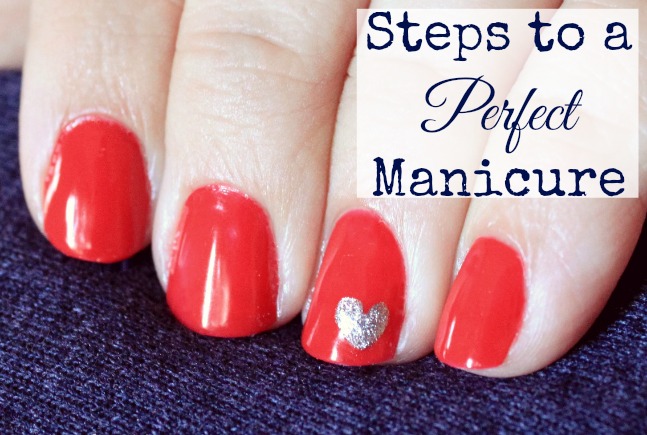
There you have it, folks! Those are the ten steps I take when I want to achieve a perfect manicure. What steps do you take when you attempt a perfect DIY manicure?





Wow! I learned so much; I’m glad I clicked over. I love the tip about the paintbrush for cleaning up the nail polish. I always make a mess on my right hand since I’m right handed.
Great tips. I have acrylics, so I get my nails done at the salon. My left hand is pretty much useless, especially when it comes to painting the nails on my right hand, so I need someone to do it for me 😉
Ah-ha! That paintbrush is a GREAT idea for cleaning up slips and spots of nail polish! Going to pick up some very very small paintbrushes the next time I’m at Michael’s for the sole purpose of my manicures!
Gorgeous! I wish my nails would grow. Totally going to look into purchasing a glass nail file! Thanks for the great tips!
I have nightmares about that cuticle pushing thing. Mine are terrible because I refuse to use one. Great tips!
I am terrible with biting my nails but I usually try to swipe some polish on them. I will have to give them some proper care and try some of these tips. Hopefully they will grow!
Thanks for the tips! I am very particular when painting my nails so I love the small brush trick.
Wow, that is a great manicure! I am never steady enough of hand to get a good manicure look like that. I need to practice more often. 🙂
Love the idea of using a small art brush to clean up the mistakes! I’m terrible about putting polish on and that sure would help make them look better.
I pinned it! This is super helpful and I really appreciate the break down by steps and tools!
Cool. It looks like you did a really nice job. (Love the tip about using a paint brush.) My problem is that nail polish never makes it a full 24 hours before it chips or peels off.
I never thought to use a small paint brush for the nail polish remover. That’s a great idea! I usually use a q-tip, but even they’re not small enough, and end up wiping some of the nail polish of the nail.
Beautiful! I love the color you chose! I always buff my nails even if I don’t polish them just because I hate those lines on them!!
Thanks for these tips! I am definitely one of those people that just cuts my nails short and then paints all over the skin around my nails too haha. I just pick it off later, but I have to be sure not to leave the house til I do that because my hands look super messy 😉
Great post.. I sooo need to take your tips and try to make my own manicure, I soo need one but hate spending the money, you made it look so simple but it turned out great, love the little heart on your nails, thanks for sharing
What an informative post on nail care. I need to take more time out to take care of my nails they are a mess.
I have always blamed being left -handed for why I make a mess when I do my own nails. Thanks for the great tutorial!
Your nails look so pretty! The hardest part for me is painting my right hand!
ok you are a genius! The nail polish remover on a small paint brush is amazing!
Great information. I am only just starting to do my nails so I can always use the tips
I wish I could stop biting my nails. If I could this would be very helpful. Your nails look great!
Thank you for sharing this. My nails are so bad. I need to spend a little more time on them.
I love doing my own nails these days. It saves so much time and money. I am the worst at painting my right hand but I have gotten way better over the years 🙂
I am so bad at doing my nails myself. I always smudge them. Thanks so much for the tutorial.
I suck at doing my own nails. I think part of it is lack of patience! But, these are great tips and I will have to give it another go!!!
These are some great tips! I have never used a glass file before, but now I want to pick one up and try it.
Thanks for the tips!!! I love painting my nails at home, so this was really helpful!
Great tips! I love the one about using a brush dipped in nail polish remover to clean up! I am sure that will help get in close without taking the polish off the nail itself!
Really great tips! I just painted my nails tonight (and you reminded me about the top coat.)
Your post made it seem as if anyone could get a perfect manicure at home. It is a skill that everyone should have in their arsenal.
Sigh. Pretty nails. Something I’ll never have. 🙁 I just cannot break my nail biting habit.
I didn’t know about the new gap trend. That’s an interesting trend. Your tips are really helpful. I do my nails at home so I love to hear what works for others.
I’m just wondering when you are going to come do my nails. LOL! I’ve never heard of a glass nail file…I will be looking for one next time I’m out though. Where do I get one? Just the regular store?
I never realized a buffer made so much difference. Thanks so much for sharing your tips!
Your nails look fantastic! I really need to keep my nails trimmed evenly. I love how yours are all the same length. 🙂
Oh I love the little brush tip! How clever! I usually use q tips but they can leave cotton behind that becomes a pain after awhile!
Great tips and I’m so jealous of your nails. I always bite mine, I need to stop!
Great tips on your tips! Couldn’t resist! LOL! Loved the cute heart.
Great tips. I need a manicure— I should give one to myself tomorrow 🙂
Nice mani!! Great tips! I need a paint brush specifically for polish. I make a huge mess 🙁
Those turned out so cute. I love the little heart!
Wow, I really need to start buffing my nails. Your before nails are beautiful compared to mine!
Very pretty. I can’t believe the difference the buffing board makes. WOW.
I love the tip about using a paintbrush dipped in nail polish remover to clean up the nails. I never thought to do that.
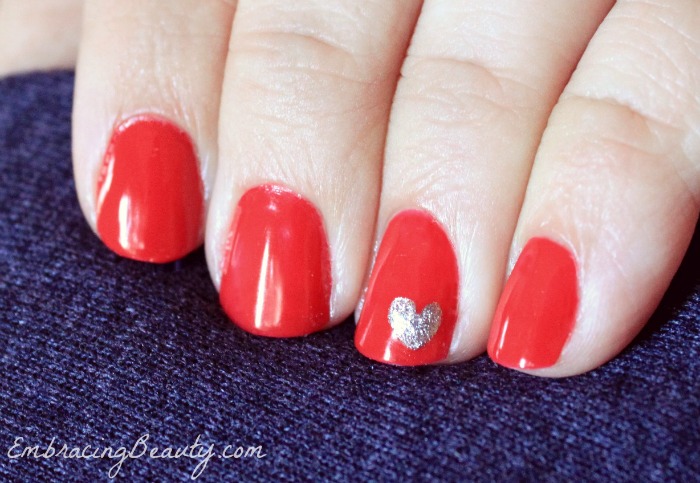
Love how easy these steps are and love the red polish with the heart! Adorable!
I WISH I could grow out my natural nails. I’m so jealous! I use acrylic, but some of these tips will still come in handy for me – like pushing back my cuticles and using a paint brush to clean up the extra polish. And these are great photos!
Wow, your nails are so long and pretty! My nails break so easily, I can’t keep a manicure for long. I have to get gel manicures!
great job, your nails look beautiful! Wish I had the time!
Your nails look beautiful. Great tips. I had no idea about the glass file.
Thanks for the tutorial!! My nails never make it to be long bad strong from all the cleaning and dishes I do!!
Thanks for the tip. I go back and forth on whether I want long or short nails. lol
They look really nice. With a toddler and a baby, it’s hard.
Shaping my nails is the hardest part of a self manicure for me.
Your nails look so pretty! Mine never look that good when I do them at home. Also love the tip about the glass file, I have one and it’s the best!
You nails look great – Great tutorial Having nice nails is a must with me! 🙂 Thanks for sharing
Thanks for the tips, I need to learn a little more patience when it comes to polish! I will try this technique!
I will have to be on the lookout for a glass file. I just use cheap ones I pick up for a buck at the drugstore, but need a longer lasting one! Your nails look so pretty!
I like that you put the before and after pictures up for the buffer block. I haven’t used one, but you’ve got me itching to get one now. 🙂
Love the buffing! I never seem to take the time for my nails.. but I’m a dental hygienist so my nails are behind gloves most of the day.. and nail polish is “unsanitary” for medical professionals. I wish they were always pretty though!! 😀
You did a beautiful job… I love the color and the heart you added too. TY!
Your nails look beautiful! I love that red shade. It’s amazing how a little bit of extra attention can make such a big difference in nails!
Your manicure looks really good! I have to get acrylic overlays on my nails. I’m so hard on them. I wish I could do them myself and have them look half as good as yours!
Such a great article! I always only do polish, and it never turns out right. LOL. I think your plain nails with the buffering look awesome!! My nails are never that long though.
What a great post. Very informative. A lot of great tips and tricks that I will be using. Great detailed pictures too!
Thank you! I’m glad you found it helpful!
I had no idea about the paint brush tip! I’ve always tried to do the cotton ball around the cuticle tool like they do in the salon and always end up with a mess.
It can be a long process to get gorgeous nails. I totally agree that a glass nail file is the better way to go over a regular emery board.
Great job with your nails!! I always forget to buff my nails when I do them. Unfortunately I don’t get to do them as much as I’d like.
I make sure to apply a top coat and base coat to make sure the nail polish lasts longer. I also liked the step by step instructions here because I was not doing some of them!
Your nails are so pretty! Mine are so brittle right now and keep breaking. I’m so ready for winter to be over!
Have you tried Nailtiques Formula 2 nail protein? It does wonders for thin, peeling, and brittle nails. I’m a huge fan.
I haven’t but thank you. I’ll definitely look for it now!
I can’t tell you how many posts i’ve read about this topic. I give up. Your nails look great though!
I’d never thought to use a glass board before. And I always have trouble around my cuticles. Thanks for the tips!
great advice! I always forget to take care of my cuticles
Thanks for the tips! I have never heard of a glass nail file! You certainly learn something new everyday!
The paint brush is a great trip for getting stray nail polish off!
Terrific tutorial! I am absolutely awful at doing my own nails, so I treat myself every 3 weeks.
I definitely needed this information, I have a terrible time doing my nails.