Letter to My Daughter – About Time

A Letter to My Daughter About Time

My Dearest Daughter,

One of the happiest days of my life was the day you were born and I can’t believe your second birthday is coming up so soon!  Your birthday will always be important to me because it’s the day I became your mother.  That’s something that nobody else but me can be.  Your ten little fingers emerged into the world that day and grabbed hold of my finger and my heart.  It seems like yesterday that you were born.

The sad truth about life is that it always goes by so fast.  James 4:14b says, “It is even a vapour, that appeareth for a little time, and then vanisheth away.”

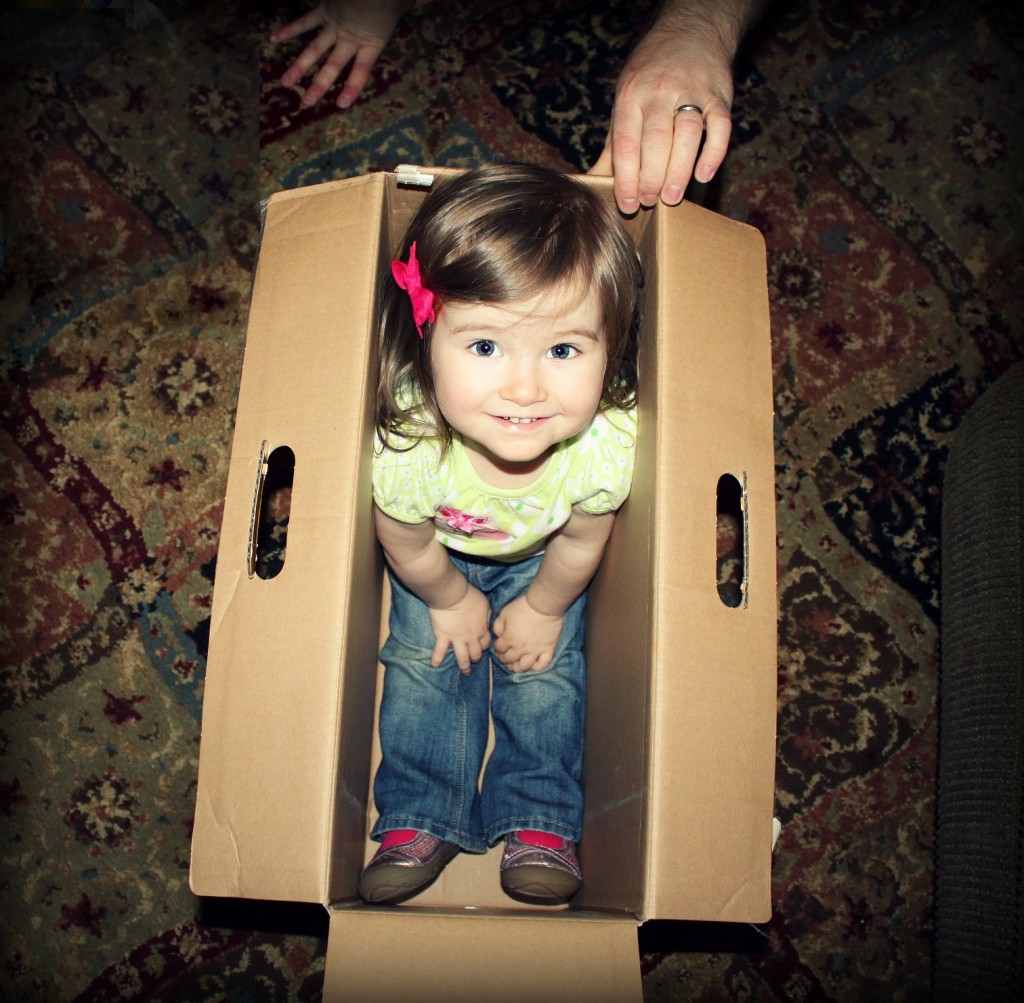
Baby Girl in a Box

Each day I try to soak in precious memories of time spent with you.  Sometimes I take pictures, record videos, or jot down notes about you but many of the memories have to stay just that.  Memories.  Today you learned how to scoot down the stairs on your bottom.  It has taken weeks to teach you but once you found the confidence to do it for the first time, this afternoon, you wanted to do over and over all day long!  Today you wanted to call PawPaw {which you say with an adorable southern draw} so we called PawPaw.  It made his day!  He’s been laid up in bed with a bad back but when he was talking to you today and listening to your babble and giggles I could hear the smile in his voice.  Tonight, when your Daddy and I put you in bed and waved at the door as we always do saying our “Goodnight”s and “I love you”s you surprised us by saying, “I love you” perfectly.  It made my heart swell up and I hugged your Daddy tight after we shut the door.  I feel so blessed to have you in my life.

Life passes very quickly.  Try to remember that and enjoy what you have.  Right now.  There will always be another goal to achieve but there will never be another today.  I used to get caught up preparing for tomorrow and missing out on today.  For instance, I would work all spring and summer trying to get a good tan so that I would have one when I went to the beach.  Then I would lay out non-stop at the beach so that when I came home everyone would comment, “You must have been to the beach.”  I did this ritual for years without realizing it was pointless.  Not to mention, it was horrible for my skin!  I don’t advise it.

Don’t live for your peers approval.  This is a lesson it took me a long time to learn and am still reminded of every once in a while.  No matter what you do someone won’t like you.  Or they won’t like a decision you made. Or your dress that day.  That’s okay!  Seek to please God above all else and don’t worry about what people say.

Precious time.  I cherished the time with my grandparents and still do with the ones who are still here on earth.  I can remember sitting as a little girl on my grandfather’s porch {who I called PaPa, pronounced PawPaw with a southern draw}.  We sat together often, played often, and talked often.  He was a wonderful man and I wish you had the opportunity to meet him.  If you ever have a baby brother he’ll be named after my PaPa.  I remember one afternoon sitting on that porch step drawing as PaPa was in his porch chair.  He asked what I was drawing and I remember trying to keep my voice from shaking as I told him I was drawing him.  I was a young girl at the time and I’ve never been much of an artist but I tried my hardest to make a realistic image of my Papa.  I wanted to remember him just like he was, right there on that porch.  I don’t know whatever happened to that picture but I’m sure it was thrown away by now.  More importantly I have that memory.

I have the memory of us taking turns scratching each other’s back.  I have the memory of him driving me and Nana {pronounced Nanny with a southern draw} to the mall many Sunday afternoons and him sitting in the car listening to the race. I have the memory of coming home from college and after spending a few minutes with him remembering how precious people are and that I need to slow down and not always be in such a hurry.  I have the memory of making cheese and cracker sandwiches with him for our tea parties.  At the same table you and I have have tea parties at now.  I have the vivid memory of him hugging me at my college graduation and telling me how proud he was of me.  That meant the world to me!  I have the memory of the last time he spoke to me.  We were leaving his hospital room and he was sitting up and in good spirits.  I was sitting on the side of his bed.  I hugged and kissed him goodbye and told him that I loved him.  Oh and how did I ever!!  I remember his last words to me were, “I love you too, Dollbaby.”  He would always call me that.

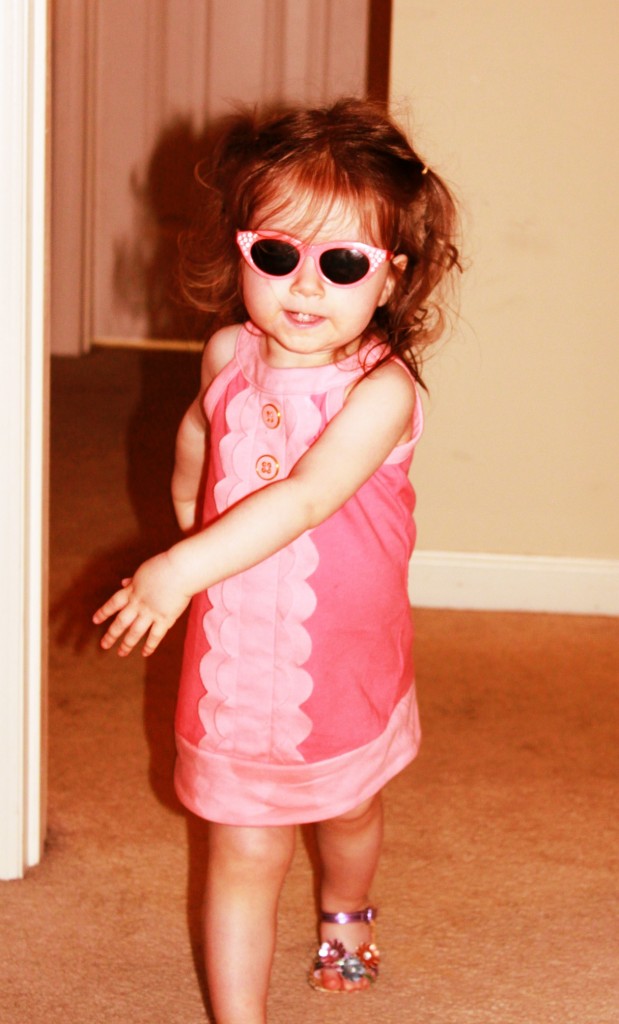
Baby with sunglasses

In your life there will be a lot of people who come and go.  Some are worth your time and your tears and others are not.  Try to find the ones who are worth it and enjoy being with them.  Don’t grow up too fast.  Stay a kid as long as you can, enjoy your high school years, make lifelong friends in college, when you’re married adore your husband, and enjoy every minute with your little babies.  Life goes by so very fast!  Dream but don’t live for tomorrow, hug those who mean something to you and let them know how you feel today, and above all, think of each day as a gift from God.  Because it is.

I love you, Sweetheart!

I hope all of this makes sense one day and doesn’t seem like a bunch of jibberish like it does to me right now.  I’ve written the majority of this letter with tears streaming down my face.  I don’t know how to effectively convey how precious time is but I hope you’ll think about it and figure it out on your own before you’re too old.

All my love,

Mom

A few bloggers and I decided to put together a Letters to our Children blog hop and we hope you’ll enjoy reading these heartfelt letters to our children.  There are 7 blogs in total and to hop over to the next blog please visit, Brandy.  She’s wonderful, I know you’ll enjoy her!
Minnie Mouse Party Advice Wanted!

I need your help, ladies!  All you fashionable, trendsetters, know-a-good-style-when-you-see-one people, I need your advice!  You see my mind is a little overwhelmed with blogging {for 6 sites!}, guest contributing {on 3 others!}, running and decorating our church’s VBS, consulting a local company with social media {check out Black Tie Transportation for all your travel needs!}, starting a new MOPS program at our church {yay!}, and of course being a wife and a mommy.  My mind is so cluttered that I need your help making a decision for my little girl’s birthday party that’s coming up.

You may remember her Pink Lemonade Party last year.  Well, this year we’re going with a Minnie Mouse theme and I’m pretty excited about it.  The thing is, I’m not in love with the Minnie Mouse party decor you can buy.  The bright fuchsia, purple, and hot pink aren’t doing it for me.  I like the classic Minnie.  You know the one with the blue dress, yellow shoes and matching yellow hat with the flower in it?  While I’m still sticking with the more modern pink shades, I’m not going as far as today’s purple colors.  Long story short, I need you to help me decide which party set to buy.

The company Minted contacted me about doing a review for one of their party sets.  It took me about two seconds to look at their well put together sets and say yes but it’s taking me much longer to decide which set I want.  None of these sets perfectly scream Minnie Mouse! but I think they can all be made to work.

Here are the three sets I’m choosing between:

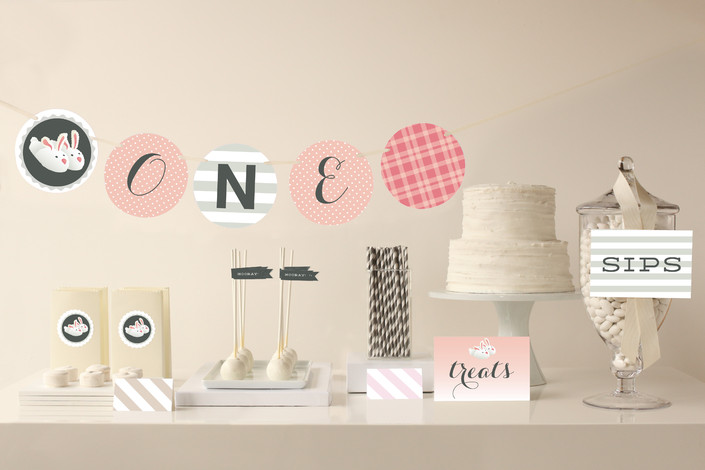
Pajama Party Decorations

 1. The Pajama Party 

It’s pretty cute right?  There is much more that’s included than what’s featured above but I’ll get into that after I showcase each of the party designs.  There is also a fun party hat and pinwheel party favors!  I love everything about this except the bunny slippers.  I would have to figure out some way to cover them up.

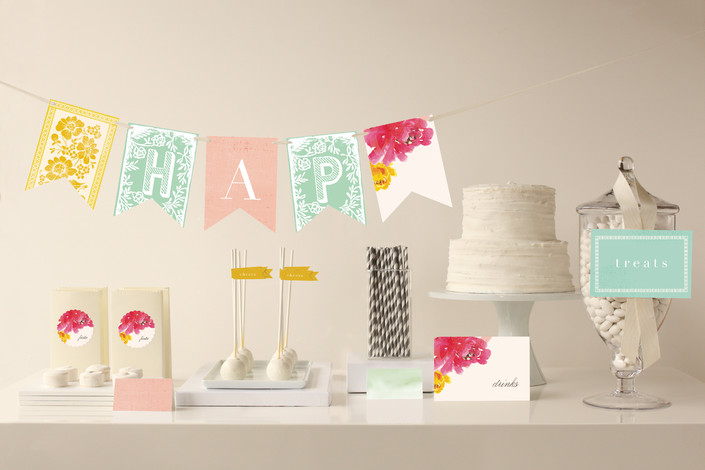
Guapa Party Decorations

2. The Guapa Party

I love the colors that are included in this set!  It would help me from buying eeeeverything in one shade of pink or another but my concern is maybe it’s too grown up.  What do you think?  Oh, and while this set includes more than is pictured it doesn’t include the fun pinwheels because this is an adult party set.  I could always buy them a la carte though!

Wooded Blossoms Party Decorations

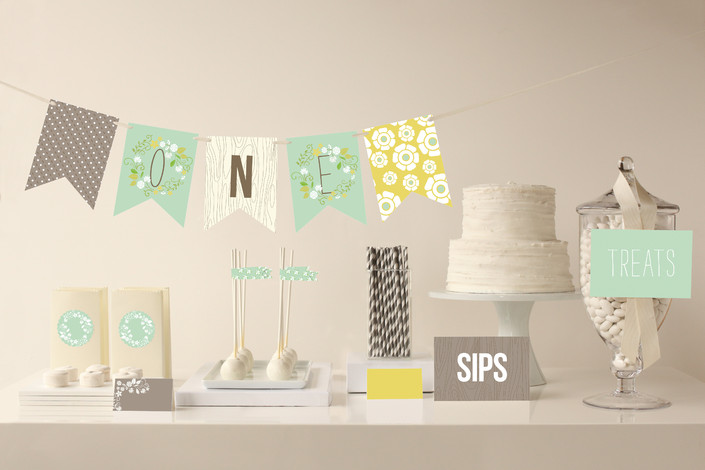
3. Wooden Blossoms Party

This set doesn’t contain pink and if you know me you probably think I’m going crazy right now but I’m not!  I still plan on incorporating pink into everything else so this would tie in well with it.  But maybe it wouldn’t work.  I’m torn! Even though this set looks more mature it is a kid set so it does have the pinwheels.  Can you tell I like the pinwheels?

From the Minted website:

Personalize bunting banners and signs to make the party extra-special. Create a unique centerpiece with table confetti and a wishing tree, top your cupcakes with fun flag stickers, and send guests home with a treat in glassine bags closed with a stylish sticker. Party decor can be purchased as a suite (starting at $65) or a la carte. All suites come with bunting banner, stickers, table confetti, and paper plates & napkins.

There you have it, folks!  There’s my dilemma and I can’t wait to hear your answer.  Feel free to browse the Minted site and pick out a fourth option if you want.

Thank you!!

She Speaks Conference Sponsorship

shespeaks logo

This year, I am going to attend the She Speaks Conference in North Carolina on July 25-27th!  I couldn’t be more excited! She Speaks is an annual conference that brings together women from across the US to learn the “nuts and bolts of speaking, writing, leading, and influencing.”  This is a great opportunity to network face-to-face with those who I’ve known online for so long.  I’m thrilled to go and soak up all the knowledge I can!  All I need now is a sponsor…or two.  

Why would you want to sponsor me?  That’s easy.

1. My audience is highly targeted.

If you’re trying to reach family minded, college graduates, female (and a few men!) consumers in the age range of 25-45 then we’re a perfect fit!

2. My audience is committed and engaged.

Site Stats as of June 1st:

  • Over 91,314 page views this month (Google analytics)
  • 45,938 unique visitors this month (Google analytics)
  • Alexa of 62,010 
  • Google Page Rank of 3

My subscriber base consists of:

  • 5,177 email subscribers
  • 14,104 Twitter followers
  • 13,300 Facebook fans
  • 1,976 Google +

3. I’m a nice and easy going person to work with.

Ready to talk about a partnership? 

How will the funds from sponsorship be allocated?

  • Purchase of a ticket to She Speaks ’13. $775
  • Travel to and from the conference {I live fairly close so I’ll be driving to and from each day}. $75
  • Food during the conference. $50

Full Sponsorship – $900

By becoming my only Full Sponsor, you will receive:

  • Apparel branding – I will wear your brand logo for the part of the conference if you wish.
  • Advertising Space – 1 premium {above the fold} 125×125 ad placement on all 6 of my “Embracing” sites for 6 months.
  • Monthly Blog Posts – 1 post per month (for 3 months) on both EmbracingBeauty.com & Facebook with your companies current news & promotions
  • Tweets/Instagram – At least 1 tweet per day with a link & mention of your brand during the conference. At least one Instagram photo per day with the mention of your brand during the conference.
  • Facebook Updates – At least 1 status update per day with a link & mention of your brand on our Embracing Beauty Facebook page during the conference.


By Sponsoring/Providing an iPad3, DSLR or Laptop – Your logo will be placed on the item and I will be using it during She Speaks.

  • Six months of advertising {125×125} on all 6 “Embracing” sites.
  • One blog post  that will feature your brand/latest products, deals and/or specials, including a link to your site.
  • Posts will be promoted on all social media sites.

Interested?  GREAT!  It’s easy to contact me… Just send an email to MrsAshleyWalkup@gmail.com and we can talk.

Awkward Moments

I read a post over a year ago that listed awkward and awesome things together.  This idea has stuck in my head for a while and I’m finally writing my version of the post…well, two posts actually.  I’m breaking mine up into two posts so check back tomorrow for the “Awesome” segment.  By the way, I can’t seem to locate the origin of the post so if you know please let me know and I’ll add the link here.

Now, on to the awkwardness…

Awkward Moments:

When I’m out with my husband and I run into someone I know but for the life of me can’t remember their name.  It’s awkward to try and introduce them because the harder I try to think of their name the more my brain turns to mush.  When possible I’ll try to walk up, hug them, and say, “Hi!  How in the world have you been?”  Then standing with them I’ll turn and say, “Have you met my husband?”  That’s my husband’s cue to introduce himself  and then my unnamed friend will reciprocate and save me from unwanted embarrassment.

Getting caught taking a drink from my toddler’s cup in public.  Sometimes a girl’s thirsty and there’s nothing else around!

Leaving an answering machine message {are they still called that?} … and then giving out the wrong cell number. Well, at least half of it. “uhhh. No, I mean…here’s my other…”  I’m a real professional.

Not realizing that I have walked out of the house and into the grocery store with my slippers on.  Thankfully they weren’t the big fluffy bunny ones but were just the cute flip-flop ones instead!

Walking over to tell someone something important, waiting patiently for them to finish their current conversation, then when it’s my turn to speak, my mind goes blank.  “Your hair looks lovely today.  Yep, I just walked over here to tell you that.”

My husband pointing out an embarrassing typo in a blog post hoooouuurs after it was published.

Realizing in the evening that I went the entire day with a huge chunk of hair that didn’t make it into my pony tail. {#SportingaRatTail}

Walking into a spider web that no one else sees.

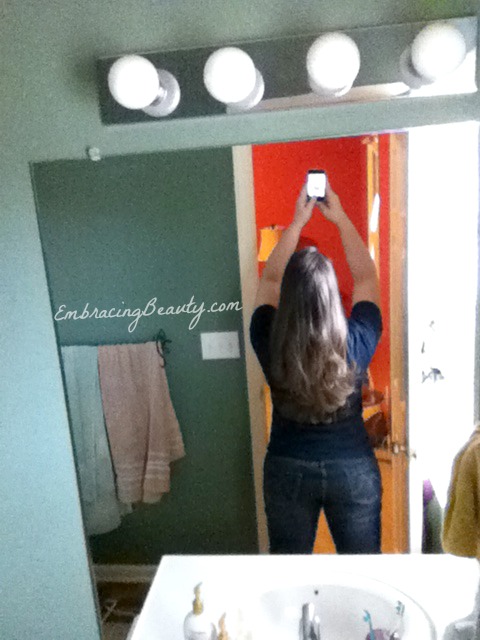
I’ll end with this awkward photo I took while trying to see what my hair looks like from behind.  Why can’t I just invest in a $1 mirror like a normal person?  I get embarrassed at myself every time I do this.

Back of Hair

{Know that the posting this photo is a demonstration of the love I have for you, my dear readers.}

What awkward moments are you brave enough to share?

Party With Dunkin’ Donuts New Limited Edition Flavors!

I participated in a campaign on behalf of Mom Central Consulting for Dunkin’ Donuts. I received a Dunkin’ Donuts Party Kit to facilitate my review and a promotional item as a thank you for participating.

New Dunkin Donut Flavors

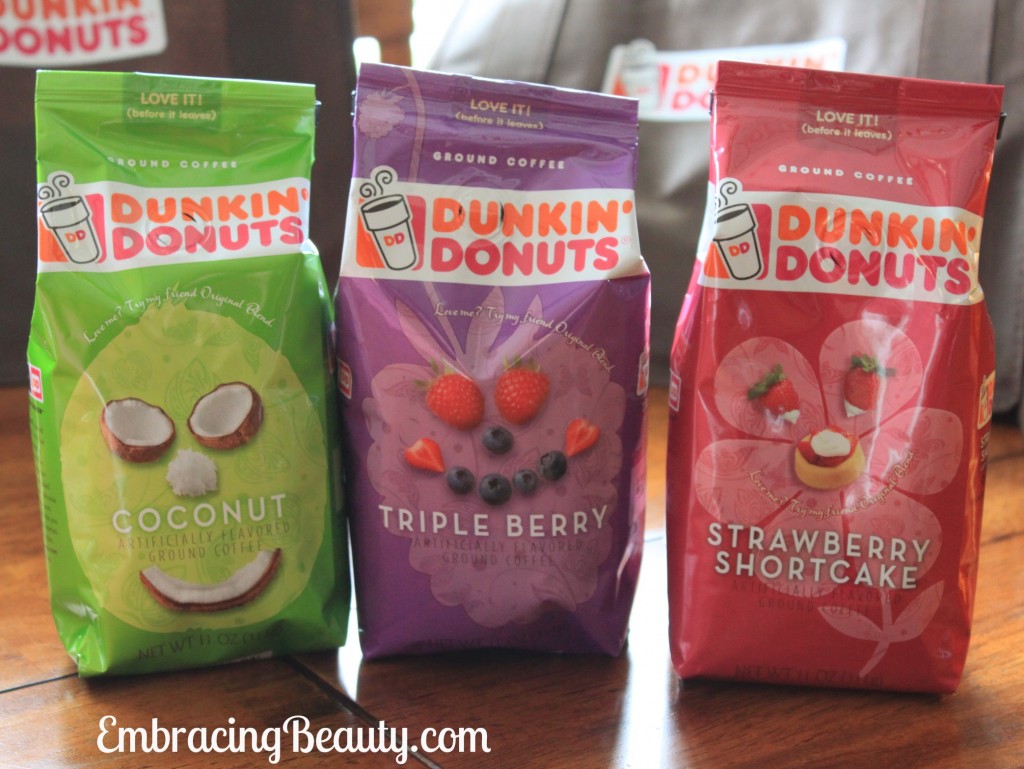
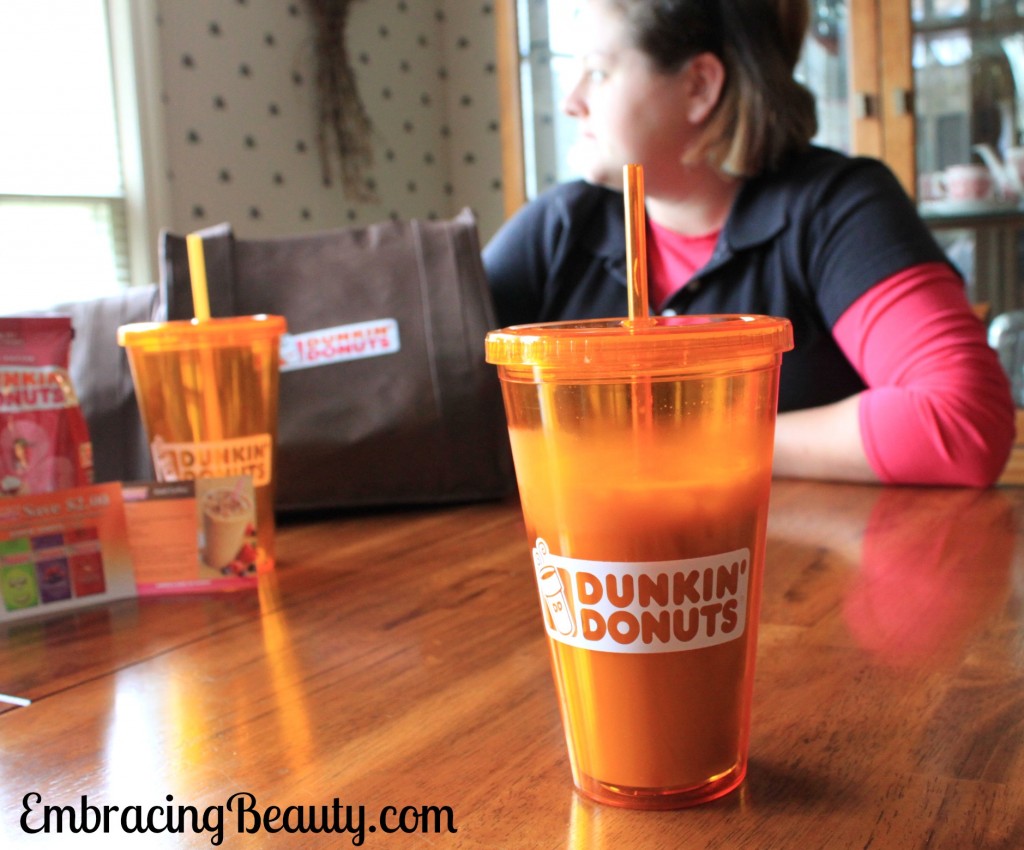
I have always liked coffee, well, at least since I was 8 years old that is.  I’ve tried a lot of different brands and while I like to switch it up a bit, Dunkin Donuts has been a top favorite for a long time.  A co-worker introduced it to me when he bought coffee for the coffee maker I kept in my office that he often snuck coffee from.  I’ve loved it ever since!  Recently though, I’ve been introduced to Dunkin’ Donuts new seasonal flavors.  This line includes Cocnut, Triple Berry, and Strawberry Shortcake.  While I was a little leery to try the Coconut one I was anxious to try the other too.

Dunkin Donuts Party

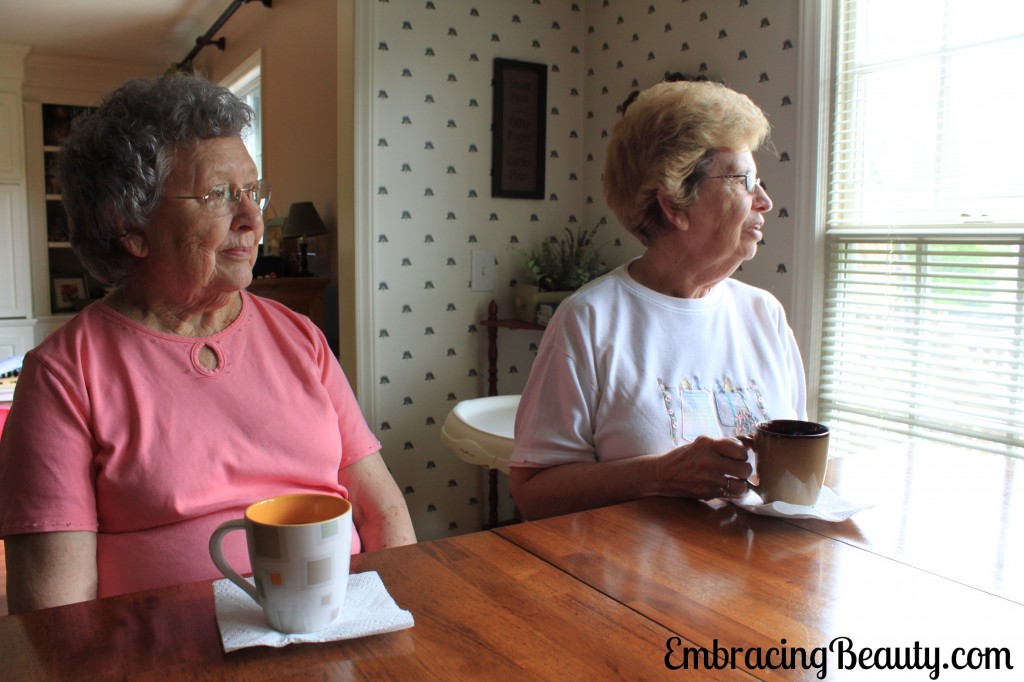
Mom Central and Dunkin Donuts sent me everything I needed to host a fabulous coffee party!  I got a bag of all three new flavors and goodie bags filled with coffee, tumblers, and coupons for all the guests.  I decided to have a afternoon coffee party with the people who taught me to love coffee and a girlfriend of mine too.

Dunkin Donuts

It was a cool day that wasn’t too hot or too cold so it was perfect to enjoy both hot coffee and iced coffee.  We had to buy a coffee filter so I could use these coffees with my Keurig.  I even had a mini-party with my parents when they came down to visit the following week.  This coffee is too good not to share!  Everyone agreed that these flavors were delicious.  I even liked the Coconut!  My favorite though was the Strawberry Shortcake and it was just perfect with a dash of Sweet Cream creamer.

I love a hot {or truthfully a warm} cup of coffee in the morning and iced coffee in the evening.  Iced coffee just gets me in the mood for summer!

Do you love iced coffee?   If so give this Dunkin’ Donuts Iced Coffee Recipe below a try.  It’s yummy!

Dunkin’ Donuts Iced Coffee Recipe
Prep time:  
Total time:  
Serves: 4
Ingredients:
  • ¾ cup of your favorite ground Dunkin’ Donuts Coffee
  • 3 cups cold water, divided
  • ⅓ cup sugar
  • ½ cup half-and-half
  • Whipped cream (optional but definitely a good thing to add!)
Instructions:
  1. Brew coffee in coffee maker using ¾ cup ground coffee and 1½ cups cold water.
  2. Combine hot brewed coffee, sugar and half-and-half in pitcher. Stir until sugar is completely dissolved. Blend in 1½ cups cold water. Chill until ready to serve.
  3. Pour over ice in tall glasses or cafe mugs. Top with whipped cream, if desired. Serve immediately.

Check out Dunkin’ Donuts new seasonal flavors available in grocery stores while they’re still available!

Disney Mickey and Minnie Nail Art

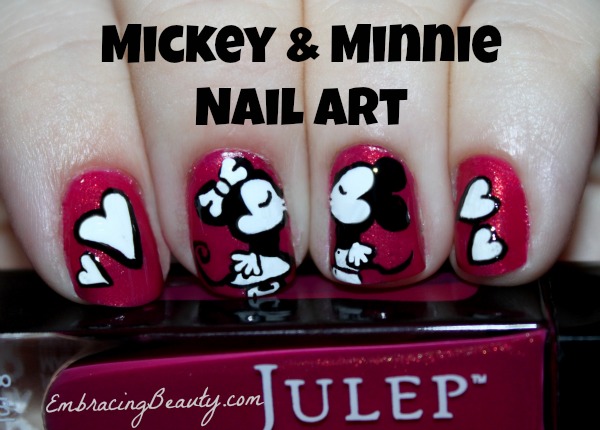
Mickey and Minnie Nail Art

Minnie Mouse is one of my favorite Disney characters!  She’s adorable for little girls and grown up girls too!  I love her sweet face, her relationship with the mouse who started it all, Mickey, and her love of polka dots.  What’s not to like?

If you follow me on Pinterest {and I hope you all do!} you’ve been bombarded with my Minnie Mouse pins lately.  I’m sorry about that!  You see, my little girl is about to turn two and I’m searching for every idea possible to make her Minnie Mouse party a success.  {Check out my DIY Minnie Mouse Halloween costume I made her.}  While browsing and browsing I found quite a few cute Minnie Mouse nail designs {which I pinned on my Pretty Nails board}.  Some were simple and some were far above my skill level.  I chose to do a design that was right in the middle.  It stretched me out of my comfort zone and I’m very pleased with the results.  If you think these are awful, please keep your comments to yourself.  Don’t bust my bubble!

My favorite Mickey and Minnie images are from the 70’s and 80’s.  Do you remember the ones?  Minnie wore a blue dress, yellow shoes, and a hat with a flower in it?  I tried to make my characters look like the ones from back then except that Minnie has a bow instead of a hat.

Have you ever done your own Mickey and Minnie Mouse Nail Art?  If so, I would love to see it!

Products Used:

Here is a list of the products that I used for my Mickey and Minnie Mouse Design:

  • – Julep Polish in a beautiful shade that isn’t available yet….that I got to name!!!  I can finally cross that item off of my bucket list.  This color will be making it’s debut soon.  Don’t you want to buy it?  I think it’s absolutely beautiful!  My poor photography skills make it look a little darker in the picture than it actually is but don’t you love the rose gold flecks in it?  Even if I didn’t have the privilege of picking the color and naming it myself it would still be my favorite polish.
  • White Nail Art Paint (Milani)
  • Dotting Tool
  • Black Polish (Sally Hansen)
  • Base and Top Coat (Julep Base Coat, Julep Polymer Top Coat)

I’m sorry that this isn’t a tutorial post but I don’t think I could do it again if I tried!  I set aside a block of time, figured out what I wanted my design to be, and carefully applied each stroke.  Sometimes I used my dotting tool or my fingernail to remove a little paint if I went a little too far.  After I was happy with my design I sealed it off with a top coat.

Even though this isn’t a tutorial, I would be happy to do my best to try and answer any questions you might have so please feel free to leave them in the comments below.  Plus, feel free to leave a comment here telling Julep what you think of their new polish color!

Puzzle Nail Art Tutorial

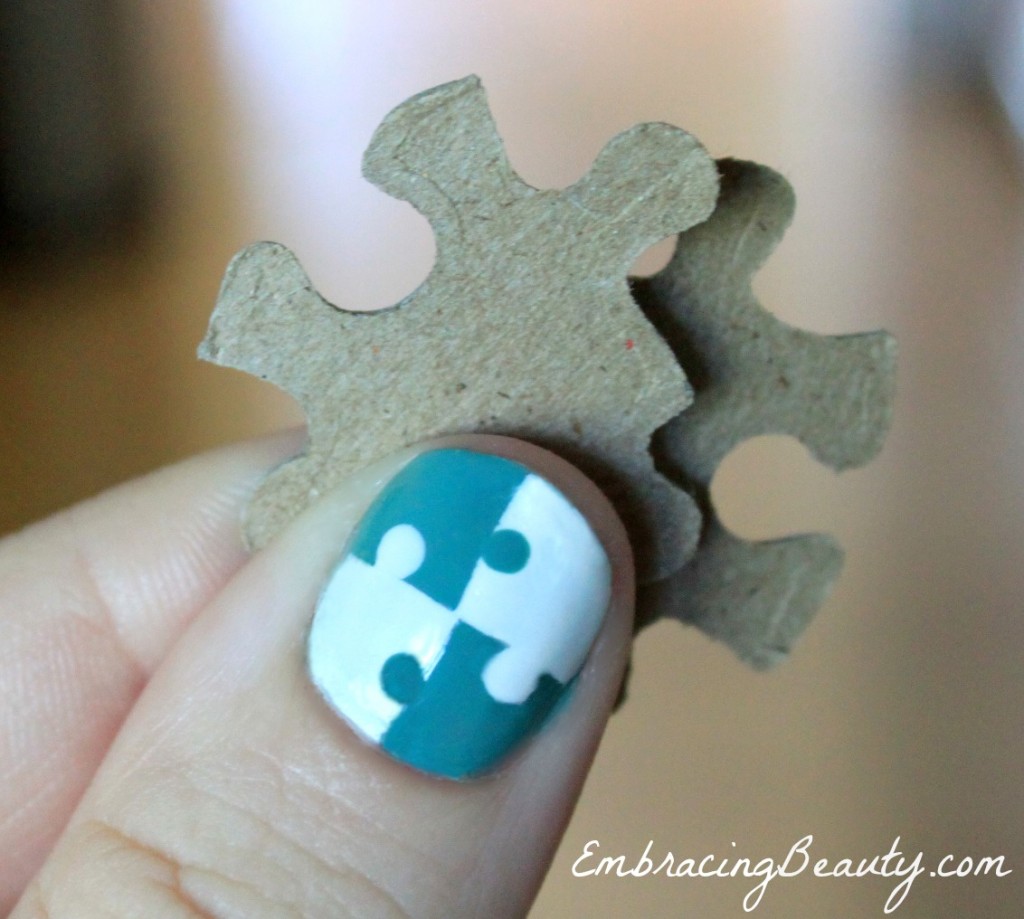
DIY Puzzle Nail Art

Last month, I told you about my puzzle nail art and how I created it.  I was excited about my puzzle nails and I’m glad to know that you liked them too!  I’ve received numerous comments and emails requesting pictures to show the tutorial step by step so I’m here to hopefully visually explain with pictures what I tried to explain with words before.  I hope this helps clear any confusion but as always, if you have any questions please feel free to contact me!

Here are a few simple steps that I think make for a great at home manicure:

  1. Trim, file, buff, & push back cuticles.  Buffing might seem like a waste of time but it will help your nail polish last longer!
  2. Apply a base coat.  Let dry.
  3. Apply your base color of choice.  I recommend starting with your lightest shade (even though I forgot to do this myself!).
  4. Allow to fully dry.  This could take a while so I usually add a quick drying top coat here so I can get to designing my nails (the fun stuff) right away.
  5. Apply tape and paint the remaining areas.
  6. If you’re doing the puzzle design that I did, take a dotting tool (or a toothpick) and dip it into the polish and then onto your nail on the  opposite color.  Repeat with each square.
  7. Apply a top coat.
  8. Take a picture and post it on Instagram with the tag #EmbracingBeauty so I can see it.  (Really, I want to see!)

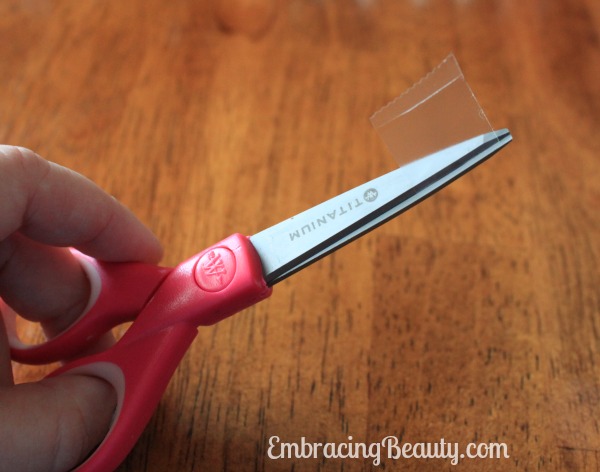
Scissors and tape

One you’ve got your lightest color applied and fully dry cut two pieces of tape to use.

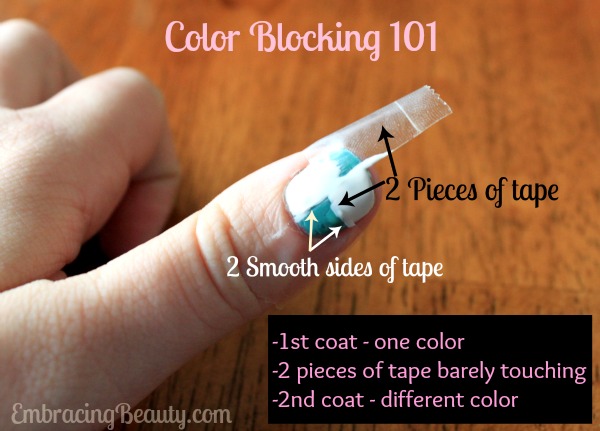
Color Blocking 101

Apply the two pieces of tape to your nail.  You want the two corners to meet in the middle and barely touch.  Make sure you use the smooth sides of the tape and not the ridged edge where you tore it off…unless you’re not doing puzzles and you’re going for that look.  Smooth the tape down with another finger nail to make sure there are no air pockets underneath where polish might seep.  Then carefully apply your darker color over your light one.  While your nail polish is still tacky and not fully dry begin sloooowly peeling the tape off.  Wait until your polish is fully dry before moving on to the next step.

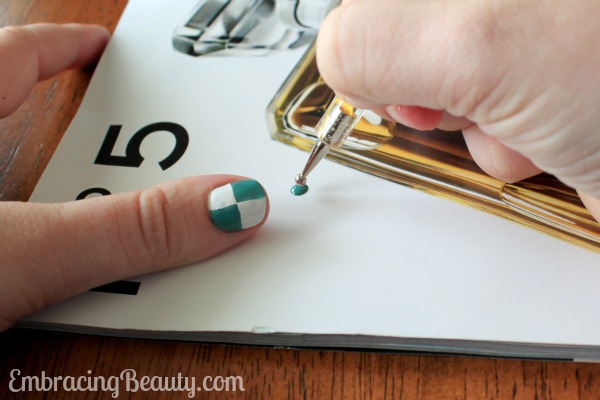
Nail Polish Dotting

Grab your favorite dotting tool and bottle of polish.  I use the cheapo dotting tools from Amazon {and love them!} but be warned they take a few weeks to ship.  Right now they are selling for $1.86 shipped but the price could always change.  You could also use a toothpick or a mechanical pencil.  For this dotting technique I chose a wider end than I usually use.

Taking your brush from your bottle of polish dab some out on your work surface.  I always use the back of a magazine I have laying around.  Screw the lid on quickly and dip your dotting tool in the polish and then on your nail.  Don’t wait too long because the polish gets tacky and hard to work with when it’s drying.  Apply one dot of your darker color onto the square of the lighter color polish.  Repeat with the other light colored square.

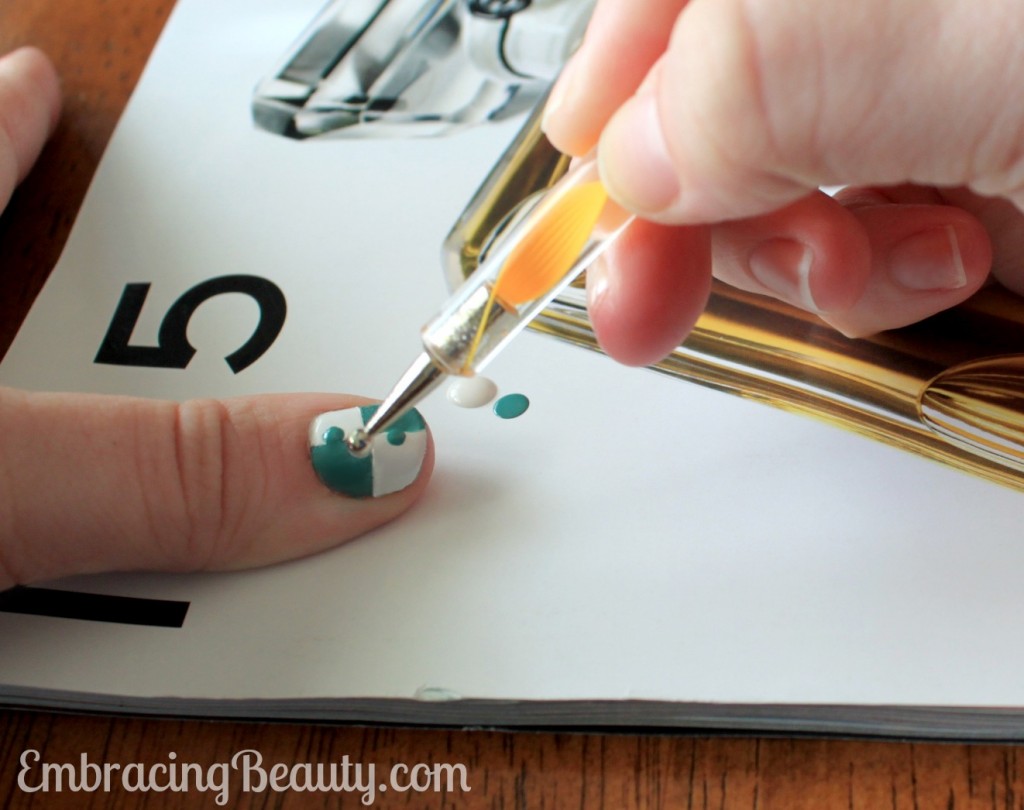
Nail Tool Dotting

Repeat with your lighter color on top of your darker color.  As you can tell by this picture the paint is thick and bubbled up – that’s okay!  Once it’s dry it will be flat and look perfectly like a puzzle piece.  Just be careful not to touch your nails for a while because it will take a little longer to dry this way.  You can also add a top coat to help seal your manicure after your polish dries.

I think that’s it!  If you got a little polish on your fingers you can remove that with nail polish remover.  I find that an old art paint brush dipped into acetone works great for scrubbing off those pesky stray smudges of polish.

If you try out these puzzle nails I would love to see the results!  Please email them to me or share them on Instagram with the tag #EmbracingBeauty so I can see it.

Happy Painting!

May Photo a Day Challenge

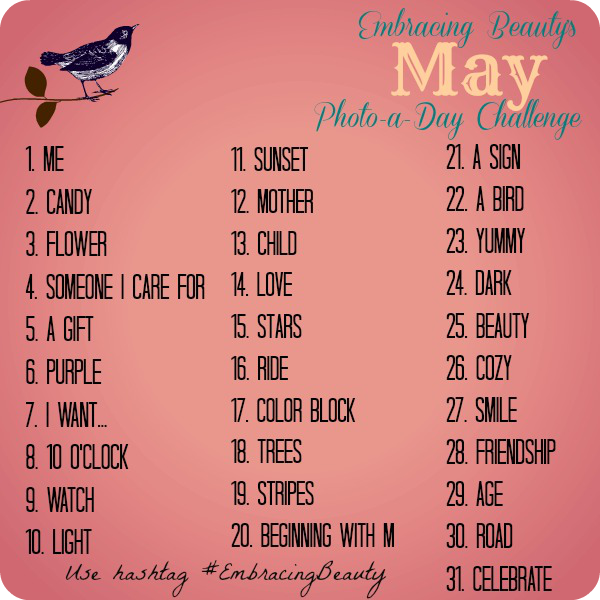
Because each of our Photo a Day Challenges have been more fun than the last I couldn’t help but host another one.  Welcome to our May Photo a Day Challenge!

Did you play along with us last month?  If you’re a regular photo-a-day’er or if this is your first challenge we welcome you to come and join us!  This is all for fun so if you skip a day or two you can make them up later or just forget about them.  No pressure!  This is just a fun way to slow down and focus on the beauty in life.  Every day moments in life are beautiful!

 May Photo a Day Challenge

It has been a true joy to see all of your fun pictures and to get to know some of you better!  More and more people are participating and I’ve been trying my best to make it around and comment or like everyone’s pictures every few days.  I can’t wait to get started looking at this month’s pictures.

How to participate:

All it takes to join in is to simply take a photo and post it on a social media site with the hashtag #EmbracingBeauty.  I’m using Instagram and sometimes I’ll post them on Twitter and Facebook too.  When you tag your photos with the #EmbracingBeauty hashtag they’ll join the list of photos under the #EmbracingBeauty hashtag (on Instagram & Twitter).  If you click on the “#EmbracingBeauty” it will pull up everyone’s photos who are playing along.  You can see all the fun photo ideas other Embracing Beauty readers are sharing.  What fun!!

Who’s ready to join me?

Letting Our Light Shine by Donating w/ Champions for Kids #MobilizingMillions #cbias

*This post has been sponsored by Social Fabric and Champions for Kids but all opinions remain my own. Full disclosure is at the bottom of the post.

Let Your Light Shine Banner

My family likes to save where we can so we can donate more.  We don’t donate to every charity out there but we donate too the charities that are closest to our hearts and several that our closest to our homes.  This month is “Missions Month” at our church and I’m priviledged to be able to serve on the missions committee at our church.  Our church believes in supporting local and national missions.  As our pastor frequently says, “The light that shines the farthest shines the brightest at home.”  The missions committee decided that the theme for this month would be “Let your light shine.”  As a way to shine our light we decided to give of our resources to two local charities.  Families are encouraged to bring donations for a local food bank and for a local pregnancy center.  I love both of these ministries and I enjoy shopping for charities.

Champions for Kids

A week or so ago I was contacted with the opportunity to Pack a Sack for Champions For Kids and I jumped at the chance.  Champions For Kids is partnering with Abbot Brand Products to bring nutritional non perishable foods to local food pantries and food banks.  I think it’s neat the way that it worked out because I would be buying food to donate anyway and now I get to promote a great cause and tell you about it.  If I wasn’t part of this campaign I wouldn’t have thought to have told you about my donation but now I can tell you how I donated and encourage you to do the same in your local community.

Being on the missions committee it was my job to help spread the word about this month-long campaign.  We’ve posted fliers, made announcements, added the details to the morning power point slide, and even handed out little key chains reminding people to shine their light.  We have a designated area in the church where people can bring non-perishable donations.

I went shopping at our near-by Walmart for items to donate.  First, I grabbed a few things I wanted to get for our home like Infant Advil (for my sick little one), an adorable mini-golf set (for her birthday coming up), and a new bucket and sponge so I can wash the thick pollen off of my car.  Secondly, I went to the tote section and picked out a medium size tote that I thought would be good to fill with food for the food bank.  Then I went shopping!  If you’re interested you check out my whole Walmart shopping trip.

Similac on Sale

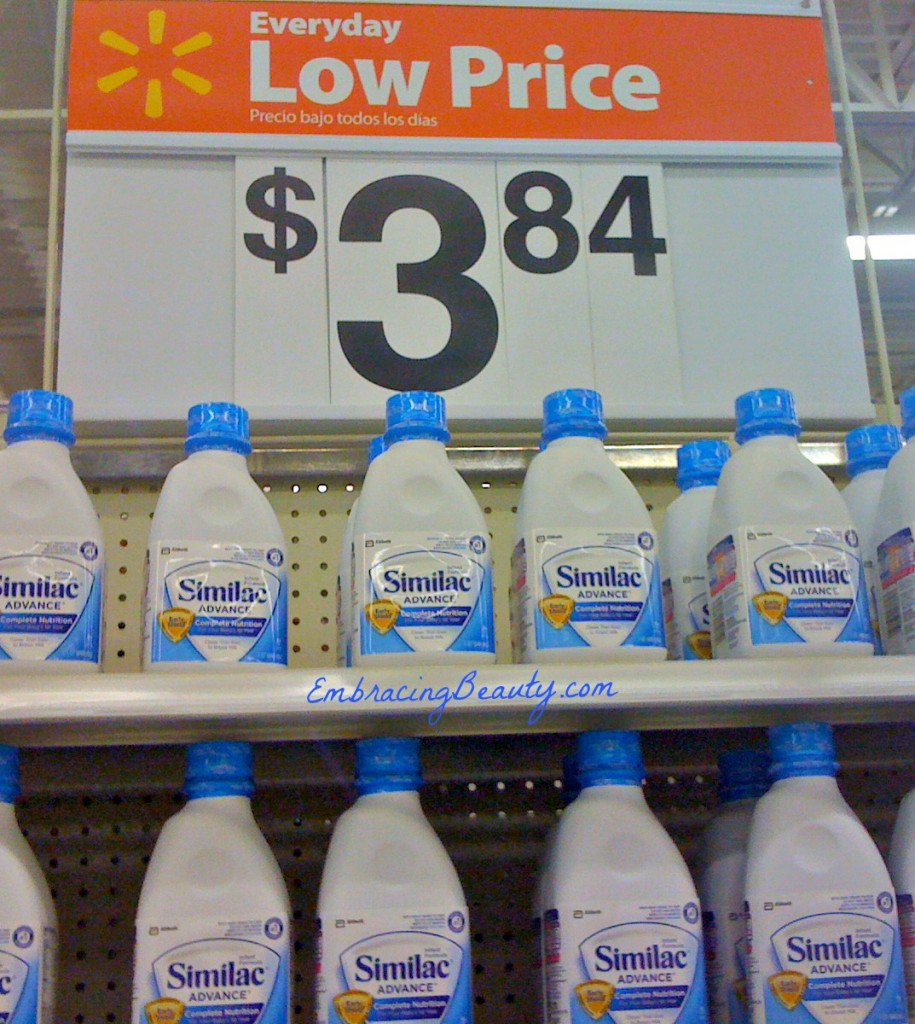
Even when buying for others I’m still thrifty.  When it came to the name brand items that I’m uncompromising on and I buy faithfully for my family I bought those to donate and when I found a store brand item that my family loves I bought it instead of the name brand.   I used coupons, paired them with sales.  I spent as much money as I had budgeted to spend but this way my money went a lot further.

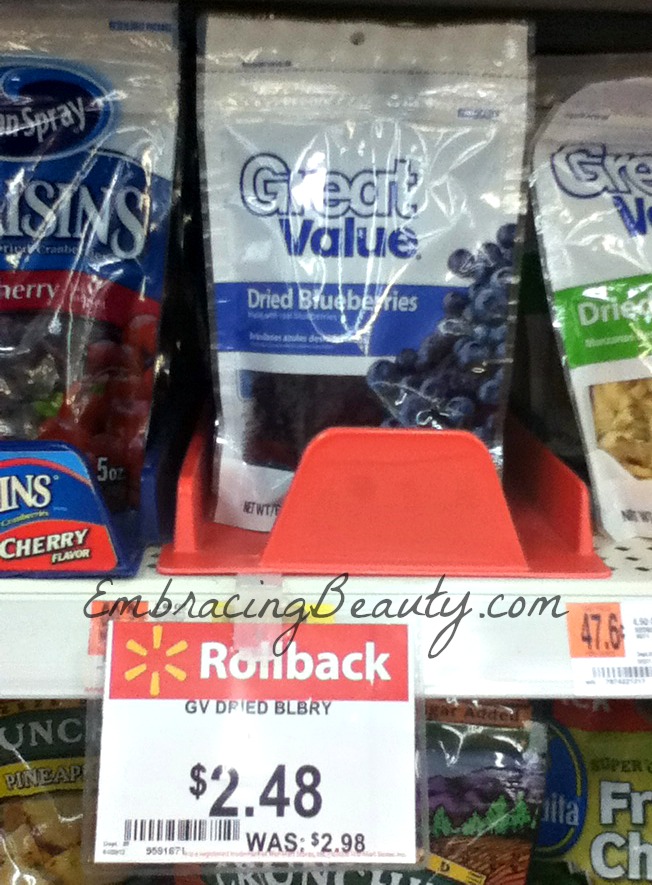
Great Value Snacks

I really want my daughter to learn to be a giver.  I hope to show her example after example of how our family gives to others and is grateful for all we have.  I know it’s never too early to start leading by example but unfortunately my little sweetheart is down with an awful virus.  She wasn’t well enough to go shopping with me and wasn’t well enough to go to church to drop off our items.  Hopefully she’ll feel better soon and she can help us deliver the items to the food bank at the end of the month.

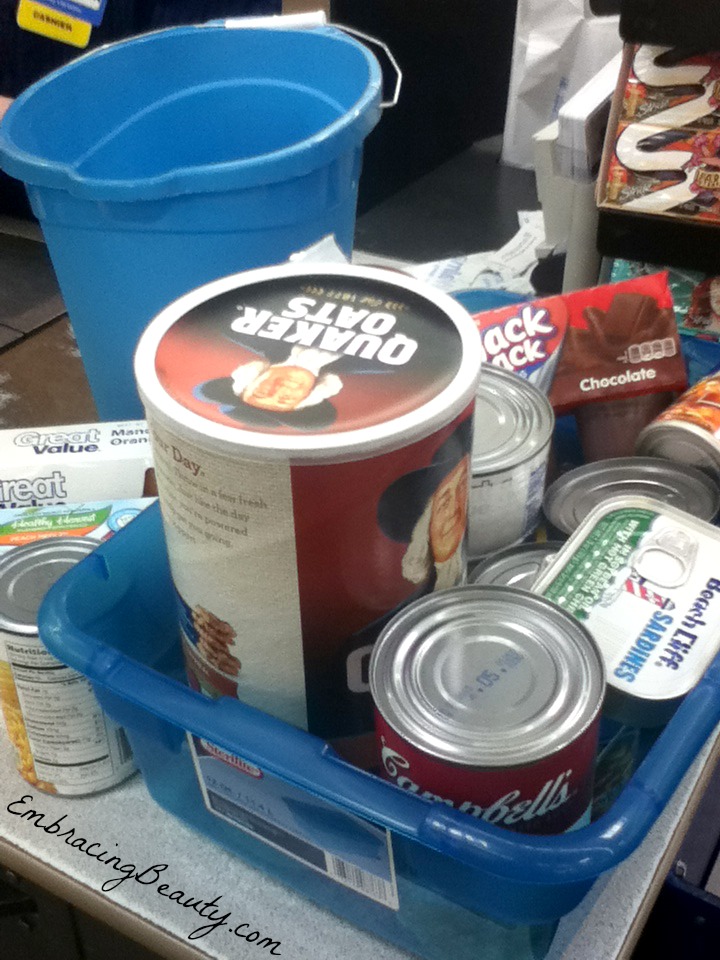
Walmart Checkout

I know money is tight in every home, I know that.  Some of you may have a few hundred to give, others a few dollars, and some truly can’t give anything.  I understand, I’ve been in each of those places at some point in my life.  If you have the money to donate I want to encourage you to give to others less fortunate…especially the children in your neighborhood.

To stay connected “like” Champions for Kids on Facebook, follow Champions for Kids on Twitter, and subscribe to Champions for Kids’ Youtube Channel.  You may also be interested in Champions For Kids Abbott Nutritional Razorfest on April 20th.


I am a member of the Collective Bias®  Social Fabric® Community.  This shop has been compensated as part of a social shopper insights study for Collective Bias®  and Champions For Kids. All opinions are my own. #MobilizingMillions #cbias #SocialFabric

Color Block Puzzle Nail Art with Sally Hansen #IHeartMyNailArt #cbias

 *This post has been sponsored by Social Fabric and Sally Hansen but all opinions remain my own. Full disclosure is at the bottom of the post.

DIY Puzzle Piece Nail Art

I have what some would call an obsession.  I’m a nail polish fanatic.  Hoarder even.  I’m too embarrassed to show you just how many nail polish bottles I actually own.  I love experimenting with nail designs and adding a fun splash of color to my nails to accentuate my outfit.

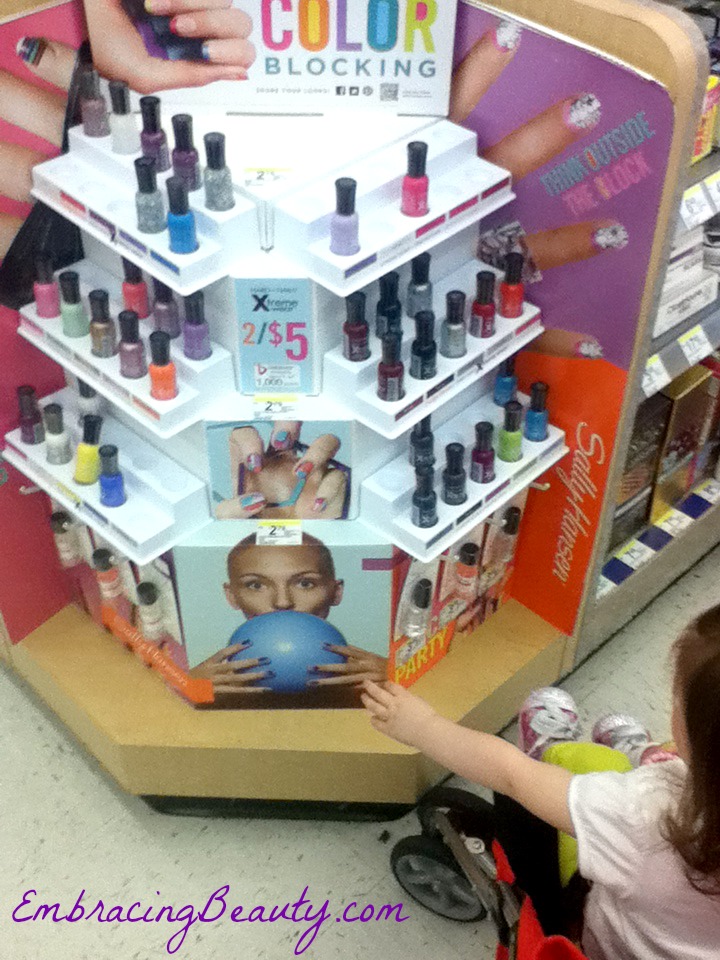
I’ve been eager to try a new design so I set a date, invited friends, and went shopping at Walgreens.  They have the biggest selection of Sally Hansen products that I’ve ever seen!  I was impressed.  I tried to think of what colors I had at home and which ones would be good to buy to match those.  I decided to let my daughter pick out which ones she wanted and I would make it work.  She loved picking them out and holding a few as we went through the store.  You can check out my entire Walgreens shopping trip to see all of the great varieties of Sally Hansen nail polish…and more pictures of my little girl!

Sally Hansen Nail Polish Stand

My little basket was full to the brim with everything I needed to host an excellent manicure party, that is, except for nail design tape.  I knew I could order some online but I wanted it quicker than that.  I searched up and down the isles but I couldn’t find what I was looking for.  I wanted to do color block nail art and to do it neatly I wanted tape.  Scotch tape works but I wanted the good stuff.  I asked a Walgreens associate if she knew if where I could find some.  She immediately stopped what she was doing and joined me in my search.  We could both picture it but we couldn’t find it.  She found some thin craft tape that we thought might fit the bill.  I’m happy to report that it worked wonderfully.  If you’re store is ever out of nail design tape (or you just can’t find it) check the craft isle!

When I got to the check out the cashier told me about two $5 coupons I could have used on my purchase if I had only gone to Coupons.com.  Being a teacher of couponing I felt like smacking myself on my head.  Even though I missed out on the coupons, I did get the 2/$5 deal w/ 1,000 points added to my Walgreens Balance Rewards Card (3/31-4/27).

If you have a smart phone, I recommend downloading their app to your phone.  They have several different handy services they offer including bar-code scanner, coupons, and you can keep track of your Balance Rewards right on your phone.  I really racked up on the reward points during this trip!

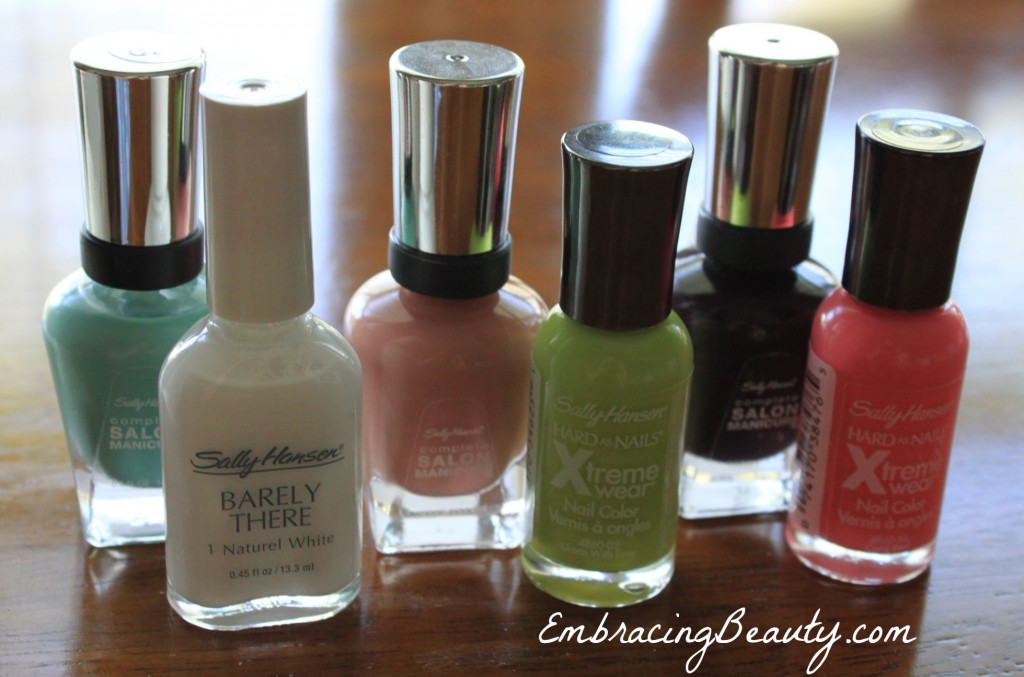
Sally Hansen Nail Polish

I had simple snacks for our “block party” so that we could eat while painting our nails.  Yep, you can tell I’m experienced at this!!  We had gummy bears, popcorn, and a few other little goodies.

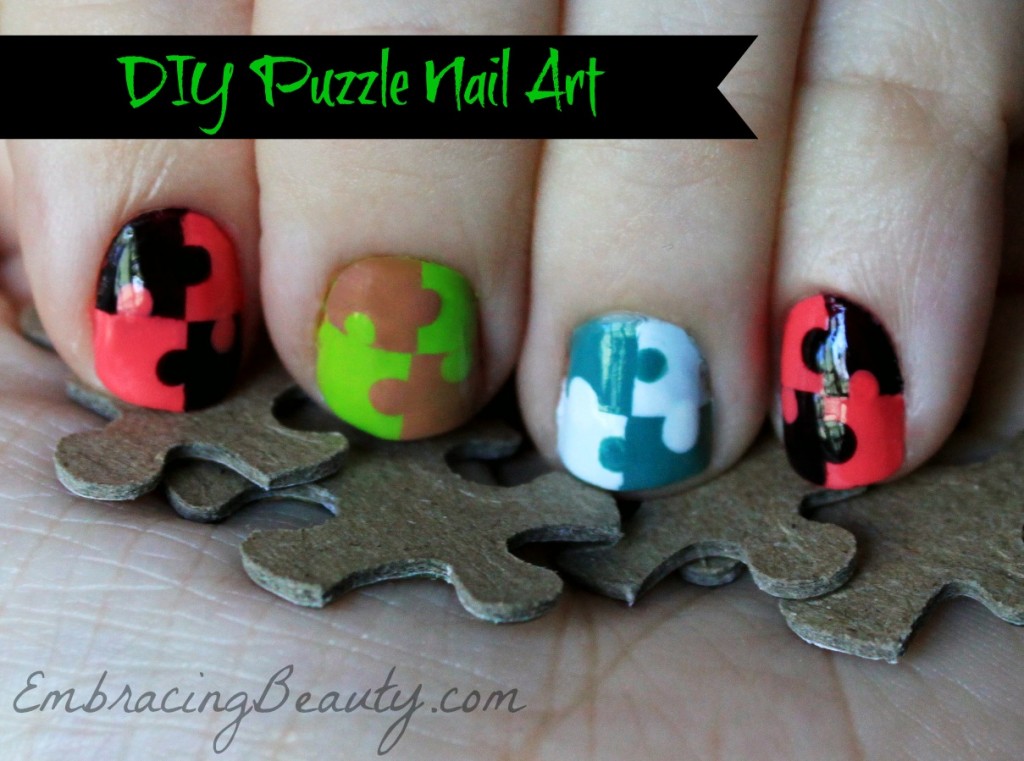
DIY Puzzle Nail Art

The nail designs were so much fun to experiment with.  I wanted to get brave enough to do a complicated design like a stained glass window or a bunch of bricks each with a different color.  I decided to mix it up a little and do puzzle piece nail art.  Not too complicated but still kind of classy.

DIY Striped Nail Art

This simple stripe design was made using our craft tape.  It held strong enough not to let the paint bleed through but not strong enough to pull off the original color.

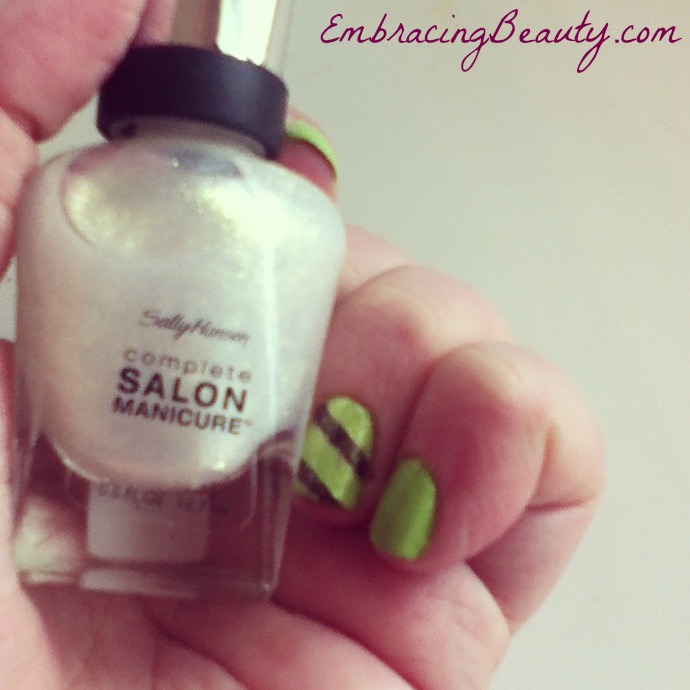
Sally Hansen Stripes

Here is a diagonal stripe with the most amazing sparkle polish over top!  Trust me, this photo doesn’t begin to show it’s beauty.

Here are a few simple steps that I think make for a great at home manicure:

  1. Trim, file, buff, & push back cuticles.  Buffing might seem like a waste of time but it will help your nail polish last longer!
  2. Apply a base coat.
  3. Apply your base color of choice.  I recommend starting with your lightest shade.
  4. Allow to fully dry.  This could take a while so I usually add a quick drying top coat here so I can get to designing my nails (the fun stuff) right away.
  5. Apply tape and paint the remaining areas.
  6. If you’re doing the puzzle design that I did, take a dotting tool (or a toothpick) and dip it into the polish and then onto your nail on the  opposite color.  Repeat with each square.
  7. Apply a top coat.
  8. Take a picture and post it on Instagram with the tag #EmbracingBeauty so I can see it.  (Really, I want to see!)

I had a great time and I hope you enjoyed reading about my latest nail art adventure.

If you end up catching the “color block bug” feel free to share your art with Sally Hansen on Facebook for a chance to win some great prizes.  Check out the Pinterest Party Walgreens and Sally Hansen are hosting where you could win a year’s supply of Sally Hansen!  You can always purchase Sally Hansen in Walgreens stores but did you know that you can also get it online?  It’s true, you can!  You can also connect with Sally Hansen on Twitter and Walgreens on Twitter.

*UPDATE! I have posted a step by step Puzzle Nail Art Tutorial here for those interested!*

What’s a nail design you would like to try?

*Disclaimer – I am a member of the Collective Bias®  Social Fabric® Community.  This shop has been compensated as part of a social shopper insights study for Collective Bias®  and COTY #cbias #SocialFabric.